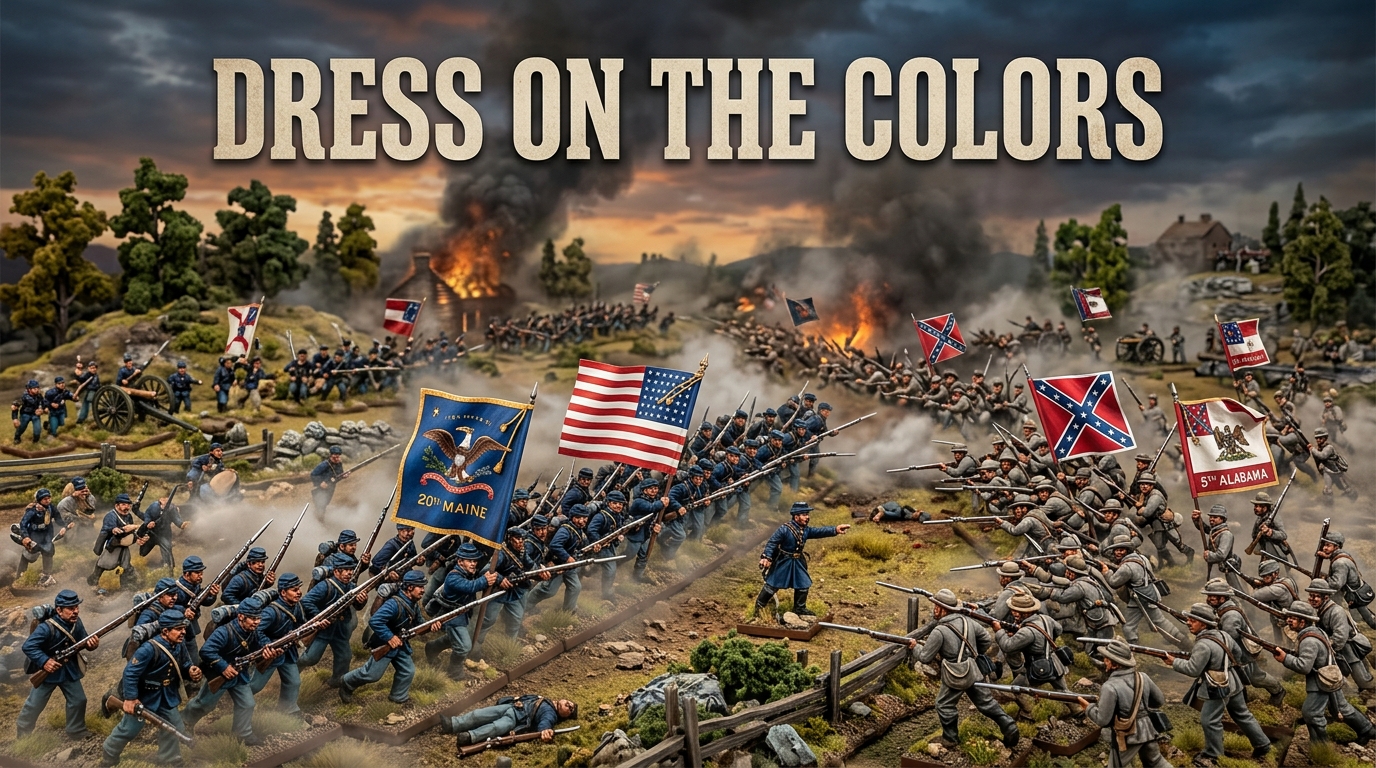
Dress on the Colors
The complete, unabridged core rules for 15mm brigade-level American Civil War combat. Built around the dynamic Staff Pip command engine and reactive tactical windows.
Introduction & Scale
00. INTRODUCTION, SCALES & UNIT STANDARDS
"The art of war is simple enough. Find out where your enemy is. Get at him as soon as you can. Strike him as hard as you can, and keep moving on." — General Ulysses S. Grant, 1864
1.0 Design Philosophy & Core Principles
[RULE-00-1.1] The Core Objective: This ruleset simulates American Civil War combat at the regimental tactical level, where players command reinforced brigades or small divisions. The mechanics are calibrated to deliver easy-to-moderate complexity, deep historical flavor, and decisive outcomes within a 3- to 4-hour gaming window for 2-4 players.
[RULE-00-1.2] The Command Philosophy (Eliminating the Freeze): Command friction is modeled through a dynamic Staff Pip Allocation System rather than all-or-nothing activation checks. Units in command can always perform basic historical maneuvers for free; Staff Pips are reserved for extraordinary tactical exertion (charging, double-time, rallying, and defensive reactions). A player's turn is never lost to a single failed command roll.
[RULE-00-1.3] Visual Clarity: Complex tracking sheets and extreme token clutter are replaced by physical tabletop cues wherever possible. Regimental attrition is represented by the physical removal of stands rather than casualty caps, and brigade morale is tracked via a single casualty die on the Brigadier's base. While the game uses a streamlined set of status markers (like Disorder, Gunsmoke, and Hesitant) to track tactical conditions, we prioritize keeping the visual spectacle of the miniatures front and center.
[RULE-00-1.4] Dynamic Engagement (The Reaction System): Although the game utilizes a structured I-Go-You-Go (IGOUGO) framework to allow efficient multi-player coordination, the non-active player is never passive. Five dedicated Defensive Reaction Windows allow the defender to execute closing volleys, opportunity fire, skirmish evades, hasty pivots, or desperate counter-charges.
2.0 Core Scales of Action
| Metric | Value |
|---|---|
| Ground Scale | 1 inch = 25-30 yards (1 mm ≈ 1 yard) |
| Time Scale | 1 Game Turn = 10-15 minutes of actual combat |
| Vertical Scale | 1 Contour Level = 15-20 feet of elevation |
| Figure Scale | 15mm miniatures (1:100 / 1:120 ratio) |
| Unit Ratio | 1 Infantry Stand = 60-75 men in two ranks |
| Artillery Ratio | 1 Gun Stand = 2 real cannons (Section) or 4–6 cannons (Battery) |
[RULE-00-2.1] Ground Scale: 1 inch = 25-30 yards on the tabletop (1 mm ~ 1 yard). This scale ensures that weapon ranges, frontages, and movement rates maintain a realistic geometric relationship across standard tabletop dimensions.
[RULE-00-2.2] Time Scale: A single game turn represents 10-15 minutes of historical battle time. A standard battle scenario lasts between 6 and 8 game turns.
[RULE-00-2.3] Figure & Stand Ratios: Infantry: 1 stand represents approximately 60-75 men organized in standard two-rank battle lines. Cavalry: 1 stand represents approximately 30-40 mounted troopers or a dismounted skirmish group. Artillery: 1 gun model with crew represents a 2-gun section (tactical scale) or an entire 4-to-6 real cannon battery (grand tactical scale).
[RULE-00-2.4] Table Space & Battlefield Footprint: 4x4 ft Table (48" x 48"): Represents ~ 1,200 yds x 1,200 yds. Ideal for single-brigade actions, small Vanguard scenarios, and 2-player pickup games (6–8 regiments per side). 4x6 ft Table (48" x 72"): Represents ~ 1,200 yds x 1,800 yds. The standard competitive and scenario format for 4 players commanding 2 reinforced brigades or a division per side (10–16 regiments per side). 4x8 ft Table (48" x 96"): Represents ~ 1,200 yds x 2,400 yds. Designed for full multi-brigade corps clashes, multi-player club nights, and grand battle scenarios (20–30+ regiments per side).
3.0 Basing Specifications (15mm Standard)
- [RULE-00-3.1] Standard Base Dimensions: The physical footprint size of the base is the critical geometric component for the rules. While 15mm miniatures are the standard, figures of 15mm or smaller (such as 10mm or 6mm) work perfectly fine on the same stands. Players should choose an appropriate number of figures per stand that looks aesthetically pleasing for their chosen miniature scale. All measurements are given in inches (with millimeter equivalents). Figures are permanently mounted on thin cardboard, plywood, plastic, or metal stands.
[RULE-00-3.2] Stand Compatibility: Players with collections based for Regimental Fire & Fury, Johnny Reb III, or Pickett's Charge (standard 1-inch wide bases) may use their figures directly without rebasing.
[RULE-00-3.3] The Center Color Stand: Every infantry regiment must designate one stand as its Color Stand (displaying the national and regimental colors). The Color Stand must always occupy the center of the front rank in Line of Battle. All regimental measurements for command radius, wheeling pivots, line-of-sight checks, and range origin originate from the center-front edge of this stand.
4.0 Regimental Sizes & Tactical Footprints
[RULE-00-4.1] Regimental Size Categories: Civil War regiments suffered severe attrition from combat and disease. Regiments are categorized by the number of active stands fielded at the start of a scenario:
| Regiment Size | Stands | Tabletop Frontage | Historical Strength |
|---|---|---|---|
| Small Regiment | 3-4 | 3.0" – 4.0" | 180 – 260 Men |
| Standard Regiment | 5-6 | 5.0" – 6.0" | 300 – 450 Men |
| Large Regiment | 7-8 | 7.0" – 8.0" | 500 – 600 Men |
[RULE-00-4.2] Minimum & Maximum Stand Thresholds: Minimum Size: An infantry regiment must have at least 3 stands to maintain formed cohesion. If a regiment is reduced to 1 stand remaining, it immediately shatters, loses tactical cohesion, and is permanently removed from play.
Maximum Size & Oversized Regiments: No single tactical unit may exceed a physical footprint of 10 stands (10.0" frontage) on the tabletop. If a scenario's historical order of battle dictates a regiment that translates to 11 or more stands (e.g., the 840-man 26th North Carolina at Gettysburg), the player must deploy it using the Wing System: * The Split: Divide the oversized regiment into two separate units of roughly equal size (e.g., a 12-stand regiment becomes two 6-stand units designated as the "Right Wing" and "Left Wing"). * Deployment & Proximity: Both wings must be deployed side-by-side at the beginning of the scenario to reflect their initial regimental cohesion. Once the game begins, they are not strictly required to maintain physical contact and may maneuver independently. * Command & Independence: Each wing operates as a completely independent tactical unit for movement, firing, and wheeling. This simulates the historical friction of managing a massive formation over the roar of battle. * The Colors: Only one wing (traditionally the Right Wing) carries the official regimental Color Stand. The Left Wing must designate a standard miniature stand as its center point for ranges and line-of-sight. * Morale: For the purposes of Brigade Morale and shatter limits, the two wings are counted as two separate regiments.
[RULE-00-4.3] Regimental Health Profiles: The fighting efficiency of a regiment is governed by its remaining stand percentage: Fresh State (>75% of starting stands): Receives +1 to Melee rolls; high staying power. Worn State (35%–75% of starting stands): Standard combat values; no bonuses or penalties. Spent State (<35% of starting stands): Receives -1 to Melee rolls; must make a Discipline Check on 1D6 whenever fired upon.
5.0 Spatial Geometry: Frontage Accuracy vs. Depth Distortion
Historical Reality vs. Tabletop Representation
According to standard Civil War drill manuals (Casey’s Infantry Tactics and Hardee’s Tactics), a regiment formed in a two-rank battle line placed each file in a space of 22-24 inches (approx. 2 feet): Historical Frontage in Yards ~ (Number of Men / 2.5) to (Number of Men / 3.0) A standard mid-war regiment of 360 men deployed in two ranks fielded 180 files, occupying approximately 120-145 yards of physical front-line terrain.
[RULE-00-5.1] Frontage Accuracy: At our ground scale of 1 inch = 25-30 yards, a 5-stand regiment occupies exactly 5.0 inches (125–150 yards) of tabletop width. The lateral width of our units on the board is an exact 1:1 match for historical battle frontages. REALITY:
- Frontage: 140 Yards
- Depth: 2 Yards
TABLETOP (15mm Stands):
- Frontage: 5.0 Inches (Properly scales to 140 Yards)
- Depth: 0.75" to 1.0" (Scales to 25 Yards — a 10x EXAGGERATED DEPTH)
[RULE-00-5.2] The Depth Distortion Dilemma: While the tabletop width is historically accurate, the physical depth of a 15mm miniature base (0.75"–1.0") scales up to 20–25 yards of ground depth. In reality, a two-rank battle line of soldiers was only 2 yards deep. Because the physical plastic/wood base is roughly 10 times thicker than a real Civil War battle line, the game requires rules to prevent players from exploiting this artificial bulk.
[RULE-00-5.3] Rules Compensating for Depth Distortion: To prevent geometric exploits, all players must treat the regiment as if it were a razor-thin, two-rank line of men standing flush on the front edge of the bases. Adhere to these three mandatory rules:
- 1. Measure from the Front Edge Only: Treat the back and sides of the base as if they do not exist. All measurements (movement distance, shooting range, and command radius) must be taken exclusively from the front edge of the unit's bases, never from the rear or sides.
- 2. The Frontal Zone vs. Flank Zone: To determine if an enemy is truly on your flank, imagine a straight horizontal line extending endlessly to the left and right, directly across the front edge of your regiment.
- If more than 50% of an attacking unit's stands (or the physical center of the unit) begins its turn behind this imaginary line, they are in your Flank Zone and qualify for a flank attack.
-
If 50% or more of the attacking unit is in front of that line, they are in your Frontal Zone and must conduct a standard frontal assault.
-
3. No "Side-Clipping" from the Front: Because the physical base is unnaturally deep, an attacker charging from the Frontal Zone cannot "clip" or hook onto the side or back edge of a base to claim a flank attack. If you charge from the Frontal Zone, your models must be brought into direct, flush contact with the front edge of the enemy stands.
6.0 Designer Commentary & Historical Context
Why 15mm Regimental Scale?
The American Civil War was fundamentally an infantryman's and brigadier's war. At the grand tactical level (where brigades are represented by single large bases), players make high-level decisions but lose the crucial tactical dilemmas of the era: refusing an exposed regimental flank, managing the smoke bank from repeated volleys, deciding when to detach skirmishers, and feeling the gradual, visible erosion of a regiment as stand after stand is carried to the field hospital. Conversely, 28mm skirmish gaming is visually stunning but requires enormous table real estate (6x10 ft or larger) to field even a single brigade without suffering from compressed, unrealistic weapon ranges. By standardizing on 15mm miniatures on 1-inch stands, a standard 4x6 ft tabletop comfortably hosts 4 full brigades (16-20 regiments plus artillery). This allows players to command realistic division-scale operations—complete with reserves, cavalry flanking screens, and coordinated counter-attacks—while preserving the individual identities, weapon profiles, and battle flags of historic regiments.
Sequence of Play
01. SEQUENCE OF PLAY & THE TURN STRUCTURE
"I am tired and sick of war. Its glory is all moonshine." — General William T. Sherman, 1865
1.0 The Game Turn
- [RULE-01-1.0] Overview: "Dress on the Colors" uses a strict I-Go-You-Go (IGOUGO) turn structure, yet it prominently features defensive reactions (Opportunity Fire, Evading, Closing Volleys) that keep the non-active player fully engaged. Each game turn consists of five phases.
2.0 Phase 1: Staff & Command Phase (Simultaneous)
- [RULE-01-2.1] Step 1.1: Staff Pip Generation: Both players roll for their Brigadier Staff Pips simultaneously based on their commander's trait (Aggressive: 1D3+1 pips | Reliable: 1D3 pips | Timid: 1D3/2 pips, rounded up).
- [RULE-01-2.2] Step 1.2: Brigade Fatigue Check: Assess Brigade casualties against the 30% (Hesitant) and 50% (Broken) thresholds.
- [RULE-01-2.3] Step 1.3: Staff Pip Reservation & Rally: Players may immediately spend pips to automatically rally units, or reserve pips (up to 1 pip) for the opponent's turn to trigger Defensive Reactions.
3.0 Phase 2: Active Maneuver & Assault Phase (Active Side)
- [RULE-01-3.1] Step 2.1: Free Standard Maneuvers: The Active Side executes standard movement for all units (Line 6 inches, Col 8 inches, Road 10/12 inches). Units moving freely cannot engage in assaults.
- [RULE-01-3.2] Reaction Window A: As active units move, the Reactive Side may trigger Opportunity Fire or Skirmish Evades.
- [RULE-01-3.3] Step 2.2: Special Orders (Pip Spends): The Active Side spends Staff Pips to declare Assaults, Double-Quick Moves, or remount Cavalry.
- [RULE-01-3.4] Reaction Window B (The 4.0" Line): When an assault crosses the 4.0" line, the Reactive Side may unleash a Closing Volley or Counter-Charge.
4.0 Phase 3: Active Ranged Combat Phase (Active Side)
- [RULE-01-4.1] Step 3.1: Firing Eligibility & Target Priority: Active units that chose "Hold Position" in Phase 2 may now fire. They must target the closest unengaged enemy (not locked in melee) within a 45° forward arc.
- [RULE-01-4.2] Step 3.2: Dice Pool & Shock Saves: Roll 1D6 per firing stand. Natural 6s trigger Shock Saves on the defender.
- [RULE-01-4.3] Step 3.3: Target Cover Saves & Casualties: Defender rolls cover saves. Every 2 unsaved hits permanently removes 1 physical stand.
- [RULE-01-4.4] Step 3.4: Gunsmoke Obscuration: Place a Smoke Marker touching the front center of the firing unit's base.
5.0 Phase 4: Assault & Melee Resolution Phase (Simultaneous)
- [RULE-01-5.1] Step 4.1: Close Combat Resolution: All units in physical base-to-base contact resolve melee.
- [RULE-01-5.2] Step 4.2: Opposed Melee Roll: Both sides roll 1D6 and add their Engaged Stands + Tactical Modifiers to generate a Final Shock Score.
- [RULE-01-5.3] Step 4.3: Winner Consolidates, Loser Retreats: The winner holds the ground (may pivot 2"). The loser takes 1 mandatory stand loss and falls back 6 inches Disordered. If the loser was already Disordered, they suffer an additional 1 Micro-Hit instead of a second Disorder marker.
6.0 Phase 5: Status, Smoke & Clean-up Phase (Joint)
- [RULE-01-6.1] Step 5.1: Smoke Dissipation: Remove Smoke Markers from units that moved, fought in melee, or held their fire this turn.
- [RULE-01-6.2] Step 5.2: Rally Lines: Disordered units may attempt a Natural Rally Check (Vet 3+, Reg 4+, Green 5+), or the Brigadier may spend unspent Pips to auto-rally units.
- [RULE-01-6.3] Step 5.3: End of Turn: Players swap Active/Reactive roles, and the Turn Counter is advanced.
Command & Maneuver
02. COMMAND, STAFF PIPS & TACTICAL MANEUVER
"I can make a brigadier general in five minutes, but it is not easy to replace a good horse." — President Abraham Lincoln, 1862
1.0 The Command Structure & Brigadier Ratings
- [RULE-02-1.1] The Brigade as Tactical Element: The primary operational command entity on the battlefield is the Brigade, commanded by a Brigadier General (or senior Colonel). Regiments and attached artillery batteries do not act independently; they derive their coordination, speed, and assault capability directly from their Brigade Commander.
- [RULE-02-1.2] Brigadier Leadership Profiles: Every Brigadier is categorized by a historical command rating that reflects their tactical initiative, staff competence, and aggressiveness:
| Leadership Profile | Description & Historical Examples | Staff Pip Generation Formula |
|---|---|---|
| Aggressive / Brilliant | Highly proactive, rapid decision-makers (e.g., J.E.B. Stuart, John Gibbon, Stonewall Jackson, Phil Sheridan). | 1D3 + 1 Pips (2-4 Pips) |
| Reliable / Standard | Competent, standard professional officers (e.g., James Wadsworth, Cadmus Wilcox, A.S. Williams). | 1D3 Pips (1-3 Pips) |
| Timid / Political | Hesitant, overly cautious, or inexperienced political appointees (e.g., Franz Sigel, Gideon Pillow). | 1D3 / 2 (Round Up) (1-2 Pips) |
- [RULE-02-1.3] Generating Staff Pips: During Phase 1: Staff & Command Phase , each player rolls for every active Brigadier under their control using the formulas above. Staff Pips represent staff officers, couriers, and concentrated personal exertion by the commander.
- [RULE-02-1.4] Physical Tracking & Pip Hoarding: Place a designated colored D6 directly behind the Brigadier’s base displaying the current number of available Staff Pips. As pips are expended, rotate the die to reflect the remaining balance.
- Preparatory Orders (Hoarding): At the end of the turn, a Brigadier may save a maximum of 1 unspent Pip to roll over into their own next turn. This represents time spent preparing for a massive push. This banked pip is added to their next generation roll. Any other unspent pips are lost.
2.0 Command Radius & Out-of-Command Status
- [RULE-02-2.1] The 4-Tier Command Network: A Brigadier issues orders based on their distance to a subordinate regiment. Measurements are taken from any edge of the Brigadier's base to the center-front edge of the regiment's Color Stand.
- Tier 1: Bugle / Acoustic Range (0–6"): At this close proximity, orders are heard over the din of battle via bugle or shouts. Impassable terrain does not block this command range. Special orders cost 1 Pip.
- Tier 2: Standard Courier Range (6–12"): Orders are delivered by mounted aides. The 12" path must be physically traced around impassable obstacles (like deep rivers or cliffs) using bridges or fords. Special orders cost 1 Pip.
- Tier 3: Distant Courier Range (12–24"): A regiment beyond 12" is outside the standard command bubble, but a courier can still reach them. Special orders cost 2 Pips (Double Cost) due to the severe time and effort required to navigate the battlefield. The courier path must trace around impassable obstacles.
-
Tier 4: Out of Communication (>24"): At distances exceeding 24 inches (equivalent to 600-700 yards), the unit is entirely cut off from the brigade chain of command. They cannot be allocated Staff Pips for any reason (no assaults, no double-time, no auto-rallying).
-
[RULE-02-2.2] Line of Sight for Command: A Brigadier does not require an unobstructed line of sight to issue orders (couriers navigate intermediate woods and hills). The only restriction is tracing physical paths around impassable water/cliffs for distances beyond 6 inches.
- [RULE-02-2.3] Out-of-Command Restrictions (The Inertia Rule): Any regiment located beyond the 12" Command Radius is Out of Command. Because they lack immediate supervision, their free standard maneuvers are severely limited:
- Distant Special Orders (12–24"): Out-of-Command units can receive Staff Pips (Assault, Double-Time, Rally), but doing so requires sending a Distant Courier and costs 2 Pips instead of 1. Units beyond 24" cannot receive Pips at all.
- Limited Free Maneuver: They may only choose one of three free maneuver options:
- Inertia: Move straight ahead in their current formation.
- Local Threat: Wheel up to 45^\circ to face a visible enemy.
-
Guide on the Colors: Execute any combination of wheels and movement, provided the entire move is spent traveling as directly as possible toward their Brigadier General to re-establish command. A unit using this move may not declare an assault or intentionally move into base-to-base contact with an enemy (halting 2.0" away if blocked).
-
Morale Penalty: Suffer a -1 penalty to all Discipline Checks .
-
[RULE-02-2.4] Attached Leaders: A Brigadier may physically attach to an infantry regiment by moving into base contact with its center Color Stand.
- Benefits: Grants +1 to Melee rolls , +1 to all Discipline Checks, and allows the attached unit to ignore Out-of-Command penalties if the brigade is dispersed.
- Risks: If the attached unit loses a stand in melee or takes a shooting hit with a natural 6, the player must immediately roll on the Leader Casualty Table .
3.0 The Staff Pip Menu: Standard vs. Special Orders
-
[RULE-02-3.1] Free Standard Orders (The "No Freeze" Baseline): On the Active Side's turn, every unit in command may perform one standard action for free without spending Staff Pips. Free actions include:
-
Advance at standard formation speed.
- Perform one 45^\circ wheel during movement.
- Execute a full formation change (e.g., Line of Battle to Assault Column).
- Hold Position & Fire: The unit does not move during Phase 2, which makes it automatically eligible to execute a volley during Phase 3 (Ranged Combat).
-
Limber or Unlimber an artillery battery.
-
[RULE-02-3.2] Special Staff Pip Tasks: Staff Pips are spent during specific phases to push units beyond standard operational limits:
| Staff Pip Action | Phase Used | Cost | Tactical Effect |
|---|---|---|---|
| Regimental Assault | Phase 2 | 1 Pip | Authorizes one formed regiment to declare a charge and move at Double-Quick speed (9") into contact . |
| "Dress on the Colors" Assault | Phase 2 | 2 Pips | Authorizes multiple regiments to charge simultaneously, provided every charging regiment is within 1.0" lateral alignment (flank-to-flank) of another charging regiment in the contiguous line. Regiments outside this alignment cost +1 Pip each to join the charge. |
| Double-Time | Phase 2 | 1 Pip | Adds +3.0" of movement to an advancing infantry regiment in Line or Assault Column. |
| Rally Line | Phase 1 or 5 | 1 Pip / 2 Pips if >12" | Immediately removes a Disorder Marker without requiring a dice roll. |
| Concentrated Battery | Phase 3 | 1 Pip | Authorizes up to 3 artillery sections in the same brigade to combine their firing dice pool onto a single target stand. |
| Reserve for Reaction | Phase 1 | 1 Pip | Saves the pip for the opponent's upcoming turn to pay for Refuse Flank or Counter-Charge . |
- [RULE-02-3.3] Expenditure Timing: Staff Pips must be declared and subtracted from the Brigadier’s tracking die at the exact moment the action is initiated. A player may not spend more pips in a single phase than the Brigadier has available.
4.0 Formations & Tactical Dispositions
| Formation | Frontage | Depth | Shooting | Speed | Special |
|---|---|---|---|---|---|
| Line of Battle (1 Stand Deep, Full Frontage) | 5.0" | 0.75"–1.0" | Full Stand Pool (5 Dice) | 6.0" | Wheel: Up to 45° |
| Assault Column (2 Stands Wide, Multiple Ranks Deep) | 2.0" | 2.25"–3.0" | Front Rank Only (2 Dice) | 8.0" | Melee Bonus: +1 Shock, Vulnerability: -1 to saves vs. Canister |
| Road / March Column (1 Stand Wide, Single File) | 1.0" | 3.75"–5.0" | Prohibited (0 Dice) | 10.0" Open / 12.0" on Roads | Vulnerability: -2 to Saves if Attacked |
- [RULE-02-4.1] Line of Battle:
- Configuration: All stands deployed side-by-side in a single rank (representing a historical two-rank line of battle). The Color Stand must occupy the exact center.
- Capabilities: Maximizes frontal musketry firepower. Every stand in the front line contributes to the Phase 3 shooting pool.
- Limitations: Moves at base speed (6"); wheels are restricted to a maximum pivot of 45^\circ per move; -2" movement penalty when traversing rough terrain or woods.
- [RULE-02-4.2] Assault Column (Column of Companies):
- Configuration: Formed 2 stands wide and 2-4 stands deep. The Color Stand is placed in the second rank.
- Capabilities: Moves at accelerated speed (8"); receives +1 to Opposed Melee Rolls on the turn it charges; wheels freely up to 90^\circ at the beginning of its move.
- Limitations: Only the 2 front-rank stands may fire in Phase 3; suffers a -1 penalty to cover saves against ALL artillery fire (Canister, Shell, and Solid Shot).
- [RULE-02-4.3] Road / March Column:
- Configuration: Formed 1 stand wide in single file.
- Capabilities: Rapid transit along roads and tracks (12" road speed); navigates narrow bridges and defiles without formation penalties.
- Limitations: Cannot fire musketry; cannot declare assaults; if targeted by shooting or charged, suffers an immediate -2 penalty to all Morale/Cover Saves.
- [RULE-02-4.4] Skirmish Screens:
- Deployment: Any infantry regiment with 4 or more stands may detach 1 stand forward as a skirmish screen by spending half of its movement allotment. The skirmish stand is placed 2.0"–3.0" directly ahead of the parent regiment's frontage.
- Strict Formation Limits (No Voluntary Open Order): Standard infantry regiments may never voluntarily deploy the bulk of their strength into a 'loose' or 'skirmish' formation to reduce casualties from artillery or musketry. They must remain in a rigid Line of Battle or Column. Only the single detached Skirmish stand (or dedicated Sharpshooter regiments) possesses the tactical training to fight effectively in open order.
- Screening Effect: Enemy fire targeting the parent line through the skirmish screen suffers a -1 to-hit penalty.
- Absorption: The first unsaved casualty hit suffered by the regiment is applied directly to the skirmish stand. When the skirmish stand takes 2 hits, it is removed, and the screen collapses.
-
Screen Recall: A skirmish stand may be recalled and reintegrated into the parent line during Phase 2 for free if the parent unit remains stationary.
- Unlimbered (Action Front): The battery is deployed with gun trails unhooked and barrels facing the enemy. It cannot move except by hand prolonge (2.0" max) but may fire at full effect in Phase 3.
- Limbered (Transport): Gun models are hitched to caissons/limbers. Moves at 8.0" open ground or 12.0" on roads. Cannot fire while limbered. Limbering or unlimbering consumes a unit's entire movement phase.
5.0 Movement Rates, Maneuver Rules & Geometry
Master Movement Rates Table
| Unit Type & Formation | Open Ground | Woods / Rough | Road / Trail | Obstacle Crossing | Charge / Assault Speed |
|---|---|---|---|---|---|
| Infantry Line of Battle | 6.0" | 4.0" | 6.0" | -2.0" | 9.0" (Double-Quick) |
| Infantry Assault Column | 8.0" | 5.0" | 9.0" | -2.0" | 9.0" (Double-Quick) |
| Infantry Road Column | 10.0" | 6.0" | 12.0" | -1.0" | Prohibited |
| Mounted Cavalry (Line) | 9.0" | 5.0" | 14.0" | -3.0" | 12.0" |
| Artillery (Limbered) | 8.0" | 3.0" | 12.0" | -4.0" | Prohibited |
| Artillery (Prolonge / Hand) | 2.0" | 0.0" | 2.0" | Impassable | Prohibited |
| Brigadier General (Mounted) | 12.0" | 8.0" | 16.0" | Free | Follows attached unit |
- [RULE-02-5.2] Wheeling & Direction Changes:
- Wheeling in Line: A regiment in Line of Battle pivots using either its far-left or far-right stand as the fixed anchor point. The sweeping flank may travel up to an arc of 45^\circ. The distance moved by the outer stand is deducted from the unit's total movement allowance.
- Pivoting on Center: A regiment may pivot on its center Color Stand up to 45^\circ by spending half of its movement allotment (3.0").
-
Assault Column Wheeling: Columns may execute a pivot of up to 90^\circ at the beginning of their move without deducting distance.
- Transforming from Line of Battle \rightarrow Assault Column (or vice versa) consumes one-half of the unit's base movement (3.0"). The unit may move the remaining 3.0" in its new formation.
- Transforming from Road Column \rightarrow Line of Battle consumes the unit's entire movement phase. The unit must deploy outward using its lead stand as the fixed center anchor point.
- [RULE-02-5.4] Inter-Unit Intervals & Passage of Lines:
- Regimental Intervals: Regiments within the same brigade must maintain a minimum lateral interval of 0.5"–1.0" between their flank stands to allow skirmishers and couriers to pass.
- Passage of Lines: A formed unit in Line of Battle may move directly through another friendly formed line to its front or rear, provided it has sufficient movement to clear the other unit's bases completely.
- Passage Test: Both units must make an immediate Discipline Check (4+ on 1D6). If either unit fails, it immediately receives a Disorder Marker.
- [RULE-02-5.5] Retrograde Movements (Falling Back):
- Falling Back in Good Order: A regiment may move straight backward up to 3.0" while maintaining its frontal facing toward the enemy. It does not suffer disorder and retains its full shooting capability in Phase 3.
- About Face & Full Retreat: A regiment may execute an About Face (spending 1.0" of move) and move at full speed away from the enemy. However, it presents its rear to the enemy and cannot fire in Phase 3.
Tactical Situation
- Brigade: 2nd Brigade, Army of Northern Virginia (Brig. Gen. Lawrence Branch — Reliable rating).
- Available Units:
- 7th North Carolina (5 stands, Line of Battle, within 6" of Branch).
- 18th North Carolina (5 stands, Line of Battle, within 8" of Branch).
- 37th North Carolina (4 stands, Road Column on a trail, 14" away from Branch — Out of Command).
Step-by-Step Resolution
-
Phase 1: Command Roll : Brigadier Branch rolls 1D3 for his Reliable rating. Roll is a
2, generating 2 Staff Pips. Branch places a D6 showing '2' behind his command base. -
Phase 2: Movement & Pip Allocation :
-
7th North Carolina (In Command): Branch wants this regiment to secure a stone wall quickly. He spends 1 Staff Pip for Double-Time . The 7th NC advances its full 6.0" base speed plus 3.0" bonus, reaching the wall at 9.0" total distance.
- 18th North Carolina (In Command): Branch spends his second Staff Pip to issue an Assault Order . The 18th NC declares a charge against an exposed Federal battery and advances 9.0" at Double-Quick speed.
- 37th North Carolina (Out of Command, ): Located 14" away (exceeding the 12" radius), the 37th NC cannot receive Staff Pips. Because it is in Road Column, it uses its free standard move to advance 10.0" straight down the road, unable to deploy into Line of Battle this turn.
- Tracking Update: Branch has spent both Staff Pips. His command die is rotated to '0'.
Designer Commentary & Historical Rationale
The Tactical Geometry of Civil War Brigades
In historical Civil War combat, a brigade commander did not command from miles behind the lines; he stood immediately behind his regiments, often within shouting distance or a brief gallop by an aide-de-camp. The 12.0-inch Command Radius translates to approximately 300-360 yards at ground scale—the precise acoustic and visual limit through black powder smoke and wooded terrain.
By allowing free standard maneuvers for all units within this radius, the system reflects the professional competence of regimental colonels who knew how to maintain alignment and dress ranks without constant micro-management.
The Staff Pip mechanism captures the true bottleneck of 19th-century command: personal attention. A general could personally ride over to organize a bayonet assault, send staff officers galloping to hasten a reserve regiment forward at double-time, or personally rally a wavering line. But he could not do all of these things everywhere at once. Restricting pips to 1–3 per turn forces players to make the hard choice: Do I push the assault on the left, or keep a staff officer in reserve to refuse my threatened right flank?
Terrain, Elevation & LOS
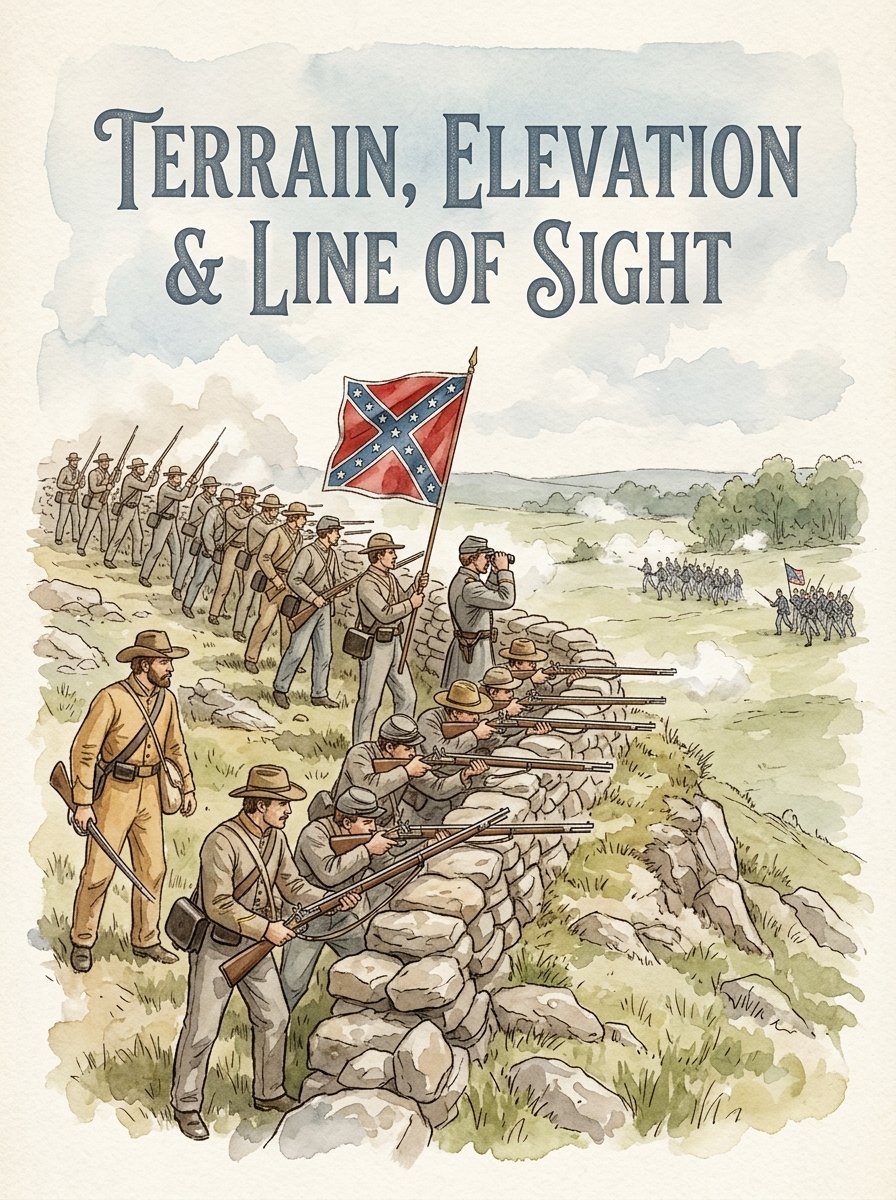
03. TERRAIN, ELEVATION, REVERSE SLOPES & LINE OF SIGHT
"There is nothing so much like a god on earth as a General on a battlefield." — Private Sam Watkins, 1st Tennessee Infantry, 1862
1.0 Master Terrain Classifications & Movement Effects
- [RULE-03-1.1] Terrain Scale & Standard: At the tactical scale of 1 inch = 25-30 yards, terrain features represent actual physical footprint boundaries on the battlefield. Units interact with terrain based on their current formation, base depth, and movement capability.
- [RULE-03-1.2] Master Terrain Matrix: All terrain types are categorized by their impact on movement rates, permitted tactical formations, cover save bonuses, and line-of-sight obstruction:
| Terrain Type | Movement Cost / Penalty | Permitted Formations | Cover Save | Line of Sight (LOS) & Tactical Rules |
|---|---|---|---|---|
| Open Ground / Pasture | Base Speed (6" Line / 8" Col) | All Formations | None | Unrestricted visibility. Baseline terrain. |
| Cornfield / High Crops | -2.0" Movement Penalty | All Formations | Light (5+) | Blocks LOS beyond 4.0". No Double-Time allowed. |
| Ploughed Field / Deep Mud | -2.0" Movement Penalty | All Formations | None | Exhausting ground; -1" to charge declarations. |
| Orchard / Light Woods | 4.0" Maximum Speed | All Formations | Light (5+) | Blocks LOS beyond 6.0". No Double-Time allowed. |
| Dense Woods / Scrub | 3.0" Maximum Speed | Column / Skirmish Only | Light (5+) | Blocks LOS beyond 3.0". Line of Battle must disorder to enter. |
| Minor Stream (Heron's Run) | -2.0" Movement Penalty | All Formations | None | Halts charges across water except at bridges/fords. |
| Major River / Deep Water | Impassable | — | — | Crossable only at designated Bridges and Fords. |
| Sunken Road / Cutting | One Full Turn to Exit | Line / Column | Heavy (4+) | Frontal fire provides +2 Melee bonus; exit consumes entire turn. |
- [RULE-03-1.3] Entering and Exiting Terrain: Movement penalties are deducted immediately upon the leading edge of the unit contacting the terrain feature. If a unit possesses insufficient remaining movement to clear the boundary, it must halt within the terrain.
- [RULE-03-1.4] Fractional Movement Minimum: A formed unit in command is always permitted to move a minimum of 2.0 inches in its active phase, regardless of cumulative terrain penalties, unless attempting to traverse completely impassable terrain.
- [RULE-03-1.5] Rough Ground & Formation Disruption: When a unit in Line of Battle moves through Dense Woods, Swamp, or Abatis, it immediately receives a Disorder Marker at the completion of its move, representing the breakdown of alignment and dressed ranks among the trees.
2.0 Linear Obstacles, Entrenchments & Sunken Lanes
- [RULE-03-2.1] Split-Rail & Snake Fences:
- Crossing Cost: Crossing a split-rail fence costs 2.0 inches of movement allowance.
- Defensive Benefit: A formed unit lined up with its front edge touching the fence gains Light Cover (5+ Save) against fire crossing the fence line from the front 180^\circ.
- Shock Defense Bonus: Defending a wooden fence grants +1 to the Opposed Melee Roll against frontal assaults, as attackers must awkwardly climb over the rails.
- Dismantling: An infantry regiment in contact with a wooden fence may spend its entire movement phase to permanently dismantle a section equal to its frontage, removing the fence piece from the board.
- [RULE-03-2.2] Stone Walls:
- Crossing Cost: Costs 2.0 inches of movement allowance. Formed columns crossing a stone wall must make a Discipline Check (4+ on 1D6) or receive a Disorder Marker upon crossing.
- Defensive Benefit: Grants Heavy Cover (4+ Save) against frontal incoming fire.
- Shock Defense Bonus: Defending a stone wall grants +2 to the Opposed Melee Roll against frontal assaults.
- [RULE-03-2.3] Hedges & Brush Rows: Treated identically to Split-Rail Fences (2.0" crossing cost, Light Cover 5+ save). Hedges do not provide shock defense bonuses in melee.
- [RULE-03-2.4] Abatis & Field Earthworks:
- Abatis (Felled Trees & Pointed Stakes): Costs 3.0 inches of movement to cross. Attackers charging through abatis lose all charging momentum bonuses and suffer a -2 penalty in melee.
- Breastworks / Earthen Trenches: Lined infantry gain Heavy Cover (4+ Save), are immune to flank shock penalties if the flank is anchored to the works, and receive +2 in Melee.
- [RULE-03-2.5] Sunken Roads (e.g., The Bloody Lane):
- Deployment: Regiments deployed inside a sunken road gain Heavy Cover (4+ Save) and +2 in Melee.
- Exit Restriction: Climbing out of a steep sunken road embankment consumes an entire turn's movement allowance (6.0"). The climbing unit cannot fire muskets during the turn it climbs out.
3.0 Structures, Buildings & Town Sectors
| Feature | Rules |
|---|---|
| Max Capacity | 2 Stands (Infantry or Dismounted Cavalry) |
| Defensive Save | Heavy Cover (4+ Save) |
| Melee Status | +2 Defense Bonus, Immune to Flank Attacks |
| Shooting Arc | 360° All-Around Fire (1D6 per garrisoned stand) |
| Artillery Siege | 4+ Hit with Solid Shot; 2 Hits collapses structure |
- [RULE-03-3.1] Isolated Farmhouses & Stone Structures:
- Garrison Capacity: A single isolated building model may be occupied by up to 2 stands of infantry or dismounted cavalry.
- Combat Profile: Troops inside gain Heavy Cover (4+ Save), receive +2 in Melee, and cannot be flanked or enfiladed.
- All-Around Fire: Garrisoned stands may split their fire dice across any face of the building (360^\circ perimeter defense).
- [RULE-03-3.2] Artillery Destruction of Buildings:
- Artillery batteries targeting a garrisoned building with Solid Shot or Shell hit on a 4+.
- Every 2 unsaved hits scored against the building itself inflicts structural damage. Upon accumulating 4 structural hits, the building collapses into rubble. The garrison takes 1 stand loss, and surviving stands are placed outside in open ground, Disordered. Rubble remains on the board as Light Cover (5+ Save).
- [RULE-03-3.3] Town & Village Sectors:
- Towns are defined by 6.0" x 6.0" square or rectangular sectors containing multiple building models.
- Formation Restrictions: Formed Line of Battle cannot enter a town sector. Regiments must enter in Assault Column, Road Column, or deploy into Skirmish Order.
- Sector Defense: Units inside a wooden village sector receive Light Cover (5+ Save); brick or masonry town sectors provide Heavy Cover (4+ Save).
- [RULE-03-3.4] Melee in Built-Up Sectors: Assaulting a garrisoned structure or town sector is resolved via the standard Opposed Melee Roll . If the defender wins or ties, the attacker is repulsed 6.0" Disordered. If the attacker wins, the surviving defenders must evacuate the structure and retreat 6.0" Disordered.
4.0 Elevation, Slopes & Dead Ground (Reverse Slopes)
- [RULE-03-4.1] Elevation Levels: Elevation is measured in stepped contours where Level 0 is baseline valley ground, Level 1 is a low hill/ridge (15–20 feet historical elevation), and Level 2 is a prominent high ridge.
- [RULE-03-4.2] The Crestline Position:
- A regiment is considered deployed on the Crest when the front edge of its bases is placed along the physical ridge line of the hill.
- Visibility: A unit on the crest has an unobstructed line of sight across all lower-elevation terrain (Level 0), looking over low obstacles such as fences and standard crop fields.
- Downhill Advantage: Firing or charging downhill from the crest grants +1 to Melee .
- Uphill Disadvantage: Units charging uphill against a crestline defender suffer a -1 Melee penalty.
- [RULE-03-4.3] The Reverse Slope & Dead Ground Rule:
- Any unit positioned more than 1.0 inch behind the crestline of a hill is on the Reverse Slope.
- Complete Concealment: Units on the reverse slope are in Dead Ground. They cannot be seen, targeted by direct fire, or spotted by any enemy unit on lower ground (Level 0) on the opposite side of the hill.
- Firing Prohibition: Units in dead ground cannot shoot at enemy units on the lower forward slopes until they physically move up to occupy the crestline.
- [RULE-03-4.4] Intervening Hills Blocking LOS: A hill contour of Level 1 completely blocks line of sight between two Level 0 units on opposite sides of the feature, unless both units are high enough to see over the intervening peak.
- [RULE-03-4.5] Artillery Plunging / Overhead Fire:
- Artillery positioned on a Level 1 or Level 2 hill may fire overhead across friendly units deployed on lower ground (Level 0), provided all safety clearances are met:
- The friendly unit must be at least 6.0 inches away from the artillery gun muzzle.
-
The friendly unit must be at least 4.0 inches away from the targeted enemy unit.
-
Canister Prohibition: Smoothbore canister (0–6") can never be fired overhead across friendly units under any circumstances.
5.0 Line of Sight (LOS) & Firing Arcs
-
[RULE-03-5.1] The 45° Forward Arc of Fire: All direct shooting (infantry musketry and artillery fire) is strictly limited to a 45^\circ forward arc extending outward from the far-left and far-right front corners of the unit's formation. Units cannot fire sideways or backward without executing a wheel or formation pivot during Phase 2.
-
[RULE-03-5.2] Origin of Measurement: All range measurements and line-of-sight checks originate from the center-front edge of the Color Stand for infantry regiments, or the center gun tube for artillery batteries.
- [RULE-03-5.3] Strict Prohibition on Firing Through Friendly Units:
- Formed battle lines cannot fire through other friendly formed units under any circumstances.
- If a friendly formed line blocks the direct line of sight to an enemy target, the firing regiment must either select a different, unblocked target or reduce its firing dice pool to represent only the individual stands possessing an unobstructed view.
- [RULE-03-5.4] Skirmish Screen Sight Exception:
- A parent regiment may fire through its own detached Skirmish Screen . The skirmishers are assumed to drop prone or step into the intervals between firing files.
- The Smoke & Obstruction Penalty: Firing through a friendly skirmish screen imposes a -1 to-hit penalty on the parent regiment's volley.
- [RULE-03-5.5] Blocking Terrain & Vision Limits: Line of sight is blocked immediately when passing through:
- Dense Woods / Wilderness: Blocks LOS beyond 3.0 inches.
- Cornfields / Tall Crops: Blocks LOS beyond 4.0 inches.
- Orchards / Light Woods: Blocks LOS beyond 6.0 inches.
- Town Sectors & Stone Buildings: Completely blocks LOS through the structure footprint.
- Intervening Hill Crests / High Ridges: Completely blocks LOS to lower ground beyond.
- [RULE-03-5.6] Target Priority Rules: A formed unit executing ranged fire in Phase 3 must target the closest unengaged enemy unit within its 45^\circ forward arc, with the following mandatory exceptions:
- If an enemy unit is actively declaring an assault or charging the firer, that enemy becomes the mandatory target.
- If an enemy regiment exposes an open flank within effective range, the firer may bypass a closer frontal target to deliver raking enfilade fire against the exposed flank.
-
Artillery may bypass closer infantry skirmishers to engage formed battle lines or counter-battery enemy artillery within medium range.
- An enemy unit is in an Enfiladed / Flank Position only if more than 50% of the firing unit's stands (or its physical center) is positioned behind the line projected outward at 90^\circ from the target's front corner.
- Raking fire down the length of an enfiladed line grants a +1 to-hit bonus and denies the target all light cover saves from split-rail fences.
Step-by-Step Scenario Analysis
-
Initial Dispositions:
-
Battery B, 4th US Artillery (Union): Deployed directly on the Crestline of Oak Ridge (Level 1) with 3-inch Ordnance Rifles.
- 2nd Wisconsin Infantry (Union): Deployed in Line of Battle 2.0" behind the crestline on the reverse slope.
-
4th Virginia Infantry (Confederate): Advancing across the valley pasture at Level 0, currently 8.0" away from the base of the ridge.
-
Line of Sight & Targeting Assessment ( / ):
-
Can the 4th Virginia see or shoot at the 2nd Wisconsin? No. Because the 2nd Wisconsin is deployed more than 1.0" behind the crestline, it is in Dead Ground . The Confederate Virginians have no line of sight to the Wisconsin infantry and cannot target them.
-
Can the 4th Virginia see Battery B? Yes. Battery B is positioned on the crestline, making it fully visible.
-
Overhead Firing Resolution :
-
Battery B wishes to fire long-range shell over the heads of friendly troops. However, because the 2nd Wisconsin is tucked safely behind the crest on the reverse slope, Battery B has a completely clear field of plunging fire into the valley without violating friendly safety clearance rules.
- Battery B rolls its 2D6 shell dice pool against the advancing 4th Virginia at Level 0 with zero obstruction.
-
Springing the Trap (Active Phase Maneuver):
-
On the following Union turn, the 2nd Wisconsin spends 2.0" of movement to advance from the reverse slope onto the crestline. It delivers a devastating close-range volley with downhill bonuses, catching the advancing Confederates in the open valley below.
7.0 Designer Commentary & Historical Context
The Tactical Reality of Reverse Slopes & Line of Sight
One of the most glaring defects of traditional miniature rules is the "God's-eye view," where every miniature on the table is visible to every other miniature as long as a cardboard tree isn't directly in between them.
Historically, Civil War commanders understood the immense defensive power of Dead Ground and Reverse Slopes. At the Battle of South Mountain (1862) and along Cemetery Ridge at Gettysburg (1863), Union commanders frequently positioned their infantry regiments 20-50 yards behind the crest of a ridge. This protected the men from Confederate artillery counter-battery fire and kept the regiment invisible to oncoming assault columns until the attackers were within 40 yards of the crest.
The 1.0-inch Reverse Slope Rule (25–30 yards ground scale) mechanically replicates this tactical doctrine with zero bookkeeping. By simply placing your stands slightly behind the ridge marker, your units are completely immune to direct ranged fire from the valley floor.
Furthermore, enforcing the strict prohibition against firing through friendly formed lines eliminates the unrealistic practice of stacking lines three ranks deep to generate massive dice walls. In this system, positioning, frontage intervals, and terrain exploitation are what win battles—just as they did in 1862.
Reactive Tactics
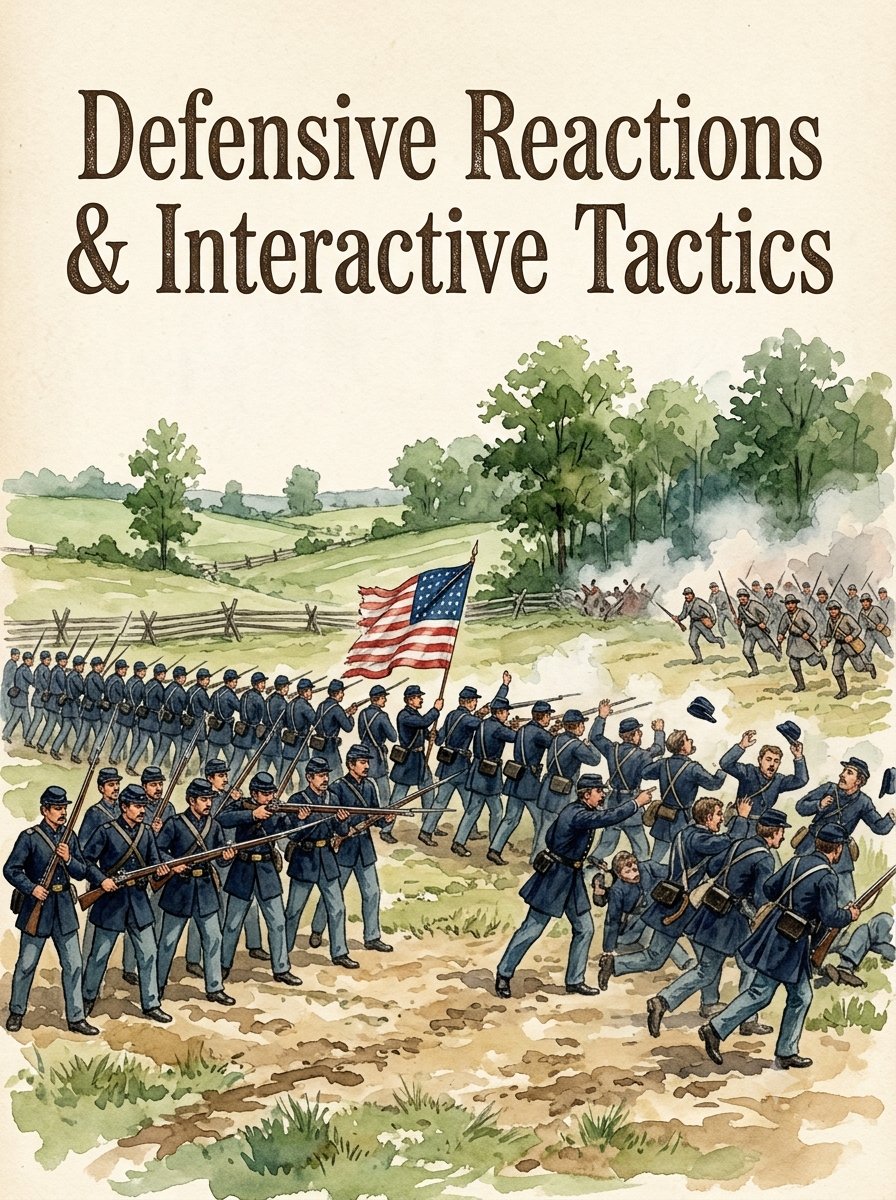
04. DEFENSIVE REACTIONS & INTERACTIVE TACTICS
"It is well that war is so terrible, or we should grow too fond of it." — General Robert E. Lee, 1862
1.0 The Reactive Philosophy & Trigger Windows
- [RULE-04-1.1] The Anti-Passivity Principle: In traditional side-by-side (IGOUGO) wargames, the non-active player often sits passively while their battle line is maneuvered around, flanked, or charged. This ruleset eliminates passive downtime by granting the defending player five specific, situational Tactical Reactions.
- [RULE-04-1.2] Reaction Trigger Windows: Reactions can only be declared during two distinct interruption windows in Phase 2: Active Maneuver & Assault Phase :
- Reaction Trigger Window A (Maneuver Interruption): Triggered during standard enemy movement when an active unit moves across a defender’s forward arc or closes within range of forward screens .
- Reaction Trigger Window B (Assault & Charge Interruption): Triggered when an active enemy unit declares a charge and closes to within 4.0 inches of a defending unit .
- [RULE-04-1.3] The Reaction Economy (Free vs. Reserved Staff Pips):
- Free Tactical Reactions: Reactions that reflect instinctive drill responses (Closing Defensive Volley and Skirmish Evade) require no Staff Pips and may be executed by any eligible unit in good order.
- Commanded Reactions: Reactions that require extraordinary tactical coordination (Refuse Flank and Counter-Charge) require the expenditure of 1 Reserved Staff Pip or a successful Discipline Check (4+ on 1D6) if no pips were reserved.
- [RULE-04-1.4] Single Reaction per Trigger Limit: A defending regiment or battery may only declare and execute one reaction per triggering enemy action. Once a reaction is resolved, the active player completes their movement or assault.
2.0 Reaction 1: Closing Defensive Volley (Point-Blank Charge Halting)
- [RULE-04-2.1] Trigger Condition: An active enemy unit declares an assault against a defending formed regiment or artillery battery and moves to within 4.0 inches of the defender's front edge.
- [RULE-04-2.2] Cost & Eligibility:
- Cost: Free (No Staff Pip required).
- Eligibility: The defending unit must have the charger in its forward 45^\circ arc of fire, must not be Disordered, and must not have an active Smoke Marker from prior firing.
- [RULE-04-2.3] Execution & Dice Pool:
- The charging unit's physical movement is temporarily halted at the 4.0" mark.
- The defender rolls its standard Phase 3 shooting dice pool (1D6 per stand firing; 2D6 per artillery section) using Short Range (0–6") to-hit numbers:
- Smoothbore Musket (Buck & Ball): Hits on 3+.
- Rifled Musket (Springfield/Enfield): Hits on 4+.
- 12-pdr Napoleon Canister: Hits on 2+ (Causes automatic Disorder).
- 3-inch / 10-pdr Rifle Canister: Hits on 3+.
- The charging attacker rolls saves for light/heavy cover if applicable (typically none in open ground charges).
- Apply stand losses (2 unsaved hits = 1 stand loss). Any natural 6 rolled to hit inflicts an immediate Disorder Marker on the charging unit.
- [RULE-04-2.4] The Charge Discipline Check:
- If the Closing Volley inflicts 1 or more stand losses OR inflicts a Disorder Marker, the charging unit's momentum is shattered and it must take an immediate Discipline Check on 1D6:
- Veteran / Elite: Passes on 3+.
- Regular: Passes on 4+.
- Green / Conscript: Passes on 5+.
- [RULE-04-2.5] Outcome of the Volley:
- Pass: The charging regiment steadies its ranks, absorbs the casualties, and closes the remaining 4.0" into physical base-to-base contact. Combat proceeds to Phase 4 Melee.
- Fail: The charge stalls. The charging unit immediately halts 2.0 inches away from the defender, receives a Disorder Marker (if not already disordered), and cannot move or attack further this turn.
- [RULE-04-2.6] Gunsmoke Aftermath: Place a Smoke Marker in front of the defending unit immediately after the volley is resolved.
3.0 Reaction 2: Opportunity / Interdiction Fire (Maneuver Punishment)
- [RULE-04-3.1] Trigger Condition: An active enemy unit executes a movement that crosses entirely within 8.0 inches across the forward 45^\circ arc of an unengaged defending formed regiment or artillery battery (e.g., executing a flank march, advancing in road column across a firing line, or moving between cover).
- [RULE-04-3.2] Cost & Eligibility:
- Cost: Free (No Staff Pip required).
- Eligibility: The defending unit must be unengaged in melee, must not be Disordered, and must not possess a Smoke Marker.
- [RULE-04-3.3] Execution & Resolution:
- The defending player calls "Opportunity Fire!" at the exact point in the enemy's movement path where the target enters optimal range and arc.
- The active unit's movement is paused mid-stride.
- The defender rolls 1D6 per stand using the appropriate range bracket (Short 0–6" or Medium 6–8").
- Target rolls cover saves if traversing light cover; apply casualties (2 hits = 1 stand) and mark Disorder on any natural 6.
- If the active unit is in Road Column, it suffers a -2 save penalty against Opportunity Fire .
- [RULE-04-3.4] Tactical Cost to Firer:
- Firing an Opportunity Volley places a Smoke Marker in front of the defending unit.
- Counts as Fired: The defending unit is marked as having fired; it cannot fire again during its own upcoming Phase 3 Ranged Combat Phase unless it spends its active turn moving out of its smoke.
- [RULE-04-3.5] Resumption of Movement: Once casualties and disorder are applied, the active unit resumes and completes any remaining movement allowance from the point of interruption. If the unit received a Disorder marker from a natural 6, its remaining movement distance is halved.
4.0 Reaction 3: Skirmisher & Light Cavalry Screen Evade
- [RULE-04-4.1] Trigger Condition: An active formed enemy battle line or column advances within 6.0 inches of, or declares an assault against, a detached Skirmish Stand or mounted light cavalry stand.
- [RULE-04-4.2] Cost & Eligibility:
- Cost: Free (Automatic drill maneuver).
- Eligibility: Any detached skirmish screen or mounted cavalry screen that is not pinned or disordered.
- [RULE-04-4.3] Evade Execution:
- The skirmish stand immediately executes a 4.0"–6.0" withdrawal move directly to the rear.
- Passage Exemption: The evading skirmish stand moves directly through friendly formed lines without causing a Passage of Lines test or disordering parent regiments.
- The skirmish stand is reintegrated into the parent regiment's rear rank or placed directly behind its Color Stand.
- [RULE-04-4.4] Attacker Redirection & The Overrun:
- If Evade is Chosen: The advancing or charging enemy unit does not stop; it continues its declared movement or charge directly toward the formed parent battle line positioned behind the vacated screen. The parent line may now execute Reaction 1: Closing Defensive Volley.
- If Evade is NOT Chosen (The Overrun): If the skirmish screen does not evade and is physically contacted by a charging formed unit (Infantry Line, Column, or Cavalry), the skirmishers are instantly Overrun and Destroyed (removed from play) without requiring a melee roll. The charging unit's momentum is not slowed; it continues its remaining charge distance directly into the target behind the skirmishers.
5.0 Reaction 4: Refuse the Flank (Hasty Pivot)
- [RULE-04-5.1] Trigger Condition: An active enemy unit moves or declares an assault that positions it within the Flank Zone (45^\circ–90^\circ) of a defending regiment in Line of Battle.
- [RULE-04-6.2] Cost & Execution Requirement:
- Cost with Reserved Pip: 1 Reserved Staff Pip . Automatic success.
- Emergency Check (No Pip Reserved): If no pip was reserved, the defending regiment must pass an immediate Discipline Check (4+ on 1D6). If passed, the maneuver succeeds. If failed, the regiment freezes in place, unable to refuse its flank, and receives a Disorder Marker.
- [RULE-04-6.3] Mechanical Execution:
- The defending regiment wheels its outer 1 or 2 flank stands backward up to 45^\circ to form an angled "L-shaped" defensive shoulder facing the incoming threat.
- The center Color Stand and opposite flank stands remain anchored in their original alignment.
- [RULE-04-6.4] Tactical Combat Impact:
- Negates Enfilade: Firing against the refused flank no longer counts as raking enfilade fire; the firer does not receive the +1 enfilade to-hit bonus .
- Converts Flank Assault to Frontal Contact: An incoming enemy charge targeting the refused flank must contact the newly angled stands frontally, denying the attacker the devastating +2 Flank Melee Modifier .
6.0 Reaction 5: Counter-Charge (Rebel Yell & Mounted Shock)
- [RULE-04-6.1] Trigger Condition: An active infantry or cavalry unit declares an assault against a defending unit across open ground within standard charge distance (9.0").
- [RULE-04-6.2] Eligibility & Traits:
- Any Confederate infantry regiment possessing the Rebel Yell trait .
- Any Veteran / Elite Union or Confederate infantry regiment in a Fresh health state.
- Any formed Mounted Cavalry regiment in good order.
- [RULE-04-6.3] Cost:
- Requires the expenditure of 1 Reserved Staff Pip . A unit cannot counter-charge without a reserved command pip.
- [RULE-04-6.4] Counter-Charge Surge Execution:
- Instead of standing stationary to receive the assault or firing a closing volley, the defending player shouts "Counter-Charge!"
- The defending unit surges forward 2.0"–3.0" into open ground to meet the oncoming attackers mid-field.
- [RULE-04-5.5] Melee Modifiers & Combat Impact:
- Negates Attacker Momentum: The original charging attacker loses its +1 Charging Momentum bonus and any downhill terrain bonuses.
- Shock Bonus: The counter-charging unit applies its +1 Rebel Yell or +1 Cavalry Shock bonus directly to the Opposed Melee Roll .
- Combat resolves immediately in Phase 4 Melee as an open-field clash.
7.0 Master Summary Matrix of All 5 Reactions
| Reaction Name | Primary Trigger | Staff Pip Cost | Eligible Units | Mechanical & Combat Effect |
|---|---|---|---|---|
| 1. Closing Volley | Enemy charges within 4.0" | Free | Formed unsmoked, undisordered units | Point-blank volley; 1+ hit or Nat 6 forces charger Discipline Check (4+) or charge stalls 2.0" away Disordered. |
| 2. Opportunity Fire | Enemy crosses front arc within 8.0" | Free | Unengaged, unsmoked formed lines | Pauses enemy move; delivers volley; places Smoke Marker on firer; counts as fired for next turn. |
| 3. Skirmish Evade | Formed enemy closes within 6.0" | Free | Detached skirmishers / cavalry screens | Screen makes immediate 4"–6" escape move through friendly lines without disordering parent unit. |
| 4. Refuse Flank | Enemy enters flank zone (45^\circ–90^\circ) | 1 Reserved Pip (or 4+ Check) | Formed infantry lines in Line of Battle | Outer 1–2 stands wheel 45^\circ to face threat; cancels enemy +1 enfilade to-hit and +2 flank melee bonuses. |
| 5. Counter-Charge | Enemy declares charge in open ground | 1 Reserved Pip | Rebel Yell units, Veterans, or Cavalry | Unit surges 2"–3" forward to meet attacker; cancels attacker momentum; applies +1 shock trait. |
-
Assault Declaration: The 14th Brooklyn declares a charge against the 5th Virginia across an open pasture (8.0" separation). The Union player spends 1 Staff Pip and moves the Brooklyn regiment forward.
-
Interruption at 4.0 Inches : At the 4.0" mark, movement halts. The Confederate player declares Reaction 1: Closing Defensive Volley.
-
Volley Execution :
-
The 5th Virginia fields 5 stands armed with Smoothbore Muskets (Buck & Ball). At Short Range (0–6"), they hit on 3+.
- Dice Pool: 5D6. Rolls:
[3, 3, 5, 2, 6]. - Result: 4 hits scored (including one natural 6).
- Casualties: 4 hits = 2 physical stands removed from the 14th Brooklyn.
-
Suppression: The natural 6 inflicts an immediate Disorder Marker.
-
Discipline Check :
-
Sufferings stand losses and Disorder forces the 14th Brooklyn to make an immediate Discipline Check (4+ for Regulars).
-
The Union player rolls a
2—Failed! -
Aftermath : The charge stalls. The 14th Brooklyn halts 2.0" away from the Virginia line, reduced to 3 stands, Disordered. The 5th Virginia receives a Smoke Marker. No melee occurs.
9.0 Designer Commentary & Historical Context
Why These Five Reactions?
The historical record of the American Civil War is replete with moments where a battle turned on split-second regimental reactions rather than high-level generalship: * The Closing Volley: At the Battle of Franklin (1864) and the Peach Orchard at Shiloh (1862), advancing assault waves were repeatedly shattered and halted within 30 paces by disciplined, point-blank volleys delivered by steady defenders waiting behind breastworks. * Refusing the Flank: Joshua Lawrence Chamberlain’s famous maneuver with the 20th Maine at Little Round Top—wheeling his left-flank company back at a right angle—is the quintessential example of Refusing the Flank under pressure. * The Counter-Charge: Confederate doctrine frequently emphasized meeting an oncoming Union advance with a sudden, screaming counter-charge into open ground, catching the Federal line disordered as it crossed fences or ditches.
By codifying these historical behaviors into five clear reaction triggers governed by a simple resource economy (Reserved Staff Pips), the game achieves maximum tactical realism and high player engagement without degenerating into chaotic, off-turn rule arguments.
Ranged Combat & Gunsmoke
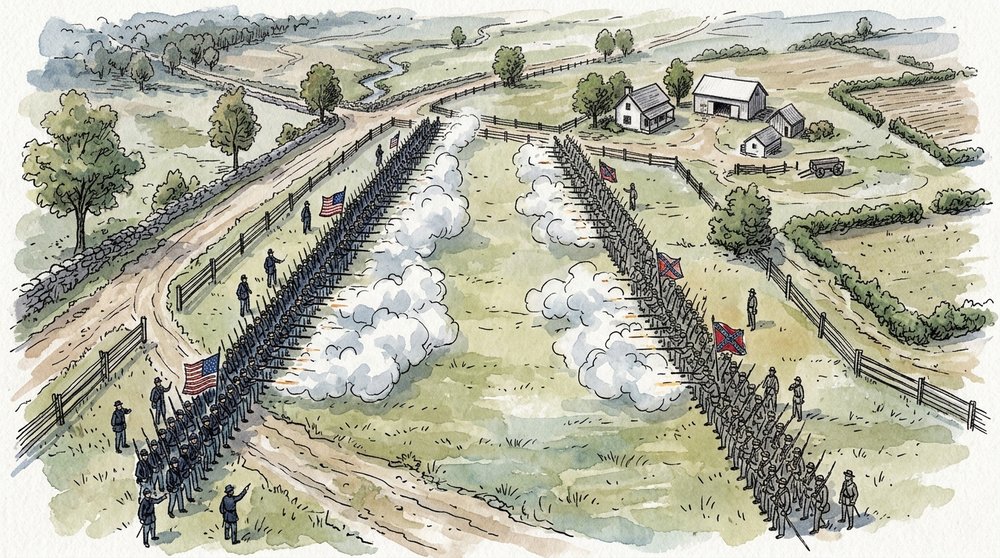
05. RANGED COMBAT, WEAPONS, COVER & GUNSMOKE
"It was not a battle; it was a murder." — Major General Daniel Harvey Hill, 1862
1.0 Sequence of Ranged Combat & Firing Eligibility
- [RULE-05-1.1] The Ranged Combat Phase (Phase 3): During Phase 3: Active Ranged Combat Phase , the Active Side resolves shooting for all eligible infantry regiments, dismounted cavalry, and unlimbered artillery batteries. Ranged combat is resolved unit-by-unit in an order selected by the active player.
-
[RULE-05-1.2] Firing Eligibility Criteria: A unit is eligible to execute ranged fire in Phase 3 if it meets all of the following conditions:
-
Did Not Move (Hold Position): It did not execute an Advance or Double-Time move in Phase 2. To fire, a unit must have chosen the "Hold Position" order. (Exception: Units that only performed a Pivot/Wheel or Formation Change may fire, but suffer a -1 to-hit penalty).
- It did not declare or participate in an Assault/Charge during Phase 2 .
-
It is not currently in physical base-to-base contact with an enemy unit in Melee.
-
It is not deployed in Road / March Column .
-
It has a valid, unobstructed Line of Sight to an enemy unit within its forward 45^\circ arc of fire .
-
It did not fire as an Opportunity Fire reaction during the opponent's preceding turn , unless it has since moved out of its smoke.
- The active unit must declare a single enemy regiment, battery, or structure as its target before rolling dice.
- Target Priority: A firing unit must target the closest unengaged enemy unit (i.e., not currently locked in physical melee base-to-base contact) within its forward 45^\circ arc , with the following mandatory exceptions:
- Enfilade Opportunity: If an enemy line exposes an open flank within effective range, the firer may bypass a closer frontal target to rake the exposed flank.
- Artillery Priority: Artillery batteries may bypass forward enemy skirmish stands to target formed infantry lines, columns, or enemy artillery batteries.
- [RULE-05-1.4] Measurement Origin & Firing Arcs:
- All ranges are measured from the center-front edge of the Color Stand for infantry regiments, or the center gun tube for artillery batteries, to the closest stand of the designated target unit.
- The firing arc is strictly restricted to the 45^\circ forward cone extending outward from the front-left and front-right corners of the unit .
- [RULE-05-1.5] Enfilade & Flank Raking Fire:
- An enemy unit is in an Enfiladed / Flank Position if the firing regiment is positioned entirely behind the line projected outward at 90^\circ from the target's front corner .
- Enfilade Benefits:
- Firing down the length of an enfiladed battle line grants a +1 to-hit bonus to all shooting dice.
- The target unit is denied all Light Cover saves from frontal linear obstacles such as split-rail fences or low stone walls.
2.0 The Stand-Based Dice Pool & Master Weapon Profiles
- [RULE-05-2.1] Dice Pool Formulation:
- Infantry in Line of Battle: Rolls 1D6 per stand firing in the front rank. (A 5-stand regiment rolls 5D6).
- Infantry in Assault Column: Rolls 1D6 per front-rank stand only (typically 2D6, see ).
- Artillery Batteries (Unlimbered): Rolls 2D6 per gun section stand (a full battery of 2 stands rolls 4D6).
- Skirmish Stands: Roll 1D6 per skirmish stand.
Master Small Arms Weapon Table
- [RULE-05-2.2] Small Arms Weapon Matrix: Base firepower is 1D6 per stand. Compare each D6 rolled against the target number. Dice meeting or exceeding the target number score Hits.
| Weapon Classification | Point-Blank Range (0" - 4.0") | Medium Range (4.1" - 8.0") | Long Range (8.1" - 16.0") | Tactical Characteristics & Historical Notes |
|---|---|---|---|---|
| Smoothbore Musket (.69 Cal / Buck & Ball) | 4+ (Roll 2 Dice per stand) |
4+ (Roll 1 Die per stand) |
— (Out of Range) |
Buck & Ball: Devastating shotgun-like effect at close range. Incapable of accurate fire beyond 200 yards. |
| Rifled Musket (Springfield / Enfield .58/.577) | 4+ (Roll 1 Die per stand) |
4+ (Roll 1 Die per stand) |
5+ (Roll 1 Die per stand) |
Universal Standard: Consistent, reliable firepower across all tactical distances up to 400 yards. |
| Single-Shot Breechloader (Sharps) | 4+ (Roll 1 Die per stand) |
4+ (Roll 1 Die per stand) |
4+ (Roll 1 Die per stand) |
Prone Reload: No long-range penalty. When deployed as Skirmishers or Dismounted Cavalry, they count as being in Light Cover (5+) even in open ground because they can reload while prone. |
| Double-Barreled Shotgun | 4+ (Roll 3 Dice per stand) |
— (Out of Range) |
— (Out of Range) |
Devastating Point-Blank: Used by partisan and militia cavalry. Extremely lethal up close but useless beyond 200 yards. |
| Whitworth Sniper Rifle | 4+ (Roll 1 Die per stand) |
4+ (Roll 1 Die per stand) |
4+ (Roll 1 Die per stand) |
Telescopic Sight: Range extends to an unprecedented 24.0". Ignores Light Cover saves. Only equipped by elite sharpshooter stands. |
| Magazine Repeater (Spencer / Henry) | 4+ (Roll 3 Dice per stand) |
5+ (Roll 1 Die per stand) |
— (Out of Range) |
Rapid Fire & Prone Reload: Devastating up close. Like Breechloaders, Skirmishers and Dismounted Cav armed with Repeaters gain Light Cover (5+) in open ground. |
Master Field Artillery Weapon Table
- [RULE-05-2.3] Field Artillery Matrix: Base firepower is 2D6 per gun stand. Compare each D6 against the target number.
| Ordnance Type & Caliber | Double Canister (0" - 4.0") | Standard Canister (4.1" - 10.0") | Medium/Long (Shell/Solid) (>10.0") | Tactical Characteristics & Battery Role |
|---|---|---|---|---|
| 12-pdr Napoleon (Smoothbore) | 2+ (Roll 3 Dice per stand) | 3+ (Roll 2 Dice per stand) | 4+ (up to 30") | Canister Monster: Devastating defensive fire. |
| 3-inch Ordnance Rifle (Wrought Iron) | 3+ (Roll 3 Dice per stand) | 4+ (Roll 2 Dice per stand) | 4+ (up to 36") | Precision Sniper: Exceptional long-range counter-battery and plunging hill fire. |
| 10-pdr / 20-pdr Parrott Rifle | 3+ (Roll 3 Dice per stand) | 4+ (Roll 2 Dice per stand) | 4+ (up to 36") | Heavy Rifled Shell: High penetration; +1 to hit stone buildings and fortifications. |
| 12-pdr / 24-pdr Field Howitzer | 2+ (Roll 3 Dice per stand) | 3+ (Roll 2 Dice per stand) | 5+ (up to 24") | Lobbed Spherical Case: Ignores light cover saves when firing shell over low ridges/fences. |
-
[RULE-05-2.4] Depressed Muzzles & Double Canister Carnage: When an artillery battery fires at an enemy within Point-Blank Range (0" - 4.0"), it is assumed the gunners are depressing their muzzles to bounce the shot off the ground and desperately loading double canisters of iron balls. In addition to the bonus dice, no cover saves are permitted against Double Canister hits. Furthermore, the target regiment suffers a -1 penalty to its resulting Discipline Check for every casualty sustained from this volley, overriding standard morale modifiers and representing the terrifying, regiment-shredding nature of this fire.
-
[RULE-05-2.5] Artillery vs. Deep Formations: A regiment deployed in a deep Assault Column presents a massive vulnerability to artillery fire (bowling-alley effect). An Assault Column suffers a -1 penalty to its Cover Saves against all incoming Artillery fire (Canister, Shell, and Solid Shot).
- By spending 1 Staff Pip during Phase 1 , a player may authorize up to 3 artillery sections within the same brigade to combine their firing dice into a single concentrated barrage targeting one enemy stand.
- Concentrated battery fire forces the target regiment to roll all cover saves at a -1 penalty.
- [RULE-05-2.7] Low Ammunition Rules (Optional Historical Chrome):
- If an infantry regiment or artillery battery rolls two or more natural 1s on its shooting dice pool during a single volley, it immediately receives a Low Ammo Marker.
- Units with a Low Ammo Marker suffer a -1 penalty on all future shooting dice until an unengaged turn is spent resupplying from the brigade wagon train.
3.0 Defensive Saves, Casualties & Micro-Damage
-
[RULE-05-3.1] The Cover Save Step: For every hit scored by the firing unit, the defending player rolls 1D6 Cover Save. Unsaved hits inflict physical casualties and attrition.
- Open Ground / Pasture: No Save. All scored hits become unsaved casualties.
- Light Cover (Save on 5+):
- Standing behind Split-Rail / Snake Fences .
- Deployed inside Orchards, Cornfields, or Light Woods .
- Positioned in sunken dirt tracks or behind low earthen berms.
- Target is in Skirmish Order (dispersed formation).
- Heavy Cover (Save on 4+):
- Lined behind Stone Walls .
- Deployed inside Sunken Roads or engineered Breastworks / Field Earthworks.
- Garrisoned inside Stone Farmsteads or masonry town sectors .
- [RULE-05-3.3] Casualty Stand Removal (2 Hits = 1 Stand):
- Every 2 unsaved hits inflicts the permanent removal of 1 physical stand (60–75 men) from the regiment. The owning player removes stands from the outer flanks, preserving the center Color Stand until last.
- Micro-Damage Tracking: If a unit sustains an odd number of unsaved hits (e.g., 1, 3, or 5 hits), the excess 1 hit is tracked by placing a small colored micro-dice directly behind the regiment's Color Stand. This hit carries over and will combine with future hits to remove the next stand.
- [RULE-05-3.4] Regimental Shatter Threshold:
- An infantry regiment reduced to 1 stand remaining immediately shatters. Its tactical integrity is destroyed; the final stand is permanently removed from the tabletop, and the loss is counted toward the Brigade Faltering Clock .
4.0 Suppression: The Natural 6 Disorder Trigger
- [RULE-05-4.1] The Suppression Rule: Black powder firepower was as much psychological as it was physical. When subjected to intense fire, units must test their nerve. The volume of fire required to trigger this test depends on the distance.
The Shock Trigger (Range Dependent): * At Short Range (0–6"): A single natural 6 rolled to hit by the firing player acts as a Shock Trigger. * At Medium/Long Range (>6"): The fire is more dispersed. It requires TWO natural 6s rolled in the same volley to act as a Shock Trigger.
- [RULE-05-4.2] The Discipline Save: When a Shock Trigger occurs, the defending regiment must immediately make a Discipline Check (
1D6against their rating: Veteran 3+, Regular 4+, Green 5+). If they fail, they receive a Disorder Marker. - Modifiers to the Discipline Save:
- Fresh (>75% stands remaining): +1
- Spent (<35% stands remaining): -1
- In Cover (Light or Heavy): +1
-
Crossfire (Fired on by multiple enemy units this phase): -1
-
[RULE-05-4.3] Resolution Timing & Multiple 6s: The Discipline Save is made immediately, regardless of cover saves against casualties. Rolling extra 6s beyond the required trigger does not force multiple saves; however, every 6 still counts as a valid hit for casualty purposes.
-
[RULE-05-4.4] Tactical Effects of Being Disordered: A unit with a Disorder Marker suffers severe tactical restrictions:
-
Movement: Cannot Double-Time; movement speed is reduced by -2.0 inches.
- Shooting: Suffers a -1 to-hit penalty on all shooting dice.
- Assaults: Cannot declare an Assault/Charge.
- Melee: Suffers a catastrophic -2 penalty on Opposed Melee Rolls . If forced to retreat from melee while already Disordered, it suffers 1 Micro-Hit via the Double Disorder rule instead of routing.
- [RULE-05-4.5] Plunging Fire & Overshoot: Combat inherently creates an area of effect. When a unit fires a volley and rolls one or more Natural 6s, check the area directly behind the target.
- Infantry Overshoot: If an infantry unit rolls one or more 6s, a secondary unit (friendly or enemy) deployed within 4.0 inches directly behind the primary target automatically suffers 1 stray hit (no cover saves allowed). A maximum of 1 overshoot hit can be inflicted per infantry volley.
- Artillery Overshoot: Artillery fire is far more penetrating. If a firing artillery battery rolls any Natural 6s, apply the following effects to the secondary unit behind the target:
- Solid Shot / Shell (>8.0"): Represents cannonballs ricocheting through the lines. The secondary unit suffers 1 automatic Unsaved Hit, representing the cannonball punching straight through the front regiment into the reserves.
- Canister (0-8.0"): Canister acts like a giant shotgun. The secondary unit suffers 1 stray hit for EVERY Natural 6 rolled by the artillery battery, as the cone of iron balls shreds the primary target and spreads into the unit behind it.
5.0 The Gunsmoke Obscuration Rules
- [RULE-05-5.1] The Smoke Bank Trigger: Whenever a stationary infantry regiment or unlimbered artillery battery executes a volley in Phase 3 (or fires an Opportunity Volley in Phase 2), place a Smoke Marker (a 1-inch tuft of gray/white polyfiber) directly against the center-front base of the firing unit.
- Open Order Exception: Units deployed in Skirmish formation (including Dismounted Cavalry) do not generate Smoke Markers when firing. Their dispersed spacing allows the black powder smoke to clear rapidly.
- [RULE-05-5.2] The Obscuration Penalty:
- Any line of sight that passes into, out of, or through a Smoke Marker at a distance greater than 6.0 inches (Short Range) suffers a -1 to-hit penalty on all shooting dice.
- This penalty applies universally to both infantry and artillery.
-
It applies to the unit that generated the smoke attempting to fire out, as well as any other friendly or enemy unit attempting to fire into or through that smoke marker. Gunsmoke never restricts or penalizes movement, it only obscures vision.
- Target units within 6.0 inches are close enough that muzzle flashes, battle flags, and closing battle lines are clearly visible. Firing at targets within 6.0" ignores all smoke penalties.
- [RULE-05-5.4] Smoke Dissipation & Clearing: Smoke is removed from the table under three specific conditions:
-
Advancing Through Smoke (Instant): If the regiment executes a forward movement during Phase 2, it steps out of its own smoke bank; remove the Smoke Marker immediately.
-
Holding Fire (Turn Clean-up): If a smoked unit chooses to hold its fire for an entire active phase (letting the air clear and barrels cool), the Smoke Marker is removed during Phase 5: Clean-up .
-
Windy Weather Condition: If the scenario designates a "Brisk Wind" weather condition, all smoke markers on the table are removed automatically at the end of every active player's turn.
-
[RULE-05-5.5] Multi-Regiment Smoke Walls: If three or more adjacent regiments in the same brigade fire from stationary positions, their individual smoke markers merge to form a continuous Smoke Wall. Line of sight through a Smoke Wall is completely blocked beyond 8.0 inches, preventing long-range artillery bombardment from targeting units behind the line.
6.0 Friendly Fire & Intervisibility Restrictions
- [RULE-05-6.1] Strict Prohibition on Firing Through Formed Friendly Lines:
- Under no circumstances may a formed infantry line or artillery battery fire through another formed friendly unit.
- If a friendly formed unit blocks any portion of the firing arc to the intended target, the firing regiment must either nominate an unobstructed target or reduce its dice pool to include only those individual stands possessing a clear, unblocked line of sight.
- [RULE-05-6.2] Firing Through Skirmish Screens:
- A parent regiment deployed in Line of Battle is permitted to fire through its own detached Skirmish Screen .
- Screen Obstruction Penalty: The muzzle blast and visual interference of the skirmishers imposes a -1 to-hit penalty on the parent regiment's volley.
- [RULE-05-6.3] Artillery Overhead & Plunging Fire:
- Artillery batteries deployed on Level 1 or Level 2 elevated terrain may fire solid shot or shell overhead across friendly units deployed on lower ground (Level 0), provided both safety clearances are met:
- The friendly unit must be at least 6.0 inches away from the artillery gun muzzle.
-
The friendly unit must be at least 4.0 inches away from the targeted enemy unit.
-
Canister Safety Rule: Canister (0–6") can never be fired overhead across friendly troops.
7.0 Master Shooting Modifiers Summary Matrix
| Tactical Condition | To-Hit Modifier | Save Modifier | Reference Rule |
|---|---|---|---|
| Firer is Disordered | -1 To-Hit | — | |
| Firer Targeting Enfiladed / Flank Arc | +1 To-Hit | Denies Fence Save | |
| Firing Through / Out of Smoke (>6") | -1 To-Hit | — | |
| Firing Through Friendly Skirmish Screen | -1 To-Hit | — | |
| Target in Light Cover (Woods, Fences, Crops) | — | Saves on 5+ | |
| Target in Heavy Cover (Stone Walls, Earthworks) | — | Saves on 4+ | |
| Target in Road Column Formation | — | -2 to Saves | |
| Concentrated Artillery Battery Barrage | — | -1 to Saves | |
| Target in Skirmish Order (Dispersed) | — | Saves on 5+ |
9.0 Designer Notes & Historical Commentary
The Lethality of Civil War Musketry & The "Smoke Blind"
Popular Civil War history often overstates the lethality of the rifled musket, imagining infantry lines dropping entire brigades at 400 yards. In actual battle, combat studies from Antietam, Gettysburg, and Chickamauga show that the vast majority of decisive firefights took place at 50-120 yards (2.0"–5.0" tabletop scale).
Why? Because after the first two regimental volleys, the battlefield became an impenetrable wall of dense, blinding black powder smoke. Officers could not see targets 100 yards away; soldiers aimed low into the sulfur clouds, firing at muzzle flashes and red battle flags. Barrels fouled with heavy lead and carbon residue, making reloading progressively harder.
The Gunsmoke Obscuration Rule elegantly recreates this historical reality without bogging the game down in chart calculations: 1. It creates a natural firepower degradation: standing in one place and firing turn after turn degrades your accuracy (-1 to-hit beyond 6"). 2. It encourages aggressive tactical movement: to deliver a truly devastating volley, an attacking commander must advance through the smoke bank to reach Short Range (0–6"), where the smoke penalty disappears and Smoothbore Buck & Ball hits on a deadly 3+. 3. It gives meaning to Artillery Positioning: placing rifled batteries on elevated ridges allows them to see over the smoke banks of the valley, providing accurate plunging fire when infantry lines are blinded below.
Assaults & Shock
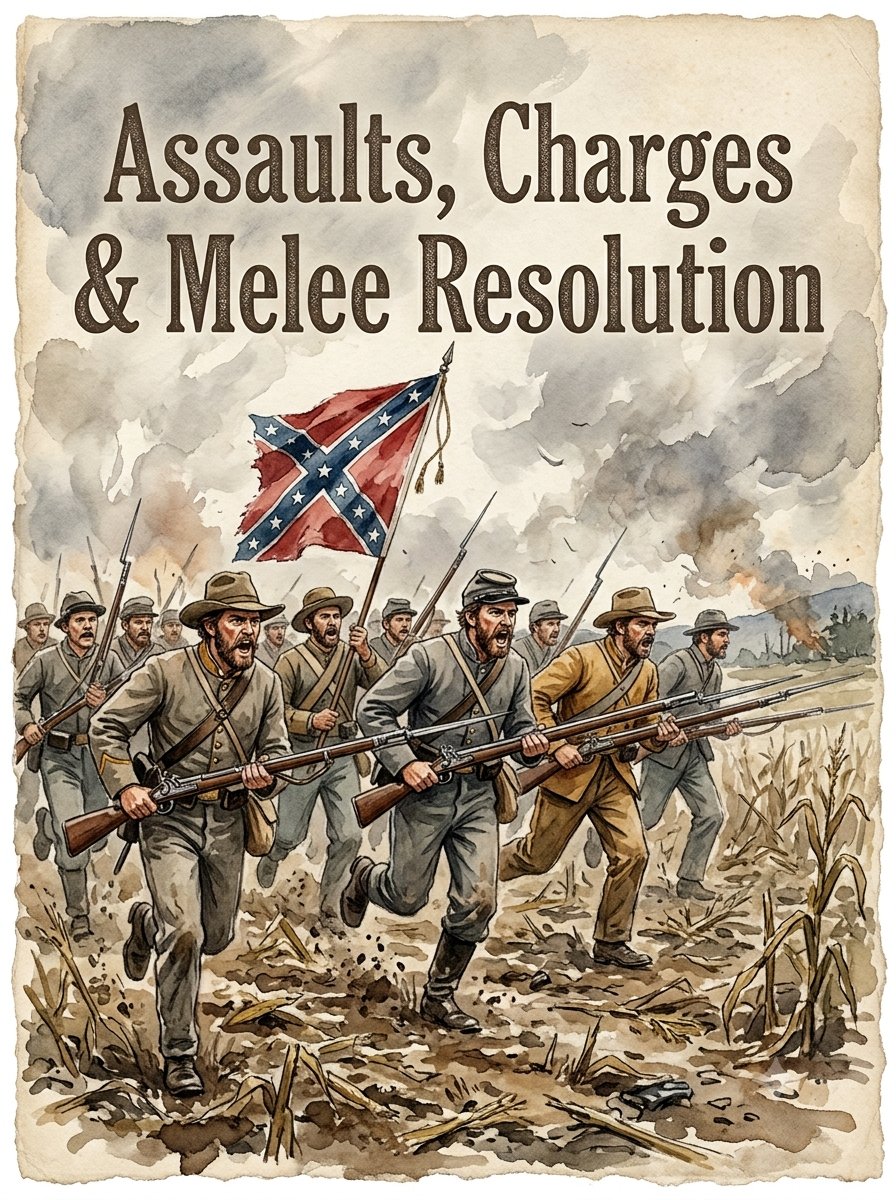
06. ASSAULTS, CHARGES, OPPOSING SHOCK & MELEE RESOLUTION
"Up, men, and to your posts! Don't forget today that you are from old Virginia." — Major General George Pickett, 1863
1.0 Assault Initiation & Charge Declarations
- [RULE-06-1.1] The Decisive Shock Phase: While ranged combat inflicts attritional attrition, close-quarters assaults and bayonet charges represent the decisive shock actions of American Civil War battlefields. Assaults are initiated during Phase 2: Active Maneuver & Assault Phase and resolved in Phase 4: Assault & Melee Resolution Phase .
- [RULE-06-1.2] The Command Requirement (Staff Pip Expenditure):
- Declaring an assault is an extraordinary exertion of command. Every infantry or cavalry regiment declaring an assault must spend 1 Staff Pip from its parent Brigadier’s command pool .
- If a Brigadier has zero available Staff Pips, subordinate regiments cannot declare charges and must remain in stationary firing or standard maneuver postures.
- Regiments belonging to a Hesitant or Broken brigade cannot declare assaults under any circumstances .
-
[RULE-06-1.3] Charge Eligibility Criteria: An infantry or cavalry unit is eligible to declare an assault if it meets all of the following conditions:
-
It is deployed in Line of Battle or Assault Column . Units in Road Column cannot assault.
-
It is not Disordered at the moment of declaration.
-
It is in a Fresh or Worn health state. A unit in a Spent health state (<35% stands remaining) cannot initiate a charge unless led directly by an attached Brigadier .
-
The intended target is within the charging unit's forward 45^\circ arc of vision and within Double-Quick Charge Range (9.0 inches for infantry, 12.0 inches for mounted cavalry).
- The charging unit designates a single enemy target and moves at accelerated Double-Quick speed (9.0") along a straight line toward the target's front or exposed flank.
- No complex wheeling or formation changes are permitted during a charge; the charging unit may make a single initial pivot of up to 30^\circ at the start of its move to align its center with the target.
- [RULE-06-1.5] Terrain Restrictions on Assaults:
- Streams & Creeks: Crossing a minor stream (e.g., Heron’s Run) immediately halts a charge; the charging unit must stop in the waterbed Disordered . Charges may only cross waterways via stone bridges or marked shallow fords.
- Dense Woods & Scrub: Reduces maximum charge speed to 4.0 inches and imposes an immediate Disorder Marker upon contact .
- Ploughed Fields & Mud: Deducts -2.0 inches from the maximum charge distance.
2.0 The Approach & Reaction Trigger Window B (The 4.0-Inch Line)
When a charging regiment advances to within 4.0 inches of the target unit's front edge, the charging unit's physical movement is temporarily suspended. The game enters Reaction Trigger Window B .
-
Point-Blank Charges (Starting Within 4.0"): If a unit declares an Assault from a starting position that is already within 4.0 inches of the enemy, the Reaction Window triggers immediately before the charging unit moves. The defender resolves their reaction, and if the attacker survives, they complete the remaining physical distance. Note that an attacker must travel a minimum of 3.0" into contact to claim the "+1 Charging Momentum" modifier in the ensuing melee.
-
[RULE-06-2.2] Order of Defensive Reactions: The defending player assesses their tactical options and declares one of three reactive choices:
-
Reaction 1: Closing Defensive Volley : The defender delivers a point-blank volley at the closing attackers (Free).
-
Reaction 4: Refuse the Flank : If the charge targets an exposed flank, the defender may spend 1 Reserved Pip (or pass a 4+ check) to wheel outer stands 45^\circ to meet the charge frontally.
-
Reaction 5: Counter-Charge : Eligible defending units (Rebel Yell units, Veterans, or Cavalry) spend 1 Reserved Pip to surge 2.0"–3.0" forward to clash in open ground.
- If the defender chooses to fire a Closing Volley, roll 1D6 per defending stand (or 2D6 per artillery section) using Short Range (0–6") target numbers :
- Smoothbore Musket (Buck & Ball): Hits on 3+.
- Rifled Musket: Hits on 4+.
- 12-pdr Napoleon Canister: Hits on 2+ (Triggers Shock Save on target).
- 3-inch / 10-pdr Rifle Canister: Hits on 3+.
- Apply cover saves (if charging through light scrub); remove casualty stands (2 hits = 1 stand loss). Any natural 6 rolled by the defender inflicts an immediate Disorder Marker on the charging unit .
- [RULE-06-2.4] The Pre-Contact Discipline Check:
- Trigger: If the Closing Volley inflicts 1 or more physical stand losses OR places a Disorder Marker on the charging unit, the attackers' momentum is severely disrupted.
- The charging unit must immediately roll a Discipline Check on 1D6:
- Veteran / Elite Quality: Passes on 3+.
- Regular Quality: Passes on 4+.
- Green / Conscript Quality: Passes on 5+.
- [RULE-06-2.5] Consequences of the Discipline Check:
- Pass: The charging regiment closes ranks over fallen comrades, steadies its battle flags, and surges across the remaining 4.0" into physical base-to-base contact. Proceed to Phase 4 Melee.
- Fail: The charge stalls completely. The charging unit immediately halts 2.0 inches away from the defender, receives a Disorder Marker (if not already disordered), and cannot move or attack further this turn.
3.0 Physical Contact & The Opposed Melee Roll (Phase 4)
- [RULE-06-3.1] Base Alignment & Contact Geometry:
- When a charging unit successfully reaches the defender, place the front bases of the attacker in flush, physical contact with the defender’s front or flank bases.
- Frontal Alignment: If the charge hits the front edge, the attacker aligns front-edge to front-edge.
- Flank Alignment: If the charge hits the flank, the attacker's front edge contacts the target's side stands at a 90^\circ angle.
- [RULE-06-3.2] The Opposed Melee Formula:
Melee in this ruleset is not a prolonged, attrition-heavy slugfest; it is resolved in a single, decisive opposed roll during Phase 4: Assault & Melee Resolution Phase :
\mathbf{Shock Score} = 1D6 + Engaged Stands + Tactical Modifiers
- Both players roll a single 1D6 simultaneously, add the number of stands directly engaged, and apply all relevant tactical modifiers from the Master Shock Table below.
Master Tactical Shock Modifiers Catalog
| Tactical Condition | Modifier Value | Applicable Side | Reference Rule |
|---|---|---|---|
| Fresh Unit Health (>75% starting stands remaining) | +1 | Attacker or Defender | |
| Spent Unit Health (<35% starting stands remaining) | -1 | Attacker or Defender | |
| Charging Momentum (Moved >= 3.0" across open ground) | +1 | Attacker Only | |
| Assault Column Formation | +1 | Attacker Only | |
| Confederate Rebel Yell Trait | +1 | Attacker (or Counter-Charge) | |
| Mounted Cavalry Shock (Charging infantry in open) | +1 | Cavalry Attacker Only | |
| Defending Heavy Earthworks / Stone Wall / Sunken Road | +2 | Defender Only | |
| Defending Light Cover / Split-Rail Fence / Crestline | +1 | Defender Only | |
| Target Enfiladed / Flank or Rear Attack | +2 | Attacker Only | |
| Unit is Disordered | -2 | Attacker or Defender | |
| Brigadier General Attached Directly to Stand | +1 | Attacker or Defender |
- [RULE-06-3.4] Engaged Stand Count Calculation:
- Frontal Clashes: Count all stands in the front rank that are in direct physical base-to-base contact, plus up to 1 unengaged flanking stand on each outer wing that can provide overlapping support.
- Assault Columns: An Assault Column formed 2 stands wide counts its 2 front stands plus the 2 supporting stands immediately in the second rank (4 stands total).
- Flank Attacks: Only the defending stands directly contacted by the attacker's frontage contribute to the defender's stand count; unengaged stands facing perpendicular cannot contribute their strength.
4.0 Melee Resolution, Casualties & Aftermath
-
[RULE-06-4.1] Determining the Victor: Compare the final modified Shock Scores of both players:
-
Higher Score: Declared the Victor.
- Lower Score: Declared the Defeated.
-
Equal Scores (Tie): The combat is a bloody deadlock .
-
[RULE-06-4.2] The Margin of Defeat (Scaling Casualties): To determine the severity of the rout, subtract the Defeated unit's Shock Score from the Victor's Shock Score. This number is the Margin of Defeat. The defeated unit suffers scaling casualties and rout distances based on this margin:
-
Tie (Margin 0 - Bloody Draw): Both sides take 1 Unsaved Hit (Half a stand) and remain locked in vicious hand-to-hand combat. Neither unit retreats; both receive a Disorder Marker. Melee will be re-rolled during the next game turn's Melee Phase.
- Repulse (Margin 1 to 2): A grinding, close-fought pushback. The loser takes 1 Unsaved Hit, receives a Disorder Marker, and falls back 3.0 inches.
- Bloody Rout (Margin 3 to 4): The line breaks under pressure. The loser takes 1 Full Stand Loss (2 Hits), receives a Disorder Marker, and falls back 6.0 inches.
-
Catastrophic Overrun (Margin 5+): The sheer weight of numbers crushes the defenders. The loser takes 2 Full Stand Losses (4 Hits), receives a Disorder Marker, and routes 9.0 inches. (Note: A regiment reduced to 1 stand is instantly Shattered and removed from the game).
-
[RULE-06-4.3] The Double Disorder Clause: If the defeated unit was already Disordered prior to rolling the Opposed Melee Roll, it resolves its Margin of Defeat penalties as normal, but instead of gaining a second Disorder marker, it triggers the [RULE-07-3.4] Double Disorder Rule and immediately takes an additional 1 Micro-Hit instead of a second Disorder marker.
-
[RULE-06-4.4] Consequences for the Victor (Consolidation & Reform):
- The victor sustains zero mandatory casualties from the melee roll and successfully holds the contested position.
- Free Consolidation Move: The victor may immediately execute a free 2.0-inch Consolidation Move:
- Advance 2.0" to occupy the vacated enemy earthworks, stone wall, or ridge.
- Pivot up to 45^\circ to face an exposed flank threat.
- Dress ranks and re-form a neat battle line.
- [RULE-06-4.5] Breakthrough & Sweeping Advances:
- Trigger: If a Fresh Attacker wins an assault with a margin of victory of +4 points or greater, and the defending unit was completely Routed/Destroyed, the attacker has achieved a Tactical Breakthrough.
- The Sweeping Advance: The victorious regiment may spend 1 additional Staff Pip from its Brigadier to execute an immediate 4.0-inch Sweeping Advance in a straight line forward. If this advance contacts a second enemy unit or artillery battery, resolve a second melee immediately with the defender counting as Disordered.
5.0 Assaulting Artillery Batteries & Heavy Fortifications
- [RULE-06-5.1] Overrunning Artillery Batteries:
- When an infantry or cavalry assault successfully closes into base-to-base contact with an unlimbered artillery battery, the artillery gunners fight hand-to-hand with rammers and sidearms.
- Artillery Melee Profile: An artillery battery section rolls 1D6 and adds +1 stand to its shock score. It receives no weapon bonuses in hand-to-hand combat.
- Battery Overrun & Capture: If the artillery battery is defeated in melee, the battery is Overrun and Captured. All gun models and crew are permanently removed from play. The victorious infantry unit occupies the gun positions.
- [RULE-06-5.2] Storming Heavy Earthworks, Stone Walls & Sunken Roads:
- Assaulting troops attempting to storm heavy stone walls , sunken roads , or engineered breastworks must overcome significant defensive advantages:
- Defenders gain +2 to their Opposed Melee Roll.
- Attackers lose all Charging Momentum (+1) bonuses upon contacting the obstacle.
- Repulse from the Works: If the attacker fails to beat the defender's score, the attacker is repulsed, takes 1 stand loss, and retreats 6.0" Disordered into the open field.
6.0 Master Melee Modifiers Reference Matrix
| Modifier Name | Point Value | Applied To | Mandatory Condition | Reference |
|---|---|---|---|---|
| Fresh Unit | +1 | Either | >75% original stands remaining in unit | |
| Spent Unit | -1 | Either | <35% original stands remaining in unit | |
| Charging Momentum | +1 | Attacker | Advanced >= 3.0" across open ground | |
| Assault Column | +1 | Attacker | Formed 2 stands wide x 2+ deep | |
| Rebel Yell | +1 | Confederate | Unit possesses Rebel Yell trait | |
| Cavalry Shock | +1 | Cavalry | Mounted charge against infantry in open | |
| Heavy Fortifications | +2 | Defender | Touching Stone Wall, Sunken Road, Works | |
| Light Obstacle | +1 | Defender | Touching Split-Rail Fence or on Crestline | |
| Flank / Rear Contact | +2 | Attacker | Contacted behind target's 90^\circ flank line | |
| Disordered State | -2 | Either | Unit possesses a Disorder Marker | |
| Attached Brigadier | +1 | Either | Brigadier attached to Color Stand |
Step 1: Charge Declaration & Approach
- Brigadier Garnett spends 1 Staff Pip to order the 4th Virginia (5 stands, Veteran, Fresh) to assault the 2nd Wisconsin (5 stands, Veteran, Fresh) across an open field (7.0" distance).
- The 4th Virginia advances at Double-Quick speed. Movement pauses at the 4.0-inch line for Reaction Window B.
Step 2: Closing Volley & Discipline Check
- The 2nd Wisconsin delivers a Closing Volley: 5 stands = 5D6 (Rifled Muskets hit on 4+ at Short Range).
- Rolls:
[2, 4, 1, 6, 5]. Results: 3 hits scored (including one natural 6). - Casualties: 3 hits on open troops = 1 stand removed from the 4th Virginia (reduced to 4 stands, 1 micro-hit carried over). The natural 6 inflicts a Disorder Marker.
- Discipline Check : Sufferings losses and Disorder, the 4th Virginia rolls 1D6 for its Veteran Discipline Check (3+). Roll is a
5—Passed! The Virginians steady their ranks and close into physical base contact.
Step 3: Opposed Melee Roll
Both players roll 1D6 simultaneously and calculate their final Shock Scores:
\mathbf{4th Virginia (Attacker):} \quad 1D6 Roll: 5
Score = 5 (Die) + 4 (Stands) + 1 (Fresh) + 1 (Momentum) + 1 (Rebel Yell) + 1 (Brigadier) - 2 (Disorder) = \mathbf{11}
\mathbf{2nd Wisconsin (Defender):} \quad 1D6 Roll: 3
Score = 3 (Die) + 5 (Stands) + 1 (Fresh) = \mathbf{9}
Step 4: Melee Aftermath
- Victor: 4th Virginia wins (11 to 9). The Virginians hold the ground and consolidate 2.0" forward.
- Defeated: 2nd Wisconsin loses 1 stand (reduced to 4 stands), receives a Disorder Marker, and retreats 6.0 inches to the rear.
- Leader Check : Because the 4th Virginia took a stand loss during the charge with an attached Brigadier, Garnett rolls on the Leader Loss table: rolls a
4—Unhurt!
Step 1: Charge Declaration & Closing Volley
- The 14th Brooklyn (6 stands in Assault Column) spends 1 Staff Pip to assault the 7th North Carolina deployed behind a heavy stone wall.
- At 4.0", the North Carolinians deliver a Closing Volley (4D6, Rifled Muskets hit on 4+).
- Rolls:
[1, 3, 5, 2]. Result: 1 hit scored. - The 14th Brooklyn takes 1 hit (tracked on micro-dice; no stand lost, no natural 6). No discipline check is required; the Brooklyn assault column hits the stone wall!
Step 2: Opposed Melee Roll
- 14th Brooklyn (Attacker):
- Stands Engaged: 4 stands (2 front rank + 2 second rank column support).
- Roll:
4. - Modifiers: +1 (Fresh), +1 (Assault Column). (Note: Charging momentum is lost against the heavy stone wall, ).
- Attacker Total Score: 4 + 4 + 1 + 1 = \mathbf{10}.
- 7th North Carolina (Defender):
- Stands Engaged: 4 stands.
- Roll:
4. - Modifiers: +1 (Fresh), +2 (Defending Stone Wall, ).
- Defender Total Score: 4 + 4 + 1 + 2 = \mathbf{11}.
Step 3: Melee Aftermath
- Victor: 7th North Carolina holds the stone wall (11 to 10).
- Defeated: 14th Brooklyn is repulsed from the wall. It loses 1 physical stand (reduced to 5 stands), receives a Disorder Marker, and retreats 6.0 inches back into the open meadow.
8.0 Designer Notes & Historical Commentary
The Psychology of the Civil War Bayonet Charge
Medical statistics from the American Civil War reveal a striking fact: fewer than 1% of all battlefield wounds were caused by bayonets or sabers.
Historical studies by military historians (such as Brent Nosworthy and Paddy Griffith) demonstrated that Civil War charges were almost never physical "fencing matches." Instead, an assault was a contest of moral cohesion and psychological shock: 1. The attackers advanced under heavy fire, screaming (the Rebel Yell) to bolster their courage and terrify the defenders. 2. The defenders waited until the chargers were within 30 to 50 yards (1.0"–2.0" ground scale) to unleash a point-blank closing volley. 3. If the volley shattered the attackers' alignment, the charge stalled and melted away in disorder. But if the attackers absorbed the fire and kept coming with bayonets leveled, the defenders almost invariably broke and ran before physical contact occurred.
The mechanics in this chapter directly replicate this historical dynamic: * The Closing Defensive Volley at 4.0 Inches determines whether the attackers have the discipline to press home the assault. * The Single Opposed Melee Roll models the immediate moral climax: one side holds its ground with a cheer, while the other shatters, drops a casualty stand, and flees 6.0" to the rear in disorder. * By eliminating multi-round, grinding melee rounds, the game stays fast, decisive, and historically authentic.
Morale & Leaders
07. MORALE, BRIGADE FALTERING, LEADERS & ARMY TRAITS
"It is well that war is so terrible, or we should grow too fond of it." — General Robert E. Lee, 1862
"I have never seen a man who was not afraid in battle." — Private Elisha Hunt Rhodes, 1862
1.0 Regimental Health & Morale States
- [RULE-07-1.1] Dynamic Degradation: Rather than using separate bookkeeping rosters or arbitrary hit-point pools, a regiment's combat effectiveness, shock resilience, and tactical discipline are governed directly by its Remaining Stand Percentage.
- [RULE-07-1.2] Regimental Health Profiles: Every regiment occupies one of three distinct health states based on its current stand count relative to its starting strength:
| Health State | Threshold | Melee/Shock Modifier | Tactical Capabilities | Resilience/Notes |
|---|---|---|---|---|
| 1. FRESH STATE | >75% of Starting Stands Remaining | +1 | Full operational speed; may Charge/Assault | High stamina; unaffected by light losses |
| 2. WORN STATE | 35% to 75% of Starting Stands Remaining | +0 | Standard movement and firing capabilities | Combat fatigue sets in; ranks thinning |
| 3. SPENT STATE | <35% of Starting Stands Remaining / 2 Stands Left | -1 | Cannot declare Assaults unless led by GM | Must make 1D6 Discipline Check if fired on |
| 4. SHATTERED | 1 Stand Remaining | N/A | Instantly collapses; removed from play | Final stand loss counts to Faltering Clock |
| Starting Unit Size | Fresh State (+1 Melee) | Worn State (+0 Melee) | Spent State (-1 Melee) | Shattered (Removed) |
|---|---|---|---|---|
| 8 Stands (Large) | 8 to 7 Stands | 6 to 3 Stands | 2 Stands | 1 Stand Remaining |
| 6 Stands (Standard) | 6 to 5 Stands | 4 to 3 Stands | 2 Stands | 1 Stand Remaining |
| 5 Stands (Standard) | 5 to 4 Stands | 3 Stands | 2 Stands | 1 Stand Remaining |
| 4 Stands (Small) | 4 Stands | 3 Stands | 2 Stands | 1 Stand Remaining |
| 3 Stands (Depleted) | 3 Stands | — | 2 Stands | 1 Stand Remaining |
Whenever a unit is subjected to a morale crisis (e.g., suffering casualties from a closing volley , executing passage of lines , or taking fire while in a Spent state), it must roll a Discipline Check on 1D6:
- Veteran / Elite Quality: Passes on 3+ (Roll of 3, 4, 5, or 6).
- Regular Quality: Passes on 4+ (Roll of 4, 5, or 6).
- Green / Conscript Quality: Passes on 5+ (Roll of 5 or 6).
- [RULE-07-1.5] Consequences of Failed Discipline Checks:
- If the unit was charging, the assault stalls 2.0" away and the unit receives a Disorder Marker .
- If the unit was stationary or in a firefight, it immediately falls back 3.0 inches directly away from the enemy and receives a Disorder Marker. If already Disordered, it falls back 3.0 inches and takes 1 Micro-Hit per the Double Disorder rule.
2.0 The Brigade Faltering Clock (The Brigade Morale Engine)
| Status | Threshold | Effects |
|---|---|---|
| Fresh Brigade | 0–29% Stands Lost | Full Operations, Full Staff Pip Menu, Standard Shooting |
| Hesitant Brigade | 30–49% Stands Lost | Cannot Charge/Assault, Cannot Double-Time, -1 to All Shooting, -1 to Discipline Checks |
| Broken Brigade | 50%+ Stands Lost | Complete Collapse, Mandatory Retreat to Edge, Victory Points Awarded |
- [RULE-07-2.1] The Brigade Collapse Doctrine: In the American Civil War, entire brigades rarely fought until every single regiment was wiped out. Instead, cumulative casualties, loss of field officers, and ammunition depletion triggered a collective moral exhaustion. This is governed by the Brigade Faltering Clock.
- [RULE-07-2.2] Tracking Brigade Casualties:
- Every brigade has a baseline Total Stand Count calculated during scenario setup (the sum of all infantry stands across all constituent regiments).
- Whenever a physical stand is removed from any regiment in the brigade due to shooting or melee, advance the casualty tally die placed on the Brigadier’s base by +1.
- [RULE-07-2.3] Threshold 1: The Hesitant State (~ 30% Total Stand Losses):
- When cumulative stand losses reach or exceed 30% of the brigade's starting strength, the brigade immediately becomes Hesitant. Place a Hesitant Marker on the Brigadier General’s base.
-
Tactical Penalties for Hesitant Brigades:
-
Assault Prohibition: Regiments in the brigade cannot declare Assaults/Charges .
-
Speed Restriction: Units cannot use the Double-Time order .
- Degraded Firepower: All regiments and attached batteries suffer a -1 to-hit penalty on all Phase 3 shooting rolls.
-
Shaken Morale: All subordinate units suffer a -1 penalty to all Discipline Checks.
-
[RULE-07-2.4] Threshold 2: The Broken / Whipped State (~ 50% Total Stand Losses):
- When cumulative stand losses reach or exceed 50% of the brigade's starting strength, the brigade is officially Whipped / Broken.
- Immediate Collapse Protocol:
- The brigade immediately forfeits all remaining Staff Pips.
- All subordinate regiments and batteries receive a Disorder Marker.
- Every unit in the brigade must spend its entire movement phase on all subsequent turns executing full retrograde moves (6.0" per turn) toward the friendly table edge.
- Broken units cannot shoot, cannot rally, and cannot initiate melee. If charged by an active enemy unit, a Broken regiment automatically Routs and is removed from the table.
Master Brigade Morale Threshold Table
| Brigade Total Starting Stands | Typical Composition | Hesitant Threshold (30% Losses) | Broken Threshold (50% Losses) |
|---|---|---|---|
| 16 Stands | 4 Small Regiments (4 stands each) | 5 Stands Lost | 8 Stands Lost |
| 20 Stands | 4 Standard Regiments (5 stands each) | 6 Stands Lost | 10 Stands Lost |
| 24 Stands | 4 Large or 5 Standard Regiments | 7 Stands Lost | 12 Stands Lost |
| 28 Stands | 5 Large Regiments | 8 Stands Lost | 14 Stands Lost |
| 32 Stands | Reinforced Division Wing (6–7 Regts) | 10 Stands Lost | 16 Stands Lost |
3.0 Rallying, Re-forming & Regimental Recovery
- [RULE-07-3.1] The Disorder Marker & Tactical Penalties: Disorder represents disrupted battle lines, smoke blindness, ducking under heavy fire, and temporary command confusion. When a regiment becomes Disordered, its rigid formation breaks down into a chaotic mob.
- Tactical Penalties: Because officers have lost control in the smoke, a Disordered unit cannot execute an Advance, Double-Time, or Assault order. It may only Hold Position, fire at reduced effectiveness, Fall Back, or wait to Rally. Removing Disorder is essential for restoring a unit's offensive fighting power.
- [RULE-07-3.2] Rallying via Staff Pips (Command Rally):
- During Phase 1: Staff & Command Phase or Phase 5: Status & Clean-up, a player may spend unspent Staff Pips from the parent Brigadier .
- Cost & Effect: Spending 1 Staff Pip immediately removes 1 Disorder Marker from any regiment within the 12.0" Command Radius (Bugle or Courier range). A Brigadier may also rally a unit that is Out of Command (>12.0") by spending 2 Staff Pips. No dice roll is required. Staff officers and couriers are assumed to physically ride to the line to dress ranks and restore order.
- [RULE-07-3.3] Natural Regimental Rally (Phase 5):
- During Phase 5: Clean-up , any Disordered regiment that did not receive a Staff Pip rally may attempt a Natural Rally Check, provided it meets the following conditions:
- It is not in physical base contact with an enemy unit.
- It did not move, declare an assault, or fire musketry during the current turn.
-
It did not sustain casualties from enemy shooting during the current turn.
-
The Check: Roll 1D6 against Troop Quality:
- Veteran / Elite: Rallies on 3+.
- Regular: Rallies on 4+.
- Green / Conscript: Rallies on 5+.
-
Result: If passed, remove the Disorder Marker. If failed, the unit remains Disordered.
- A unit may never possess more than one Disorder Marker at any given time.
- If a unit is already Disordered and an event (such as failing a terrain friction check, failing a discipline check, or losing a melee) dictates that it receives a second Disorder Marker, the unit instead immediately suffers 1 Micro-Hit. This Micro-Hit carries over and contributes to future stand losses.
-
This mechanic simulates the attritional exhaustion of a unit being constantly pushed beyond its breaking point, without instantly erasing it from the battlefield.
- If an unengaged, stationary regiment spends two consecutive full game turns out of enemy line of sight and beyond 12.0" of the nearest hostile unit without firing or moving, it may remove its micro-damage hit counter, effectively absorbing minor stragglers back into the formation. (Physical stands removed are never recovered during a single battle).
4.0 Leaders, Headquarters & Officer Casualties
- [RULE-07-4.1] Leadership Command Functions:
- Brigade Commander (Brigadier): Commands 3-6 regiments plus attached artillery. Generates 1-4 Staff Pips each turn and maintains a 12.0" Command Radius .
- Division / Corps Commander: Operates on a 1.5" x 1.5" base. Has an 18.0-inch Command Radius. Once per turn, a Division Commander may grant +1 Bonus Staff Pip to any subordinate Brigadier within radius.
- [RULE-07-4.2] Attaching Leaders to Regiments:
- A Brigadier may physically attach to an infantry or cavalry regiment by moving into base contact with its center Color Stand .
- Combat Benefits:
- Grants +1 to the Opposed Melee Roll in assault/defense .
- Grants +1 to all Discipline Checks rolled by that regiment.
- Allows a unit in a Spent health state to declare assaults .
-
[RULE-07-4.3] The Leader Casualty Risk Trigger: Whenever a Brigadier is physically attached to a regiment that:
-
Sustains 1 or more physical stand losses from ranged fire or melee; OR
- Is targeted by ranged fire where the attacker rolls a natural 6 to-hit;
The owning player must immediately roll a Leader Casualty Check on 1D6.
Master Leader Casualty Table
| 1D6 Roll | Casualty Result | Tactical & Command Consequences |
|---|---|---|
| 1 – 3 | Unhurt / Close Call | Bullet passes through uniform or strikes horse. No effect; commander continues leading. |
| 4 | Lightly Wounded | General is hit but refuses to leave the field. Generates -1 Staff Pip on all subsequent turns. |
| 5 | Severely Wounded / Captured | General falls from saddle and is carried off. Stand is removed from play. The senior Colonel takes command: on the next turn, generate pips using the Timid / Political formula (1D3 / 2) . |
| 6 | Killed in Action (KIA) | General is killed instantly. The attached regiment immediately receives an automatic Disorder Marker. The brigade loses all remaining Staff Pips for the current turn. On the next turn, a replacement Colonel assumes command with a permanent Timid profile. |
- [RULE-07-4.5] Targeting Solitary Command Stands: A solitary Brigadier stand cannot be targeted by direct small arms fire or artillery unless it is the closest visible enemy unit within 6.0" of the shooter. If caught in open ground by an enemy charge without an attached friendly regiment, the command stand must immediately execute a 6.0" evasion move or be captured.
Step-by-Step Scenario Analysis
-
The Casualties Accumulate: Across Turns 2 and 3, the 2nd Brigade (Army of the Potomac) sustains heavy Confederate artillery fire and repulses an assault. The brigade loses:
-
143rd Pennsylvania: 2 stands lost.
- 149th Pennsylvania: 2 stands lost.
- 150th Pennsylvania: 1 stand lost.
-
121st Pennsylvania: 1 stand lost.
-
Phase 1: Morale & Status Assessment :
-
Total Starting Stands: 20 stands.
- Cumulative Stands Lost: 6 stands (30% attrition).
- The Faltering Threshold Triggered: Brigadier Potts reaches the 6-stand loss limit. He places a Hesitant Marker on his command base.
-
Tactical Consequences for the Brigade:
-
On Turn 4, Brigadier Potts rolls 2 Staff Pips. He wants to order the 150th Pennsylvania to counter-attack an exposed Confederate battery.
- Order Denied: Because the brigade is Hesitant, it cannot declare Assaults/Charges . The 150th PA cannot charge.
- The brigade attempts to fire musketry in Phase 3. All regiments suffer a -1 to-hit penalty on their shooting dice due to thinning ranks and demoralization.
- The Danger of Total Collapse:
If the brigade loses 4 more stands (reaching 10 stands lost / 50%), the entire brigade will become Broken and must begin a mandatory retreat off the battlefield.
Step-by-Step Resolution Walkthrough
-
The Desperate Charge ( / ):
-
The 33rd Virginia is reduced to 2 stands (Spent health state, -1 to melee). Normally, a Spent unit is forbidden from declaring an assault.
-
However, Brigadier Garnett personally attaches to the regiment's Color Stand. His presence authorizes the spent regiment to declare a charge. Garnett spends 1 Staff Pip.
-
The Approach & Canister Blast :
-
At the 4.0" mark, the Union battery delivers a Closing Canister Volley (2D6, hitting on 2+).
- The Union player rolls:
[2, 6]. Result: 2 hits scored (including one natural 6). -
The 33rd Virginia is in the open (no save). 2 hits = 1 stand removed! The regiment is down to its final stand (Color Stand). The natural 6 inflicts a Disorder Marker.
-
The Leader Casualty Check :
-
Because the attached regiment suffered a stand loss and a natural 6, Brigadier Garnett must immediately roll on the Leader Casualty Table .
-
The Confederate player rolls 1D6: Roll is a
5— Severely Wounded! -
Command Aftermath :
-
General Garnett is shot from his horse and carried off the field; his stand is removed from play.
- Without the general present, the 33rd Virginia is reduced to 1 stand remaining . The regiment immediately shatters, collapses, and its final stand is removed from the table.
- The brigade loses 2 stands total toward its Faltering Clock, and on the next turn, a replacement Colonel assumes command with a Timid rating.
6.0 Designer Notes & Historical Commentary
The Anatomy of Brigade Morale & Command Risk
In 19th-century linear combat, the breaking point of an army was almost never determined by physical extermination. Civil War soldiers were volunteers with strong community ties; regiments from the same county or state stood side by side in the brigade line.
When a brigade took 30% casualties, the psychological weight was catastrophic: company captains were dead, color guards had been shot down multiple times, cartridge boxes were empty, and the wounded crying for water filled the rear lines. At this stage, a brigade became Hesitant—it could still defend a fence line with sullen obstinacy, but it could no longer summon the offensive momentum to charge across an open field.
At 50% casualties, the brigade ceased to exist as an organized combat formation. The line disintegrated into clusters of retreating men seeking the safety of the division reserve.
The Brigade Faltering Clock captures this historical dynamic with complete mechanical elegance: * Zero Table Clutter: One D6 on the Brigadier's base tracks the fate of 4-5 regiments. * Collective Responsibility: A player cannot sacrifice two "throwaway" regiments on a hopeless assault without dooming their entire brigade to a Hesitant state. * The Heroic Dilemma: Attaching your Brigadier to an assault gives you the crucial +1 Melee bonus and rallies spent units, but as happened to Albert Sidney Johnston at Shiloh and John Reynolds at Gettysburg, leading from the front carries a high risk of being carried off the field in a blanket.
Cavalry & Special Rules
08. CAVALRY OPERATIONS, DISMOUNTED TACTICS, WEAPONS & HORSE ARTILLERY
"Whoever saw a dead cavalryman?" — Major General Joseph Hooker, 1863
"You will have to fight like the devil to hold your own until supports arrive." — Brigadier General John Buford, 1863
1.0 Mounted Operations, Formations & Movement
- [RULE-08-1.1] Regimental Scale & Basing:
- Cavalry regiments field 3-5 stands (representing 200–400 mounted troopers).
- Mounted stands are based on 1.0" x 1.0" to 1.25" (25mm x 25–30mm) bases, fielding 2 mounted figures per stand in a single rank .
- [RULE-08-1.2] Mounted Formations:
- Mounted Line of Battle: Stands deployed side-by-side in single rank. Maximum mounted speed; full saber/revolver shock profile.
- Mounted Column of Route: 1 stand wide, multiple ranks deep. Rapid road transit (14.0" on roads); highly vulnerable if charged (-2 save penalty).
-
Mounted Skirmish Screen: Dispersed stands with 1.0" intervals between bases; used for scouting and screening friendly flanks.
| Movement Type / Surface | Mounted Line | Mounted Column | Dismounted Skirmish Line | Horse Holders |
|---|---|---|---|---|
| Open Ground / Pasture | 9.0" | 10.0" | 5.0" | 4.0" |
| Roads & Hard Trails | 10.0" | 14.0" | 6.0" | 8.0" |
| Woods / Rough Ground | 5.0" | 6.0" | 4.0" | 2.0" |
| Charge / Assault Speed | 12.0" | Prohibited | Prohibited | Prohibited |
- [RULE-08-1.4] Mounted Shock vs. Formed Infantry:
- Against Steady Formed Lines: Charging a formed, undisordered infantry line in good order is high risk. The infantry defender delivers a **Closing Defensive Volley ** with smoothbores or rifled muskets hitting on 3+ or 4+.
- Against Disordered or Column Formations: If mounted cavalry charges infantry that is Disordered, marching in Road Column, or retreating, the cavalry receives +1 Cavalry Shock and the infantry defender suffers a -2 Melee penalty .
- [RULE-08-1.5] Cavalry vs. Cavalry Clashes:
- When two mounted cavalry units clash in melee, both sides apply their stand count plus 1D6.
- The unit possessing Charging Momentum gains +1 Shock.
- The defeated cavalry unit loses 1 stand and is driven back 9.0 inches Disordered.
2.0 Dismounted Tactics
- [RULE-08-2.1] Dismounting: A cavalry regiment may spend half of its movement allowance to dismount. The unit is then treated exactly as a standard Infantry Skirmish Screen for the purposes of movement and shooting.
- [RULE-08-2.2] Remounting: A dismounted unit may remount by spending a full action phase to gather their horses and mount up.
3.0 Cavalry Weaponry & Carbine Mechanics
- [RULE-08-3.1] Master Cavalry Weapon Profiles: Cavalry armaments varied from muzzleloading smoothbores and revolvers to repeating carbines:
| Cavalry Firearm Type | Short Range (0–6") | Medium Range (6–14") | Long Range (14–18") | Firepower Trait & Tactical Profile |
|---|---|---|---|---|
| Breechloading Carbine (Sharps / Burnside / Smith) | 4+ | 4+ | 5+ | Rapid Reload: Roll +1 Bonus Die per 2 firing stands in the regiment. |
| Repeating Carbine / Rifle (Spencer 7-Shot / Henry) | 3+ | 4+ | 5+ | Devastating Volume: Generates +2 Bonus Dice to the regiment's total shooting pool. |
| Muzzleloading Carbine / Rifled Musketoon | 4+ | 5+ | — | Standard cavalry carbine; no rate-of-fire bonuses. |
| Shotguns & Revolver Pairs (Confederate Cavalry) | 3+ | — | — | Deadly Point-Blank: Hits on 3+ at <= 4.0"; +1 to Melee; zero capability beyond 4.0". |
- [RULE-08-3.2] Mounted Shooting Restrictions:
- Mounted cavalry firing carbines or revolvers from the saddle may only shoot at Short Range (0–6"), rolling 1D6 per 2 stands (rounded down).
- Mounted shooting represents firing from the saddle while advancing; it inflicts suppression (Disorder on natural 6s) but rarely inflicts heavy stand losses.
- [RULE-08-3.3] Rapid Fire & Ammunition Depletion:
- Units armed with Spencer Repeaters or Sharps Carbines deliver intense firepower but consume cartridges rapidly.
- If a repeating cavalry unit rolls two or more natural 1s on its Phase 3 shooting dice, place a Low Ammo Marker on the unit .
- While Low on Ammo, repeating units lose their +2 bonus dice and hit on standard 4+/5+ until resupplied.
4.0 Screening, Reconnaissance & Evasion Tactics
- [RULE-08-4.1] The Vanguard & Flank Screen:
- A mounted or dismounted cavalry regiment may deploy as an extended Screen covering a frontage of up to 12.0 inches across a friendly brigade's front or flank.
- Masking Friendly Forces: Enemy units beyond 12.0" cannot draw direct Line of Sight or target friendly infantry deployed behind a cavalry screen.
- [RULE-08-4.2] Cavalry Evasion (Reaction 3 Application):
- When an active formed enemy infantry line advances within 6.0 inches of a cavalry screen, or declares an assault against it, the cavalry may execute Reaction 3: Skirmish & Cavalry Evade .
- Evasion Distance: Mounted cavalry withdraws 6.0 inches; dismounted cavalry withdraws 4.0 inches.
- The evading cavalry can withdraw diagonally or directly through friendly formed lines without inflicting disorder or requiring a passage of lines test.
- [RULE-08-4.3] Delaying Actions (The "Dismount & Fall Back" Tactic):
- Dismounted cavalry defending a ridge, sunken lane, or tree line may fire a defensive volley at advancing enemy columns. When the enemy closes to 4.0", the cavalry may declare an immediate retrograde withdraw (4.0") back to their horse holders, remount, and deploy on the next ridge line.
5.0 Horse Artillery ("Flying Batteries")
| Profile Attribute | Details |
|---|---|
| Ordnance Types | 3-inch Ordnance Rifles or 12-pdr Napoleons |
| Limbered Speed | 10.0" Open Ground / 14.0" on Roads |
| Rapid Action | Limber or Unlimber for HALF MOVE (4.0" Move + Fire) |
| Prolonge Speed | 3.0" by hand in action front |
| Firing Dice | 2D6 per Section (Standard Artillery Matrix) |
- [RULE-08-5.1] Horse Artillery Organization & Mobility:
- In Horse Artillery batteries, every single cannoneer is mounted on an individual horse rather than walking or riding caisson chests.
- Speed: Limbered horse artillery moves at 10.0 inches in open ground and 14.0 inches on roads.
- [RULE-08-5.2] Rapid Deployment (The Half-Move Unlimber):
- Standard foot artillery requires an entire turn's movement allowance to limber or unlimber .
- Horse Artillery Exception: Horse artillery may limber or unlimber by spending only half of its movement allowance (4.0").
- [RULE-08-5.3] The Flying Battery Galloper Tactic:
- Horse artillery may accompany mounted cavalry charges to deliver point-blank canister support.
- If horse artillery unlimbers within 6.0 inches of an enemy unit, its canister volley hits on 2+ (Napoleons) or 3+ (3-inch Rifles) and automatically inflicts a Disorder Marker .
Step 1: Tactical Setup
- The 8th Illinois Cavalry (4 stands mounted starting strength) dismounted on Turn 1:
- 3 stands deployed in Skirmish Order behind a split-rail fence along McPherson’s Ridge.
- 1 Horse Holder stand concealed in a swale 3.0" behind the ridge .
- The 5th Alabama Infantry advances in Assault Column along the Chambersburg Pike at a range of 10.0" (Medium Range).
Step 2: Phase 3 Shooting Resolution
- Dice Pool Formulation: 3 dismounted stands armed with Spencer Repeating Carbines (+2 Bonus Dice).
- Total Dice: 3 (Stands) + 2 (Repeaters) = \mathbf{5D6}.
- At Medium Range (6–14"), Spencers hit on 4+.
- Rolls:
[4, 2, 5, 6, 1]. Result: 3 hits scored (rolls of 4, 5, and 6). - Suppression : The natural 6 inflicts an immediate Disorder Marker on the 5th Alabama.
Step 3: Saves & Casualties
- The 5th Alabama is in Assault Column: suffers -1 to cover saves . In open road ground, it has no save.
- 3 hits = 1 stand removed, with 1 hit carried over on micro-dice.
- The Alabama assault column is Disordered and halted in its tracks on the road.
Step 1: Charge Declaration & Contact
- The 1st Virginia Cavalry spends 1 Staff Pip to declare a mounted charge against the 121st Pennsylvania (10.0" away in open ground).
- The 121st Pennsylvania is currently Disordered from prior artillery shelling.
- No Closing Volley: Because the Pennsylvania infantry is Disordered , it cannot fire a Closing Defensive Volley. The cavalry closes the entire 10.0" into physical base-to-base contact!
Step 2: Opposed Melee Roll
Both players roll 1D6 simultaneously:
\mathbf{1st Virginia Cavalry (Attacker):} \quad 1D6 Roll: 4
Score = 4 (Die) + 4 (Stands) + 1 (Fresh) + 1 (Momentum) + 1 (Cav Shock vs. Open Infantry) = \mathbf{11}
\mathbf{121st Pennsylvania (Defender):} \quad 1D6 Roll: 3
Score = 3 (Die) + 3 (Stands) - 1 (Spent State) - 2 (Disordered) = \mathbf{3}
Step 3: Melee Aftermath & Immediate Rout
- Margin of Victory: 11 to 3 (Margin of +8!).
- The Double Disorder Trigger: The 121st Pennsylvania was already Disordered prior to rolling melee. Under the Double Disorder rule, a defeated unit that is already Disordered takes the standard melee penalty (1 Stand Loss + 6.0" retreat) and takes an additional 1 Micro-Hit.
- The Pennsylvania regiment removes 1 physical stand, tracks 1 Micro-Hit, and retreats 6.0" (still Disordered). The 1st Virginia Cavalry consolidates 2.0" forward, holding the field triumphant.
7.0 Designer Notes & Historical Commentary
The Myth of the Napoleonic Saber Charge in the ACW
Early in the Civil War, romantic notions of European cavalry charges dominated both armies. But the lethal range of rifled muskets quickly proved that massed cavalry charges against formed, steady infantry were suicidal.
Instead, American cavalry evolved into the most modern, versatile arm on the battlefield: mounted infantry and mobile shock dragoons. * Buford at Gettysburg: On July 1, 1863, General John Buford dismounted his two cavalry brigades along McPherson's Ridge. Using single-file horse holders, fence lines, and rapid-firing carbines, Buford's 2,500 troopers held off Henry Heth’s 7,500-man Confederate infantry division for over two critical hours until the Union I Corps arrived. * Stuart and Sheridan: In the East and West, cavalry was used for deep scouting, screening brigade maneuvers, seizing bridges, and striking retreating or disordered enemy lines with devastating momentum.
The rules in this chapter accurately capture this dual nature: 1. Dismounting with Horse Holders: Enforces the historical trade-off—dismounting gives you dispersed, hard-to-hit skirmishers armed with rapid-firing breechloaders, but permanently ties down 25% of your fighting manpower to hold the horses. 2. Vulnerability of Mounts: Placing your Horse Holder stand in an exposed field risks losing your horses to enemy fire, leaving your troopers stranded as slow foot skirmishers. 3. Opportunistic Shock: Mounted cavalry remains terrifying against disordered, retreating, or marching columns, but charging a solid battle line waiting behind a fence will get your saddles emptied in seconds.
Pickup Games & Scenarios
09. PICKUP GAMES & SCENARIO GENERATION
1.0 The Random Engagement Generator
- [RULE-09-1.1] Playing Without a Historical Scenario: While Dress on the Colors is heavily designed for recreating historical American Civil War scenarios, players will often want to set up balanced, competitive "pickup games" at their local club. To ensure every battle feels distinct and tactically challenging, players can use the Random Engagement Generator.
- [RULE-09-1.2] Generating the Battle: Before deploying any miniatures, players roll 1D6 on the Deployment Type Table and 1D6 on the Victory Conditions Table.
- [RULE-09-1.3] Initiative & Attacker/Defender: Unless the rolled Deployment Type dictates otherwise, players roll 1D6 against each other. The highest roller chooses which table edge they wish to deploy on and decides who will deploy their first Brigade. The player who deploys first automatically becomes the Active Player for Turn 1.
2.0 Deployment Type Matrix (Roll 1D6)
| 1D6 Roll | Deployment Name | Setup Rules & Arrival Mechanics |
|---|---|---|
| 1 | The Meeting Engagement | Vanguard forces collide. Both players deploy only 1 Brigade within 6.0" of their respective table edges. The rest of their armies are held in "Reserve" off-table and march onto their friendly table edge on Turn 2 (second brigade) and Turn 3 (remaining brigades). |
| 2 | The Pitched Battle | Standard formed battlelines. Both players deploy their entire armies simultaneously before Turn 1 begins. The deployment zones extend up to 12.0" inward from their respective friendly table edges. Players alternate placing one brigade at a time. |
| 3 | Flank March | A surprise arrival. Player A (Defender) deploys their entire army normally (12.0" from their edge). Player B (Attacker) deploys half their army normally, but the other half is held in reserve. On Turn 3, Player B's reserve arrives on a randomly determined side table edge (roll 1D6: 1-3 Left Edge, 4-6 Right Edge). |
| 4 | Dawn Assault | Early morning fog and low light. The Defending player deploys their entire army up to 18.0" from their edge. The Attacker begins completely off-table and moves onto the board on Turn 1. During Turn 1, all shooting and command radius ranges for both sides are halved due to the dim morning light. |
| 5 | Echelon Attack | Diagonal confrontation. Players choose opposite corners of the table instead of flat edges. Deployment zones are measured 18.0" radially outward from the chosen corners. The armies fight diagonally across the center of the table. |
| 6 | River Crossing | Forcing the ford. The table is bisected horizontally by a river or deep stream with only 2 passable fords or bridges. The Defender deploys their entire army on one side of the river. The Attacker deploys on the other side and must cross under fire. |
3.0 Victory Conditions Matrix (Roll 1D6)
| 1D6 Roll | Victory Condition | Win Requirements & Game Length |
|---|---|---|
| 1-2 | Break the Enemy | Pure Army Morale. There are no geographical objectives or turn limits. The game ends instantly the moment one army has 50% or more of its Brigades in a "Broken" state on the Faltering Clock (see Chapter 07). The broken army loses cohesion and yields the field. |
| 3-4 | Key Terrain | Objective control. Before deployment, players take turns placing 3 Objective Markers on the centerline of the table (representing crossroads, high ground, or farmhouses). The game lasts exactly 6 Turns. The player controlling the most objectives at the end of Turn 6 wins. Control requires a non-disordered infantry unit within 3.0" of the marker with no enemy units within 3.0". |
| 5 | Breakthrough | Shatter the line. The game lasts exactly 6 Turns. The Attacking player wins if they manage to exit at least 2 non-disordered infantry regiments off the Defender's starting table edge. The Defender wins if they prevent this from happening by the end of Turn 6. |
| 6 | The Grand Hybrid | Casualties and Ground. The game lasts exactly 8 Turns. Players score 1 Victory Point for every enemy brigade that reaches a "Broken" state on the Faltering Clock, and 1 Victory Point for holding the physical center point of the battlefield at the end of Turn 8. The highest score wins. |
Optional Rules & Friction
10. OPTIONAL RULES
"War is cruelty, and you cannot refine it." — General William T. Sherman, 1864
"The dead covered more than five acres of ground about as thickly as they could be laid." — Private Sam Watkins, 1864
These mechanics add deep historical flavor, "friction," and narrative progression to your battles. They are completely optional and should only be used if both players agree before the game begins.
1.0 Pre-Game Command Bidding
- [OPT-10-1.1] The Bidding Phase: Instead of rolling for standard Turn 1 initiative, both players receive a pool of 15 Pre-Battle Points. Before deployment, players secretly allocate these points across four categories using a piece of paper.
- [OPT-10-1.2] Resolving Bids: Reveal the allocations simultaneously. The player who bid the most points in a category wins that specific advantage. (Ties result in neither player getting the advantage).
- Scouting: Winner may move or remove one terrain piece (excluding rivers) up to 6.0" before deployment.
- The March: Winner forces the enemy to deploy their entire army first.
- Initiative: Winner automatically takes the first turn of the game.
- Logistics: Winner selects one enemy artillery battery; it begins the game with a "Low Ammo" marker.
2.0 The Clean Barrels (First Volley)
- [OPT-10-2.1] Pristine Muskets: Historically, the very first shot a regiment fired was meticulously loaded in camp. To represent this, place a small visual token (such as a white cotton puff or a brass percussion cap) next to every infantry regiment during deployment.
- [OPT-10-2.2] The Bonus: When a regiment fires its muskets for the very first time in the game, it receives a flat +1 To-Hit modifier on its shooting dice.
- [OPT-10-2.3] Fouled Barrels: Immediately after this first attack is resolved, remove the token. The regiment will never receive this bonus again during the battle, representing black powder fouling and combat stress.
3.0 The Friction of War Events
- [OPT-10-3.1] Triggering Friction: At the start of the turn, if both players roll the exact same number when generating their Commander's Staff Pips, the Active Player must pause and roll 1D6 on the Friction Table below before issuing any orders.
| 1D6 Roll | Battlefield Event | Effect |
|---|---|---|
| 1 | Ammunition Wagon Delayed | The opponent selects one active battery or regiment. It immediately receives a Low Ammo marker. |
| 2 | Sudden Squall | A brief rain dampens powder. For this entire turn, all shooting dice pools for both sides are halved (rounded down). |
| 3 | Misinterpreted Orders | The opponent selects one active regiment. It must immediately move 6.0" straight forward. |
| 4 | "The General is at the Front!" | The Active Brigadier generates +2 Pips this turn. However, if any unit in his brigade takes a casualty, he is automatically wounded (removed from play). |
| 5 | Panic in the Ranks | A false rumor sweeps the line. Roll 1D6 for a random active regiment; on a 1-3, they receive a Disorder marker. |
| 6 | Heroic Momentum | The Active Player chooses one regiment. It may Assault this turn for 0 Pips and automatically passes its Discipline Check to close. |
4.0 Hidden Deployment (Blinds)
- [OPT-10-4.1] The Tokens: During deployment, instead of placing miniature regiments on the table, players deploy numbered wooden blocks or "Blind" tokens. Each player receives exactly 1 Blind for each of their real Brigades, plus 2 "Dummy" Blinds.
- [OPT-10-4.2] Maneuvering Blinds: Blinds move exactly like troops during the Maneuver phase, at a flat speed of 9.0" across any terrain.
- [OPT-10-4.3] Unmasking: A Blind is immediately revealed if an enemy unit or enemy Blind moves within 12.0" (visual range), or if the controlling player voluntarily unmasks it to shoot.
- [OPT-10-4.4] The Trap: If a revealed Blind is a Dummy, it is instantly removed from the table. If it is a real Brigade, replace the token with the actual miniatures, facing any direction the controlling player wishes.
6.0 Historical Army Traits
- [RULE-07-5.1] Army Traits Overview: To capture the distinct doctrinal and historical character of famous units and theater characteristics without creating bloated rule exceptions, units may be assigned one or more standard Historical Traits during scenario design:
| Trait | Effects |
|---|---|
| 1. REBEL YELL (Confederate Assault Trait) | +1 to Opposed Melee Rolls when charging/counter-charging. Forces charging enemy to take Discipline Check if counter-charged. |
| 2. SEEN THE ELEPHANT (Green / Inexperienced) | Must make 1D6 Discipline Check (5+) first time unit takes fire. Failure inflicts Disorder Marker and halts advance. |
| 3. IRON DISCIPLINE (Elite Formations) | Immune to first natural 6 Disorder result in a game turn. Rallies naturally on a 3+ on 1D6. |
| 4. STEADY (Disciplined Drill Regiments) | +1 on Discipline Checks caused by Closing Defensive Volleys. Re-roll 1 failed Morale/Cover Save per turn. |
| 5. SHARPSHOOTERS / BUCKTAILS | May re-roll one missed shooting die at Medium Range (6"–14"). Detaches Skirmish Screen for free without movement penalty. |
| 6. BUCK & BALL SPECIALISTS | Hits on 3+ at Short Range (0–6"); rolls +1 bonus die at <3.0". Incapable of fire beyond 14.0". |
- [RULE-07-5.2] The Rebel Yell Doctrine:
- Application: Confederate infantry regiments with the Rebel Yell trait gain +1 to their Opposed Melee Roll when executing an Assault or declaring a Reaction 5: Counter-Charge .
- Psychological Shock: When a Rebel Yell unit successfully closes into base contact against a Green or Regular Union unit that is not in heavy earthworks, the Union defender must pass an immediate Discipline Check (4+) before melee dice are rolled. Failure imposes a Disorder Marker on the defender prior to calculating the melee score.
- [RULE-07-5.3] Seen the Elephant (Green Units Under Fire):
- Application: Applies to newly recruited or unblooded units.
- The Test: The very first time the regiment suffers an unsaved hit or a natural 6 from enemy musketry or artillery during the game, it must take an immediate Discipline Check (5+ on 1D6).
- Failure: The unit immediately receives a Disorder Marker, halts in place, and cannot move forward for the remainder of that turn.
- [RULE-07-5.4] Iron Discipline (Elite Formations):
- Application: Represents crack shock formations (e.g., The Iron Brigade of the West, The Stonewall Brigade, Hood's Texas Brigade, The Orphan Brigade).
- Suppression Immunity: The unit ignores the first natural 6 Disorder result inflicted on it during each game turn. It takes the casualty hit, but ignores the suppression disorder.
- Elite Rally: Rallies naturally on a roll of 3+ on 1D6 in Phase 5.
7.0 The Horse Holder Rule (Detailed Dismounting)
- [RULE-08-2.1] The Decision to Dismount: American Civil War cavalry functioned primarily as mobile dragoon infantry. An unengaged mounted cavalry regiment in good order may dismount during Phase 2: Active Maneuver Phase by spending half of its movement allowance (4.5").
- [RULE-08-2.2] The Horse Holder Deduction (The 1-in-4 Rule):
- Historical cavalry drill regulations required one man in every four to remain in the rear holding the reins of four horses.
- Stand Conversion: When a cavalry regiment dismounts, detach 1 stand to serve as the Horse Holder Stand. The remaining stands are placed forward as a Dismounted Skirmish Line.
- [RULE-08-2.3] Deploying the Dismounted Skirmish Line:
- Dismounted stands fight in Skirmish Order (spaced with up to 0.5" gaps between bases).
- Defensive Benefit: Dismounted cavalry in open ground count as being in Light Cover (5+ Save) due to their dispersed, prone firing postures.
- Terrain Exploitation: Dismounted cavalry may enter dense woods, rocky ridgelines, and structures without formation disorder penalties.
- [RULE-08-2.4] The Horse Holder Stand (Vulnerability & Movement):
- The Horse Holder stand is placed 2.0"–3.0" directly behind the center of the dismounted firing line, preferably in dead ground or behind cover.
- Movement: Horse holders move at 4.0" in open ground or 8.0" on roads. They must maintain a distance of no more than 4.0" from their parent dismounted line.
- Combat Vulnerability: Horse holders cannot shoot. If targeted by enemy fire, they receive no cover save. If contacted by an enemy charge, the horse holders are Captured / Destroyed: the stand is removed, and the parent dismounted regiment can never remount for the remainder of the battle.
- [RULE-08-2.5] Remounting Procedure:
- To remount, the dismounted firing stands must fall back into physical base contact with their Horse Holder stand.
- Spending half of a turn's movement allowance (4.5") remounts the unit, restoring the full starting mounted stand count. The unit may move the remaining 4.5" as a mounted line or column.
8.0 Advanced Artillery Tactics
- [RULE-05-8.1] Overhead Fire: Artillery batteries deployed on a higher elevation contour (e.g., a Level 1 Hill) may fire over the heads of friendly infantry on a lower contour (e.g., Level 0) without triggering Friendly Fire penalties. However, the friendly infantry must be at least 3.0" away from the artillery bases, and the target must be at least 3.0" behind the friendly infantry.
- [RULE-05-8.2] Counter-Battery Fire: Artillery firing exclusively at enemy artillery stands executes Counter-Battery Fire. If a natural 6 is rolled to-hit on the shooting dice, it does not just cause a crew casualty; it scores a direct hit on a caisson, limber, or gun carriage, destroying the enemy gun stand outright and removing it from play.
- [RULE-05-8.3] Bouncing Solid Shot (Enfilade): If an artillery battery fires spherical case or solid shot (Medium or Long Range) directly into the flank of an enemy line of battle, the shot bounces laterally down the ranks. The battery rolls +2 bonus dice on the attack, representing the devastating "bowling ball" effect of enfilading round shot.
7.0 Pre-Planned Written Orders (Token System)
- [OPT-10-7.1] Design Intent: This optional module replaces the dynamic activation system. It forces players to pre-plan their entire brigade's actions before any movement occurs, perfectly simulating the rigid, un-cancelable nature of 19th-century orders.
- [OPT-10-7.2] Phase 1 (Order Placement): After rolling for Staff Pips, the active player must place a face-down Order Token behind every single regiment and battery under their command.
- Tokens Available: Move/Advance, Assault (Costs 1 Pip), Hold Position / Fire, Change Formation.
- [OPT-10-7.3] Phase 2 (Execution): All tokens are flipped face-up simultaneously. The active player must execute the revealed orders exactly as written. If a unit reveals an Assault token but the target has moved out of range due to a reaction, the unit must still move its full 9.0" Double-Quick speed in a straight line toward where the target used to be. If a unit reveals a Hold / Fire token, it cannot move or pivot during Phase 2.
8.0 Elite Sharpshooter Regiments (Optional Trait)
In specific historical scenarios, an army may be permitted to field a dedicated sharpshooter regiment (e.g., Berdan's 1st US Sharpshooters). We strongly recommend limiting this to a maximum of 1 regiment per army.
- Full Skirmish Deployment: Unlike standard infantry, this entire regiment may deploy in Skirmish Order. All physical stands in the regiment are spread apart with exactly 1.0" intervals between them. (Dispersing into or recalling from this formation costs half of the unit's movement allowance).
- Movement: The regiment moves at the standard Skirmish speed (8.0"). They ignore all movement penalties and friction checks for crossing Difficult Terrain (woods, rough ground, fences).
- Firing (Offensive): They fire with their normal weapon profile (usually Rifled Muskets or Breechloaders), rolling 1D6 per stand. Because they are dispersed, they do not block Line of Sight. Friendly units may fire "through" the gaps in the sharpshooter line at targets beyond them without penalty.
- Receiving Fire (Defensive): Enemies suffer a -1 To-Hit penalty when firing at the sharpshooters due to their dispersed nature. Enemy units may also choose to fire "through" the sharpshooters to target formed friendly lines behind them.
- Receiving Charges (Evasion): If charged by enemy formed infantry or cavalry, the sharpshooters may use the Skirmish Evade (Reaction 3) to fall back 4.0"-6.0" through friendly lines for free.
- Melee Weakness: Because they are dispersed, they cannot declare an Assault against enemy formed lines. If they are charged and cannot (or choose not to) evade, they do not automatically die like a 1-stand screen, but they suffer a catastrophic -2 penalty to their Opposed Melee Roll.
9.0 Seeing the Elephant (Premature Firing)
- [OPT-10-9.1] Design Intent: This rule simulates the terrible fire discipline of raw recruits. Green troops facing a terrifying bayonet charge often fired their volleys too early out of panic, leaving them unloaded and defenseless when the enemy actually closed the distance.
- [OPT-10-9.2] The Panic Fire Check: When a Green (Inexperienced) regiment is targeted by an enemy Assault and the enemy reaches the 4.0-inch Reaction Trigger Window, the Green defender must immediately pass a Discipline Check (4+).
- [OPT-10-9.3] Failure Consequences: If the check is failed, the Green regiment panics and fires early. They are forced to use their Closing Defensive Volley at maximum range before the attacker enters point-blank distance. They suffer a -2 To-Hit penalty on this volley (representing erratic, long-range panic fire). Because they have fired early, they have empty muskets and receive a -1 penalty in the ensuing Opposed Melee Roll.
10.0 The July Sun (Heat Exhaustion)
- [OPT-10-10.1] Design Intent: Simulates the grueling physical toll of fighting in heavy wool uniforms during mid-summer campaigns like Gettysburg or Bull Run, where heatstroke caused as many drop-outs as enemy bullets.
- [OPT-10-10.2] The Exhaustion Threshold: If a regiment moves at Double-Quick speed (or declares an Assault) for two consecutive game turns, they succumb to heat exhaustion.
- [OPT-10-10.3] Forced Disorder: At the end of their movement on the second consecutive turn, the unit automatically receives a Disorder Marker. They cannot Double-Quick or charge again until this marker is removed via a Rally action.
11.0 Uncontrollable Pursuit (Breakthrough Frenzy)
- [OPT-10-11.1] Design Intent: Historically, when a regiment finally broke an enemy line in brutal hand-to-hand combat, they often became intoxicated by victory. Officers lost control as the men charged wildly forward into the enemy rear, breaking their own battle lines and exposing themselves to counter-attack.
- [OPT-10-11.2] The Frenzy Check: If a regiment completely destroys or routs an enemy unit in Melee, they must immediately pass a Discipline Check (4+).
- [OPT-10-11.3] Breaking the Line: If the check is failed, the victorious unit becomes Frenzied. They must immediately make a free, mandatory forward move of 4.0 inches directly toward the nearest enemy unit or objective, breaking formation with their parent brigade. They receive a Disorder Marker at the end of this uncontrolled pursuit move.
12.0 Refusing the Flank (The Chamberlain Maneuver)
- [OPT-10-12.1] Design Intent: Bending a battle line backward to protect an exposed flank (like the 20th Maine at Little Round Top) was one of the most difficult maneuvers to execute under fire. It required intense officer coordination to pull men backward without the rank-and-file thinking a general retreat had been ordered.
- [OPT-10-12.2] The Command Friction Check: Normally, wheeling or pivoting is a free maneuver. However, if a unit attempts to pivot its wing backward (Refusing the Flank) while within 12 inches and Line of Sight of an enemy unit, it requires direct officer intervention. The parent Brigadier must expend 1 Staff Pip and the regiment must immediately roll a Discipline Check (4+).
- [OPT-10-12.3] Resolution & Retries: The outcome depends on the D6 roll:
- Success (4, 5, 6): The men understand the orders and successfully execute the maneuver.
- Standard Failure (2, 3): The maneuver fails due to battlefield noise and confusion. The unit remains in its original facing, and the 1 Staff Pip is wasted. The player may attempt the maneuver again immediately if they have another Staff Pip to spend.
- Catastrophic Failure (1): Total chaos! The men misinterpret the order as a general retreat and break ranks. The unit remains in its original facing but immediately receives a Disorder Marker. The Staff Pip is wasted, and no further attempts may be made to maneuver this unit this turn.
13.0 Digging In (Hasty Breastworks)
- [OPT-10-13.1] Design Intent: Especially from 1864 onward (e.g., The Wilderness, Spotsylvania), ACW troops learned to throw up logs, fence rails, and dirt piles almost immediately after halting. This rule allows dynamic manipulation of battlefield terrain.
- [OPT-10-13.2] The Digging Action: During Phase 1 (Command & Maneuver), an infantry regiment may spend 1 Staff Pip and declare they are "Digging In." The unit may not move, fire, or participate in Assaults this turn.
- [OPT-10-13.3] Placement & Protection: At the end of the turn, place a Hasty Works marker along the unit's front facing.
- If the unit was in Open Ground, they now count as being in Light Cover (5+ save) against fire crossing their front.
- If the unit was already in Light Cover (such as a woodline or rail fence), they upgrade that position to Heavy Cover (4+ save).
- Works may not be built in marshes, across streams, or inside masonry structures.
14.0 Spiking the Guns (Artillery Overrun)
- [OPT-10-14.1] Design Intent: When infantry overran an enemy battery, they often hammered rat-tail files into the touchholes of the cannons ("spiking" them) so the enemy couldn't use the pieces if they counter-attacked and recaptured the ground.
- [OPT-10-14.2] Capturing the Battery: If an infantry unit successfully wins a melee against an artillery battery, the battery's stands are removed, and the infantry occupies the guns.
- [OPT-10-14.3] Spiking vs. Hauling: During their next Command Phase, the occupying unit's Brigadier must decide the fate of the guns:
- Spike the Guns: By spending 1 Staff Pip, the infantry permanently disables the battery. Remove the guns from the table. Even if the enemy retakes the hill, the artillery cannot be recovered or used.
- Haul them off: The player may attempt to drag the guns to their own board edge for Campaign Victory Points, but doing so prevents the unit from moving faster than half-speed or firing until the guns are secured. If the enemy counter-attacks while the guns are still on the table, the guns are recaptured intact.
15.0 The Rebel Yell / Union Huzzah (Psychological Shock)
- [OPT-10-15.1] Design Intent: Represents the sheer, coordinated psychological terror of an entire brigade roaring its battle cry during a massive bayonet charge, breaking enemy nerves before the lines ever physically clash.
- [OPT-10-15.2] The Declaration: Once per game per army, a Brigadier may spend 2 Staff Pips at the start of Phase 4 (Assault & Melee) to unleash their faction's terrifying battle cry across their entire brigade.
- [OPT-10-15.3] The Psychological Effect: For that entire Assault phase, every enemy unit charged by that brigade suffers an automatic -1 penalty to all Reaction Saves and Discipline Checks.
- [OPT-10-15.4] The Recoil: Such intense adrenaline comes at a cost. At the end of the turn, every unit in the brigade that participated in the charge receives a Disorder Marker due to physical exhaustion and broken formation, regardless of whether they won or lost the melee.
16.0 Desperate Valor (Command Action)
- [OPT-10-16.1] Design Intent: Civil War soldiers were professional and deeply disciplined. Charging into defensive volleys or depressed canister fire was viewed as suicidal, yet units routinely executed these orders when strategically necessary, driven by raw unit cohesion and extreme leadership. This rule gives players the historical tool to push men through this brutal slaughter.
- [OPT-10-16.2] The Order: During Phase 1 (Command & Maneuver), a Brigadier may spend 2 Special Staff Pips to order "Fix Bayonets / Desperate Valor" for a single regiment that is declaring an Assault.
- [OPT-10-16.3] The Benefit: The intense command focus grants the charging regiment incredible nerve. During the ensuing Assault phase, the regiment gains Advantage on all Discipline/Morale checks (roll 2D6 and drop the lowest). This allows them a vastly higher chance to absorb punishing defensive volleys or point-blank canister without breaking before contact.
17.0 Caught Flat-Footed (Forced Reaction Penalty)
- [OPT-10-17.1] Design Intent: Adapted from the Johnny Reb 3 'Forced Conditional Hold'. It heavily penalizes units that are caught marching or moving in column formation when suddenly ambushed by a charge, reflecting the panic of attempting to unpack into a fighting line under extreme duress.
- [OPT-10-17.2] The Trigger: If a unit is declared as the target of an enemy charge while currently deployed in Road Column or Assault Column.
- [OPT-10-17.3] The Penalty: If the targeted unit does not have a Reserved Staff Pip to spend on a Defensive Reaction (such as Refusing the Flank or forming a Closing Volley), they are caught completely flat-footed.
- [OPT-10-17.4] Resolution: The flat-footed unit automatically suffers a -1 penalty to their Melee Shock score, and must immediately take a Discipline Check. If they fail, they are Disordered before the enemy even makes contact.
18.0 The Second Line of Battle (Support Morale)
- [OPT-10-18.1] Design Intent: Simulates the massive psychological comfort a regiment felt when they knew friendly reinforcements were deployed directly behind them, ready to step up and plug the gaps.
- [OPT-10-18.2] The Support Bonus: Whenever a regiment is required to take a Discipline Check (whether from a Closing Volley, taking heavy casualties, or preparing to assault), they gain a +1 Bonus to their 1D6 roll.
- [OPT-10-18.3] Eligibility: To claim this bonus, there must be a friendly, formed regiment (not skirmishers) deployed within 3.0 inches directly behind the center of the testing regiment. The supporting regiment cannot currently have a Disorder marker.
19.0 Plunging Fire & Overshoot (Rifled Muskets)
- [OPT-10-19.1] Design Intent: While highly accurate at long ranges, the rifled musket's Minié ball had a severe, rainbow-like trajectory. In the blind panic of an incoming bayonet charge, soldiers frequently forgot to adjust their rear sights back down to zero, causing their defensive volleys to fly harmlessly over the attackers' heads.
- [OPT-10-19.2] The Overshoot Penalty: When a unit equipped with Rifled Muskets fires a Defensive Closing Volley against an incoming Assault, they only score hits on a 5+ (instead of the standard 4+).
- [OPT-10-19.3] Smoothbore Superiority: Units armed with Smoothbore Muskets or Repeaters do not suffer this penalty. This creates a distinct tactical advantage for smoothbores when defending a static line against a charge, simulating their point-and-shoot reliability at close range.
20.0 Environmental Friction & Weather (Optional Historical Chrome)
The American Civil War featured some of the most miserable weather conditions in military history, from the torrential downpours of Williamsburg to the sweltering humidity of Gettysburg. Players may agree to apply one Atmospheric condition and one Ground condition to a scenario to radically alter the tactical landscape.
Ground Conditions (Impacts Movement & Artillery)
- [OPT-10-20.1] Dry / Firm: Standard rules. Artillery solid shot ricochets normally.
- [OPT-10-20.2] Soft / Slick Ground: After a light rain or spring thaw.
- Infantry/Cavalry: -1.0" to all movement.
- Artillery: Wheels sink slightly. Unlimbering costs 2 Staff Pips. Solid shot sinks rather than bouncing, reducing the maximum effective range of all artillery by 6.0".
- [OPT-10-20.3] Deep Mud / Saturated:
- Infantry: -2.0" to movement. Double-Time orders are strictly prohibited unless moving entirely along an established road.
- Cavalry: -4.0" to movement.
- Artillery: Unlimbering remains a free action (0 Pips), but the guns sink to their axles. A battery that unlimbers in Mud cannot fire during Phase 3 of that same turn. If limbered artillery moves into open ground (off-road), it immediately becomes permanently stuck and cannot move for the rest of the game.
Precipitation & Visibility (Impacts Shooting & Misfires)
- [OPT-10-20.4] Light Rain / Drizzle:
- Damp Powder (Misfires): If an infantry or cavalry unit rolls two or more '1's on a shooting attack, their paper cartridges are damp and their barrels fouled. Place a "Fouled" marker on them. They suffer a -1 penalty to all future shooting. A Brigadier can spend 1 Staff Pip during Phase 1 to "Clear Arms" and remove the marker.
- [OPT-10-20.5] Heavy Rain / Torrential Downpour:
- Wet Powder: No unit may claim a "First Fire" bonus. The Fouled/Misfire rule triggers if even a single '1' is rolled in a firing pool.
- Blinding Rain: Line of Sight (LOS) is hard-capped at 12.0".
- [OPT-10-20.6] Light Fog:
- Hazy Silhouettes: Line of Sight (LOS) is hard-capped at 18.0".
- Concealed Deployments: Units cannot be targeted by artillery beyond 12.0" unless they currently have a Smoke Marker (i.e., they have already fired).
- [OPT-10-20.7] Dense Fog / Morning Mist:
- Blind Combat: Line of Sight (LOS) is hard-capped at 6.0".
- Stumbling Assaults: Units cannot declare an Assault order unless the target is already visible within the 6.0" radius.
- Fog Lifting: At the start of Turn 3 (and every subsequent turn), the active player rolls 1D6. On a 5+, the Dense Fog thins out and becomes Light Fog.
Extreme Temperatures (Impacts Fatigue & Morale)
- [OPT-10-20.8] Severe Heat:
- Heat Exhaustion: The physical toll of running in thick wool uniforms under a baking sun is severe. Any unit that executes a Double-Time or Assault order immediately suffers 1 Micro-Hit (attrition) as men succumb to heatstroke and fall out of the ranks.
21.0 Late-War Open Order (1864+)
By 1864, the devastating accuracy of the rifled musket and the tangled terrain of battlefields like The Wilderness forced commanders to abandon rigid Napoleonic lines. Entire regiments, and sometimes whole brigades, were deployed in loose, dispersed skirmish lines to survive the approach and navigate the woods.
[!NOTE] Tactical Context: When to use Open Order * The Pluses: Open Order is the ultimate survival and stalling formation. Because it grants a +1 Cover Save and ignores the movement penalties of Dense Woods, it is perfect for marching across open ground under heavy artillery fire (acting as a bullet sponge) or quickly navigating broken terrain to tie up the enemy in a prolonged, long-range firefight. * The Drawbacks: It has absolutely zero offensive shock power. You cannot declare an Assault, and because it suffers a -1 To-Hit penalty, your overall volley fire is diluted. Most dangerously, if a tightly packed enemy Assault Column manages to reach you with bayonets, your spread-out skirmishers will instantly scatter (losing a full stand automatically). Use Open Order to survive the approach, but rely on a solid Line of Battle when it is time to take ground!
[OPT-10-21.1] Deploying into Open Order * Command Cost: Transitioning an entire regiment away from standard tactical doctrine requires a Special Order. It costs 1 Staff Pip to deploy a single regiment into Open Order (or 2 Staff Pips to simultaneously deploy an entire brigade). * The Maneuver: The unit spends half its base movement (3.0") to execute an outward oblique. Physically separate the regimental stands so there is exactly a 1.0-inch gap between every stand in the unit.
[OPT-10-21.2] Movement & Maneuvers * Speed: An Open Order regiment moves at 6.0" in Open Ground, and 5.0" in Dense Woods or Rough Terrain. * Terrain Mastery: They completely ignore the automatic Disorder penalty for entering Dense Woods, Swamps, or Abatis. * Agile Facing (No Wheeling): Because the men are not locked shoulder-to-shoulder, the unit does not execute formal Wheels. During its movement phase, an Open Order regiment may freely pivot all of its stands in place to face any new direction without spending movement distance. * Restrictions: An Open Order regiment cannot use the Double-Time order, cannot declare an Assault, and does not secure the flanks of friendly formed units (they cannot act as an anchor).
[OPT-10-21.3] Firepower & Survivability * The Bullet Sponge (+1 Cover): Because the men are spread out 5 to 10 paces apart and instinctively hit the dirt when fired upon, an Open Order regiment receives an automatic +1 to all Cover Saves against artillery and musketry. (e.g., Open Ground provides a 5+ Light Cover save; Light Woods provide a 4+ Heavy Cover save). * Dispersed Fire (-1 To-Hit): An Open Order regiment rolls its full allotment of firing dice in Phase 3. However, because they are firing "at will" rather than executing a synchronized officer-led volley, they suffer a -1 To-Hit penalty on all shooting rolls.
[OPT-10-21.4] The Melee Trap Open Order trades physical mass for survival. A loose chain of individuals cannot physically halt a dense, 400-man assault column with bayonets. * Overrun: If an Open Order regiment is contacted by a charging formed unit (Line or Column), the Open Order unit automatically loses the melee without rolling any dice. They are instantly overrun. The Open Order unit suffers the loss of 1 Full Stand (2 hits), receives a Disorder Marker, and must immediately fall back 3.0". * Attacker Momentum: The victorious attacker may then execute a standard Free Consolidation Move (2.0") or spend 1 Pip for a Sweeping Advance (4.0") to strike the units behind the skirmishers.
22.0 The Wave Attack (Deep Mass Assault)
In May 1864, Colonel Emory Upton realized that sending a single, wide line of battle against entrenched Confederates at Spotsylvania's "Mule Shoe" was suicidal. His solution was to stack twelve regiments into a massive, tightly packed vertical column. The goal was pure kinetic shock: the men were ordered to remove the percussion caps from their rifles so they could not stop to shoot. If the first line was shot to pieces, the second line would simply run over them and breach the trench.
[!TIP] Designer's Note: Deployment & Time Constraints From a gaming perspective, attempting to manually march a deployed brigade from a wide horizontal line into a deep vertical stack in the middle of a battle will take 3 or 4 turns of wheeling and marching. Doing this under enemy fire will get your brigade destroyed. Historically, Upton assembled his massive column behind the lines in a dense pine forest, completely out of sight. Players are strongly encouraged to deploy their regiments into this formation during the pre-game Setup Phase, or to seamlessly pivot into it when a brigade arrives on the board marching in a Road Column.
[OPT-10-22.1] Authorizing the Wave Assault * Command Cost: It costs 2 Staff Pips from the Brigadier to authorize a Wave Assault. * Alignment: The player designates 2 or more regiments from the same brigade (up to the entire brigade). The remaining regiments of the brigade may act independently. The participating regiments must be aligned front-to-back, with the front of the supporting regiment placed no more than 1.0" behind the rear of the lead regiment. All regiments in the mass must be in the identical formation (either all in Line of Battle, or all in Assault Column). Open Order regiments may not participate.
[OPT-10-22.2] The Kinetic Strike (No Musketry) The defining characteristic of the Wave Attack is unstoppable forward momentum. To prevent units from stalling in the killing zone: * No regiment participating in a Wave Assault is permitted to fire in Phase 3. Their sole purpose is movement and melee shock.
[OPT-10-22.3] Continuous Momentum (The Surge) The paired regiments declare a charge as a single unified mass. 1. The enemy resolves their defensive closing volley against the Lead Regiment. 2. If the Lead Regiment is Shattered, or if it fails its Discipline Check and falls back in Disorder, the charge does not stall. 3. The supporting regiment immediately executes a free Passage of Lines, pushing straight through the fleeing men of the Lead Regiment. The supporting regiment completes the charge distance and strikes the enemy in melee without losing the turn's momentum.
[OPT-10-22.4] The Artillery Magnet Stacking thousands of men directly behind each other creates the ultimate target for enemy cannons. * If an enemy artillery battery fires Solid Shot or Shell at a Wave Mass, they do not need to roll a Natural '6' to trigger an Overshoot. Every hit scored on the Lead Regiment automatically inflicts 1 Stray Hit on the support regiment directly behind it, as the cannonballs punch through the dense ranks.
Campaign Progression
11. CAMPAIGN PROGRESSION
"We are in a campaign now that will not end until the enemy is destroyed." — General Ulysses S. Grant
1.0 Campaign Progression (The Persistent Army)
- [CMP-11-1.1] The Post-Game Sequence: For players wishing to link their battles into a persistent narrative campaign, regiments do not "reset" between games. After a battle concludes, execute the following steps:
- [CMP-11-1.2] The Surgeon's Roll: Every stand lost in the battle is not necessarily dead. Roll 1D6 for every lost stand. On a 4+, stragglers return and the stand is restored. On a 1-3, the stand is permanently crossed off the roster for the rest of the campaign.
- [CMP-11-1.3] Gaining Experience: If a Green or Standard regiment successfully wins a melee or survives heavy fire without breaking, they gain 1 Experience Point. At 2 Points, they permanently gain an Elite Trait (e.g., Steady or Iron Discipline).
- [CMP-11-1.4] Promoting the General: If a Brigadier survives a battle and his brigade achieved its objective, his Command Rating permanently increases by one tier (e.g., Timid becomes Reliable).
Designer Notes & Philosophy
09. DESIGNER NOTES, MATHEMATICAL MODELS & HISTORICAL PHILOSOPHY
1.0 Design Mission & The 3–4 Hour Table Target
- [NOTE-09-1.1] The Core Dilemma of ACW Miniature Gaming: American Civil War wargames traditionally suffer from an agonizing design dichotomy:
- The "Grognard Spreadsheet" Dilemma: Older, highly-granular simulation systems offer immense tactical realism and granular ballistics, but require constant chart lookups, complex stand-fraction math, and simultaneous chit plotting. A four-regiment brigade clash can easily take 4-5 hours, making division-sized battles impossible on a weeknight.
- The "Generic Horse-and-Musket" Dilemma: Many fast-play systems offer exhilarating speed, but their baseline mechanics were engineered for 18th-century European warfare. They often lack the unique tactical grit of the American Civil War—the blinding black powder smoke banks, the devastating power of Buck & Ball at point-blank range, the psychological terror of the Rebel Yell, and the reality that ACW brigades broke from collective moral exhaustion rather than total physical extermination.
- [NOTE-09-1.2] The Design Solution: This ruleset was engineered from the ground up to occupy the "Golden Middle": providing deep historical realism and tactical decision-making with zero chart lookups during play and a clutter-free table.
2.0 Deconstructing Historical Mechanics (The Evolutionary Path)
- [NOTE-09-2.1] What We Kept, What We Fixed, and What We Cut:
1. The Granular Simulation Approach
- What We Loved: The dynamic health track (Fresh / Worn / Spent); strict visual casualty tracking; granular distinction between weapon calibers (Buck & Ball vs. Springfield).
- What We Fixed: The Maneuver Table swing. In older systems, a single bad die roll can cause a crack veteran regiment to freeze, disorder, or fall back without taking a shot. We replaced this with a guaranteed baseline of standard orders backed by a Staff Pip allocation pool .
- What We Cut: Ratio-based Fire Combat Tables and complex ballistic calculation charts. Firing is now resolved via direct D6 target pools.
2. The Modern Friction Approach
- What We Loved: Tracking Brigade Faltering rather than army-wide break points; dedicated pre-movement assault phases.
- What We Fixed: Many games use tokens to track every single casualty, morale grade, and ammo state. We mitigate this clutter by relying on physical stand removal for casualties and a single die on the Brigadier for morale. We still use a streamlined set of tactical markers (Disorder, Gunsmoke, Hesitant, etc.) to keep the game moving without paperwork, but it is heavily reduced compared to older systems.
- What We Cut: Fragmented rulebook cross-referencing and fiddly skirmish screen detachment math.
3. The Resource-Management Approach
- What We Loved: The brilliant multi-use dilemmas (spending resources for pips, interrupts, or casualty cancels).
- What We Fixed: The "Draw Drought". Being unable to move or fire because you lack the right random card or resource frustrates players seeking a tactical simulation.
- What We Cut: Proprietary card decks and double-rank base stacking. We restored standard single-rank 15mm frontages to accurately model the thin, vulnerable ribbons of Civil War battle lines .
4. The Simultaneous Hidden-Order Approach
- What We Loved: Simultaneous hidden order chits; deep appreciation of terrain angles.
- What We Fixed: The glacial play speed. Simultaneous order reveals and multi-step chart calculations stretch even small skirmishes past the 4-hour mark.
- What We Cut: Hidden written orders. Tactical intent is now expressed through the 5 Defensive Reaction Windows .
5. The Fast-Play Cinematic Approach
- What We Loved: Fast, dice-rolling excitement; minimal chart dependency; easy multiplayer participation.
- What We Fixed: The "Brigade Freeze" (failing a command roll ending all orders for the entire wing) and extreme "Teleporting Movement" on high command rolls that break 15mm table geometry.
- What We Cut: Generic saving-throw assumptions that ignore specific tactical cover.
3.0 Mathematical Modeling & Combat Probability Analysis
The Stand-Based D6 Dice Pool Engine
- [NOTE-09-3.1] The Mathematics of Fire Combat: Traditional ACW games use ratio charts (e.g., "18 musketry factors firing at Table D with a +2 modifier yields a 6.0" on the table = 1 stand loss and disorder check"). This requires constant table lookups.
Our system replaces this with a Binomial Dice Pool (1D6 per stand firing) evaluated against fixed target numbers based on range and weapon class :
Expected Hits E(H) = n \cdot P(Hit)
Expected Losses E(L) = (E(H) \cdot (1 - P(Save)) / 2)
- Where n is the number of stands firing, P(Hit) is the probability of hitting based on weapon range, and P(Save) is the target's cover save probability.
Master Firepower Probability Matrix
- [NOTE-09-3.2] Hit & Casualty Output for a Standard 5-Stand Regiment (5D6):
| Weapon Class & Range Band | Single Die Hit % | Target Number | Expected Hits (5D6) | Hits vs. Open Ground (0 Save) | Hits vs. Light Cover (5+ Save) | Hits vs. Heavy Cover (4+ Save) | Expected Stand Losses (Open) |
|---|---|---|---|---|---|---|---|
| Smoothbore (Short: 0–6") | 66.7% | 3+ | 3.33 Hits | 3.33 | 2.22 | 1.67 | 1.67 Stands |
| Smoothbore (Medium: 6–14") | 33.3% | 5+ | 1.67 Hits | 1.67 | 1.11 | 0.83 | 0.83 Stands |
| Rifled Musket (Short: 0–6") | 50.0% | 4+ | 2.50 Hits | 2.50 | 1.67 | 1.25 | 1.25 Stands |
| Rifled Musket (Medium: 6–14") | 50.0% | 4+ | 2.50 Hits | 2.50 | 1.67 | 1.25 | 1.25 Stands |
| Rifled Musket (Long: 14–20") | 33.3% | 5+ | 1.67 Hits | 1.67 | 1.11 | 0.83 | 0.83 Stands |
| Repeating Rifles (7D6 at Short) | 66.7% | 3+ | 4.67 Hits | 4.67 | 3.11 | 2.33 | 2.33 Stands |
| 12-pdr Napoleon (Canister: 4D6) | 83.3% | 2+ | 3.33 Hits | 3.33 | 2.22 | 1.67 | 1.67 Stands |
EXPECTED STAND LOSSES PER VOLLEY (5-Stand Regiment Firing):
text
Smoothbore at Short (0–6") ───────► [████████████████] 1.67 Stands Lost Rifled Musket at Medium (6–14") ──► [████████████] 1.25 Stands Lost Rifled Musket at Long (14–20") ───► [████████] 0.83 Stands Lost Rifled Musket vs Heavy Works ─────► [██████] 0.62 Stands Lost
The Mathematical Balance of the 2 Hits = 1 Stand Threshold
-
[NOTE-09-3.3] Attrition Slope Modeling: Why requires 2 unsaved hits to remove a stand?
-
If 1 hit = 1 stand, a single point-blank volley from a 5-stand regiment would inflict an average of 2.5 to 3.3 stand losses, evaporating over 50% of a regiment in a single 15-minute turn. This creates an unhistorical "arcade meatgrinder" where battle lines disintegrate before tactical maneuver can occur.
- If 3 or 4 hits = 1 stand, firefights become overly protracted, requiring 8-10 volleys to cause meaningful attrition, pushing the game past the 4-hour window.
- At 2 hits = 1 stand, a standard firefight in open ground inflicts 1 stand loss and 1 micro-hit per volley. A full-strength 5-stand regiment can withstand 3 to 4 sustained volleys before entering a Spent state. This provides exactly the right historical endurance for lines to trade fire, maneuver reserves, and execute counter-attacks.
The Mathematics of Suppression (The Natural 6.0" Trigger)
- [NOTE-09-3.4] Probability of Inflicting Disorder:
Instead of requiring a separate, time-consuming morale check after every shooting roll, our system integrates psychological suppression directly into the firing dice: any natural 6.0" rolled to-hit inflicts an instant Disorder Marker .
The probability P(Suppression) of rolling at least one natural 6.0" across a dice pool of n dice is:
P(Suppression) = 1 - <=ft((5 / 6)\right)^n
- For a 3-Stand Depleted Unit (3D6): 1 - (5/6)^3 = 1 - 0.5787 = \mathbf{42.1%}
- For a 4-Stand Small Unit (4D6): 1 - (5/6)^4 = 1 - 0.4823 = \mathbf{51.8%}
- For a 5-Stand Standard Unit (5D6): 1 - (5/6)^5 = 1 - 0.4019 = \mathbf{59.8%}
- For a 6.0"-Stand Large Unit (6D6): 1 - (5/6)^6 = 1 - 0.3349 = \mathbf{66.5%}
- For a 7-Stand Repeating Unit (7D6): 1 - (5/6)^7 = 1 - 0.2791 = \mathbf{72.1%}
| Regimental Size | Suppression Probability |
|---|---|
| 3 Stands (3D6) | 42.1% |
| 4 Stands (4D6) | 51.8% |
| 5 Stands (5D6) (Standard Line) | 59.8% |
| 6 Stands (6D6) | 66.5% |
- [NOTE-09-3.5] Historical Realism of the Curve: A standard 5-stand regiment has a ~ 60% chance of inflicting Disorder on its target with each full volley. This means that a stationary unit taking sustained fire from a full battle line will almost certainly be suppressed within 1-2 turns, naturally halting enemy advances and simulating the moral paralysis of being pinned down without rolling extra dice.
Opposed Melee Shock Formula Modeling
- [NOTE-09-3.6] Why 1D6 Instead of 2D6-1D10 in Melee? Our Melee Formula is:
Shock Score = 1D6 + Engaged Stands + Tactical Modifiers
- If a D10 is used (as in RF&F), the random die roll represents up to 70% of the total score, meaning a tiny, exhausted 2-stand unit rolling a '10' routinely crushes a fresh 6.0"-stand veteran brigade rolling a '2'. This generates excessive "die-roll absurdity."
- If 2D6 is used (as in older simulations), the bell curve clusters heavily around 7, making high-standing units nearly invincible and eliminating the possibility of dramatic historical upsets.
- Using 1D6 provides a flat, controlled variance of 1 to 6. A 5-stand fresh unit (5 + 1 = 6 base) has a decisive baseline advantage over a 3-stand worn unit (3 + 0 = 3 base), but a brilliant tactical modifier (+2 Stone Wall or +1 Rebel Yell) combined with a good roll still allows the defender to hold the line. It rewards sound tactical positioning over lucky dice rolls.
4.0 Spatial Physics: Frontage Accuracy vs. Depth Distortion
-
[NOTE-09-4.1] The Geometric Proof of 15mm Frontage: According to standard Civil War drill manuals (Casey's Infantry Tactics), an infantry file (2 men) occupied 22 to 24 inches (2.0 feet) of shoulder-to-shoulder frontage.
-
A regiment of 360 men deployed in two ranks has 180 files.
- Total historical frontage: 180 x 2.0 ft = 360 feet = \mathbf{120 yards}.
- At our ground scale of 1 inch = 25 yards:
Tabletop Frontage = (120 yards / 25 yards/inch) = \mathbf{4.8 inches}
-
A standard 5-stand regiment based on 1.0-inch stands measures exactly 5.0 inches wide. The mathematical match between our miniature stands and real 1862 battlefronts is practically 100% accurate.
-
Rule 2: The Flank Zone is defined by a straight horizontal line extending from the front edge. An attacker must start entirely behind this imaginary line to claim a flank bonus .
- Rule 3: Side-clipping the base thickness from the Frontal Zone is strictly prohibited. Frontal charges must make flush contact with the front edge of the target.
5.0 The Gunsmoke Obscuration Mechanics (Historical & Tactical Rationale)
-
[NOTE-09-5.1] Historical Accounts of Black Powder Fog: The American Civil War was the last major conflict fought entirely with black powder. Primary source accounts from both Union and Confederate soldiers consistently describe the rapid onset of blinding sulfur smoke:
-
Antietam (The Cornfield): Major Rufus Dawes of the 6th Wisconsin wrote that after ten minutes of musketry, "the air was so thick with gray sulfur smoke that we could only see the red flashes of the enemy's muskets thirty paces ahead."
- Chickamauga: General D.H. Hill noted that in the dense woods along the creek, "the smoke hung in heavy banks under the foliage, completely concealing the battle lines of both armies."
6.0 Command Friction: Staff Pips vs. Activation Checks
-
[NOTE-09-6.1] The Psychological Failure of "Brigade Freeze": In systems that use all-or-nothing command activation rolls , rolling poorly on your first command check immediately terminates your turn for that brigade. In a 4-player game, a player who rolled badly on Turn 1 might sit for 45 minutes without moving a single miniature. This is the single most common reason casual players walk away from historical wargaming.
-
[NOTE-09-6.2] The "Fail-Forward" Staff Pool Solution:
Our command engine is built on a Fail-Forward Philosophy:
- Free Standard Orders : Every regiment in command (12.0") can always perform standard military maneuvers for free (advance, wheel 45^\circ, change formation, hold & fire). Nobody ever freezes on normal turns.
- Staff Pips as Extra Exertion : Staff Pips represent staff officers, couriers, and the personal presence of the Brigadier. Pips are required only for extraordinary tactical exertion: declaring bayonet assaults, ordering double-time marches, concentrating artillery batteries, or rallying disordered lines.
- Meaningful Resource Scarcity: Generating 1-3 pips per turn forces players to make agonized command choices: "I have 2 Staff Pips. Do I order an assault on the left, hasten my reserve regiment forward at double-time, or keep 1 pip in reserve to refuse my threatened right flank?"
- Pip Hoarding (Preparatory Orders): By allowing commanders to bank a maximum of 1 unspent Pip for their own next turn, we solved a massive math bottleneck. Reliable or Timid commanders can now slowly bank enough Pips to order a massive 4-regiment contiguous brigade assault, replicating the immense time it took historically to dress ranks and prepare a major push.
7.0 The 5 Reactive Windows (Engaging the Non-Active Player)
-
[NOTE-09-7.1] Why Side-by-Side (IGOUGO) with Reactive Windows? Many modern skirmish games use alternating unit activation (Player A moves 1 unit, Player B moves 1 unit). While great for 1-on-1 games with 5 figures, alternating activation completely falls apart in 4-player, multi-brigade battles:
-
It creates extreme analysis paralysis as players calculate sequential activation order across 20 units.
- It allows "double-activation exploits" at turn transitions.
-
It destroys the historical visual aesthetic of coordinated, simultaneous brigade battle lines advancing together.
-
[NOTE-09-7.2] The Interactive Solution:
By retaining the Side-by-Side framework but embedding Five Dedicated Reaction Windows , both sides are constantly playing simultaneously:
- When the active player moves carelessly across an open field, the defender interrupts with Opportunity Fire .
- When the active player declares an assault, the defender interrupts with a Closing Defensive Volley , a Hasty Flank Refusal , or a screaming Rebel Yell Counter-Charge .
- The non-active players never put their dice down, ensuring total engagement and intense tabletop drama on every single turn.
8.0 Summary of Key Design Constants
| Master Design Constants Summary | Value |
|---|---|
| Ground Scale | 1 inch = 25-30 yards |
| Time Scale | 1 Game Turn = 10-15 minutes of combat |
| Regimental Frontage | 1.0 inch per stand (~60–75 men in 2 ranks) |
| Average Regiment | 5 Stands = 5.0 inches width (~350 men) |
| Command Radius | 0-6" (Bugle), 6-12" (Courier), 12"+ (Distant) |
| Attrition Rate | 2 Unsaved Hits = Remove 1 Physical Stand |
| Suppression Trigger | 6s To-Hit = Discipline Save or Disorder |
| Gunsmoke Penalty | -1 To-Hit beyond 6.0 inches |
| Hesitant Threshold | 30% Total Brigade Stands Lost |
| Broken Threshold | 50% Total Brigade Stands Lost |
| Game Pacing Target | 6-8 Turns in 3.0-3.5 Hours |
Scenario: Heron's Creek
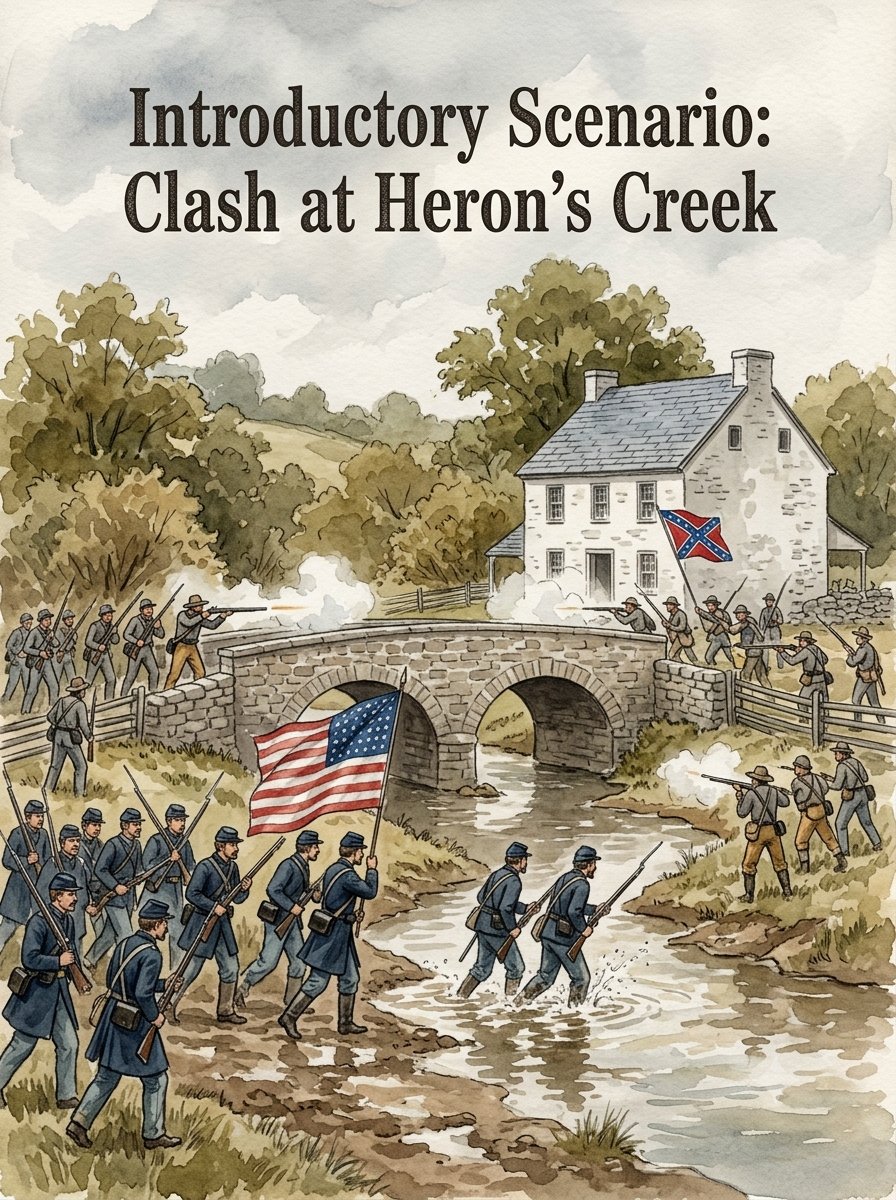
10. INTRODUCTORY SCENARIO: "CLASH AT HERON'S CREEK" (AUTUMN 1862)
1.0 Historical Background & Tactical Context
- [SCEN-10-1.1] Setting the Engagement: Late September 1862, Maryland Campaign. In the wake of major fighting along the Potomac, a Federal division advances to secure the vital road junction and stone bridge spanning Heron's Run Creek. Simultaneously, a Confederate rearguard division is ordered to seize the high ground and deny the crossing to cover the withdrawal of the army's wagon trains.
- [SCEN-10-1.2] Tactical Parameters:
- Table Dimensions: 4.0 ft (Deep) x 6.0 ft (Wide) (48" x 72").
- Scale: 1 inch = 25 to 30 yards ground scale; 15mm miniatures.
- Pacing & Duration: Exactly 7 Game Turns (Estimated playtime: 2.5 to 3.5 hours).
- Player Allocation: Designed for 4 Players (2 Union: Left Wing & Right Wing; 2 Confederate: Left Wing & Right Wing) or 2 Players head-to-head.
2.0 Battlefield Map & Terrain Specifications
[UNION DEPLOYMENT ZONE: South Edge (Within 6.0" of Table Edge)]
- [SCEN-10-2.1] Master Terrain Breakdown Table:
| Terrain Feature | Location on Table | Movement Effect | Cover Save Provided | Tactical / Line of Sight (LOS) Impact |
|---|---|---|---|---|
| Heron's Run Creek | Bisects table East-to-West (y = 24") | -2.0" Penalty | None | Halts charges across waterbed . |
| The Stone Bridge | Center of Creek (x = 36", y = 24") | Road Speed (12") | None | Primary Objective (3 VP). Bottleneck defile. |
| The Shallow Ford | East of Bridge (x = 52", y = 24") | Normal Speed | None | Allows Line of Battle to cross without disorder. |
| Miller's Farm | North-East Sector (x = 50"–64", y = 34"–42") | -2.0" entering | Heavy (4+) | Objective (2 VP). Masonry walls grant +2 Melee. |
| Oak Ridge Woods | North-West Sector (x = 8"–24", y = 32"–44") | 4.0" Max Speed | Light (5+) | Blocks LOS beyond 6.0" . |
| The Cornfield | South-West Sector (x = 12"–28", y = 8"–18") | -2.0" Penalty | Light (5+) | Dense stalks: Blocks LOS beyond 4.0". |
| The Low Ridge | South-East Sector (x = 48"–66", y = 8"–16") | Normal | None | Objective (2 VP). Level 1 Crest: Downhill +1 Melee. |
| Split-Rail Fences | Bordering Cornfield and Roads | -2.0" to cross | Light (5+) | Linear obstacle; grants 5+ save against frontal fire. |
3.0 Scenario Rules & Victory Objectives
- [SCEN-10-3.1] Deployment Protocol:
- Confederate Side (North): Deploys first, entirely within 6.0 inches of the North table edge.
- Union Side (South): Deploys second, entirely within 6.0 inches of the South table edge.
- First Turn Initiative: The Union player is designated the Active Side on Turn 1.
- [SCEN-10-3.2] Game Length: The battle concludes at the end of Turn 7 (Phase 5 clean-up).
- [SCEN-10-3.3] Victory Point Scoring: At the end of Turn 7, both sides calculate total Victory Points (VP):
| Victory Point Objective | Condition | VP Award |
|---|---|---|
| The Stone Bridge (Primary) | Held by controlling bridge and 4" area | 3 VP |
| Miller's Farmstead (Secondary) | Held by garrisoning farm or walls | 2 VP |
| The Low Ridge Crest (Secondary) | Held by occupying Level 1 crestline | 2 VP |
| Brigade Casualty Awards | Forcing Enemy Brigade into Hesitant State | 1 VP each |
| Brigade Casualty Awards | Forcing Enemy Brigade into Broken State | 3 VP each |
- [SCEN-10-3.4] Determining the Outcome:
- Major Victory: Lead by +4 or more VP.
- Minor Victory: Lead by +1 to +3 VP.
- Draw / Inconclusive: Equal VP totals.
4.0 Union Order of Battle (Army of the Potomac)
Total Force Strength: 8 Infantry Regiments, 2 Artillery Batteries (42 Total Stands / ~2,800 men).
Union 1st Brigade ("Western Volunteers") — Left Wing
- Brigade Commander: Brig. Gen. Marcus Vance
- Leadership Profile: Aggressive / Brilliant .
- Staff Pip Roll: 1D3 + 1 Pips (2-4 Pips per turn).
- Brigade Stand Strength: 21 Total Stands.
- Faltering Thresholds: Hesitant at 7 Stands Lost (30%) | Broken at 11 Stands Lost (50%).
text
┐  2nd WISCONSIN INFANTRY REGIMENT (Iron Brigade)    Starting Stands: 6 Stands (Large)  Troop Quality: Veteran (Discipline Check: 3+)   Armament: Rifled Muskets (.58)  Health Track: Fresh: 6–5 | Worn: 4–3 | Spent: 2   Special Trait: IRON DISCIPLINE : Ignores first natural 6.0" Disorder result each   game turn. Rallies naturally on a 3+ on 1D6.  ┘
text
┐  6th WISCONSIN INFANTRY REGIMENT    Starting Stands: 5 Stands (Standard)  Troop Quality: Regular (Discipline Check: 4+)   Armament: Rifled Muskets (.58)  Health Track: Fresh: 5–4 | Worn: 3 | Spent: 2   Special Trait: STEADY : +1 to Discipline Checks caused by Closing Defensive   Volleys. May re-roll one failed cover save per game.  ┘
text
┐  19th INDIANA INFANTRY REGIMENT    Starting Stands: 5 Stands (Standard)  Troop Quality: Regular (Discipline Check: 4+)   Armament: Rifled Muskets (.58)  Health Track: Fresh: 5–4 | Worn: 3 | Spent: 2   Special Trait: Standard Veteran Line . Baseline infantry.  ┘
text
┐  7th WISCONSIN INFANTRY REGIMENT    Starting Stands: 4 Stands (Small)  Troop Quality: Regular (Discipline Check: 4+)   Armament: Smoothbore Muskets  Health Track: Fresh: 4 | Worn: 3 | Spent: 2   Special Trait: BUCK & BALL SPECIALISTS : Hits on 3+ at Short Range (0–6").   Incapable of firing beyond 14.0".  ┘
text
┐  BATTERY B, 4th US ARTILLERY    Starting Stands: 1 Stand (Section)  Troop Quality: Veteran (Discipline Check: 3+)   Armament: 12-pdr Napoleons (M1857 Smoothbore Gun-Howitzer)   Combat Profile: Canister (0–6"): 2+ Hit | Rolls 4D6 | Auto-Disorder   Medium (6–18"): 4+ Hit | Rolls 2D6 | Solid Shot / Shell   Long (18–30"): 5+ Hit | Rolls 1D6 | Lobbed Solid Shot   Special Trait: CANISTER SPECIALISTS: Re-roll 1 missed die in canister range.  ┘
Union 2nd Brigade ("Keystone Brigade") — Right Wing
- Brigade Commander: Brig. Gen. Arthur Potts
- Leadership Profile: Reliable / Standard .
- Staff Pip Roll: 1D3 Pips (1-3 Pips per turn).
- Brigade Stand Strength: 21 Total Stands.
- Faltering Thresholds: Hesitant at 7 Stands Lost (30%) | Broken at 11 Stands Lost (50%).
text
┐  143rd PENNSYLVANIA INFANTRY REGIMENT    Starting Stands: 6 Stands (Large)  Troop Quality: Regular (Discipline Check: 4+)   Armament: Rifled Muskets (.58)  Health Track: Fresh: 6–5 | Worn: 4–3 | Spent: 2   Special Trait: Standard Full-Strength Line . Baseline infantry.  ┘
text
┐  149th PENNSYLVANIA INFANTRY REGIMENT ("Bucktails")    Starting Stands: 5 Stands (Standard)  Troop Quality: Veteran (Discipline Check: 3+)   Armament: Rifled Muskets (.58)  Health Track: Fresh: 5–4 | Worn: 3 | Spent: 2   Special Trait: BUCKTAIL SKIRMISHERS : May detach 1 stand as a Skirmish Screen   for free without expending half-move. Re-roll 1 missed shot at 6"–14".  ┘
text
┐  150th PENNSYLVANIA INFANTRY REGIMENT    Starting Stands: 5 Stands (Standard)  Troop Quality: Regular (Discipline Check: 4+)   Armament: Rifled Muskets (.58)  Health Track: Fresh: 5–4 | Worn: 3 | Spent: 2   Special Trait: Standard Line Regiment .  ┘
text
┐  121st PENNSYLVANIA INFANTRY REGIMENT    Starting Stands: 4 Stands (Small)  Troop Quality: Green (Discipline Check: 5+)   Armament: Rifled Muskets (.58)  Health Track: Fresh: 4 | Worn: 3 | Spent: 2   Special Trait: SEEN THE ELEPHANT : Must pass a 5+ Discipline Check the first   time it sustains fire. Failure inflicts instant Disorder.  ┘
┐  COOPER'S BATTERY B, 1st PENNSYLVANIA ARTILLERY    Starting Stands: 1 Stand (Section)  Troop Quality: Regular (Discipline Check: 4+)   Armament: 3-inch Ordnance Rifles (Wrought Iron)   Combat Profile: Canister (0–6"): 3+ Hit | Rolls 3D6 | Standard Canister   Medium (6–20"): 4+ Hit | Rolls 2D6 | High Precision Shell   Long (20–36"): 4+ Hit | Rolls 2D6 | Long Range Precision Sniper   Special Trait: LONG RANGE COUNTER-BATTERY: Hits on 4+ out to 36.0" on elevated terrain.  ┘
5.0 Confederate Order of Battle (Army of Northern Virginia)
Total Force Strength: 8 Infantry Regiments, 2 Artillery Batteries (41 Total Stands / ~2,750 men).
Confederate 1st Brigade ("Stonewall Veterans") — Left Wing
- Brigade Commander: Brig. Gen. Richard Garnett
- Leadership Profile: Aggressive / Brilliant .
- Staff Pip Roll: 1D3 + 1 Pips (2-4 Pips per turn).
- Brigade Stand Strength: 21 Total Stands.
- Faltering Thresholds: Hesitant at 7 Stands Lost (30%) | Broken at 11 Stands Lost (50%).
text
┐  4th VIRGINIA INFANTRY REGIMENT (Stonewall Brigade)    Starting Stands: 6 Stands (Large)  Troop Quality: Veteran (Discipline Check: 3+)   Armament: Rifled Muskets (.58)  Health Track: Fresh: 6–5 | Worn: 4–3 | Spent: 2   Special Trait: REBEL YELL : +1 to Opposed Melee Rolls when charging or   counter-charging. Forces defender Discipline Check on contact.  ┘
text
┐  2nd VIRGINIA INFANTRY REGIMENT    Starting Stands: 5 Stands (Standard)  Troop Quality: Veteran (Discipline Check: 3+)   Armament: Rifled Muskets (.58)  Health Track: Fresh: 5–4 | Worn: 3 | Spent: 2   Special Trait: REBEL YELL : +1 to Melee Rolls in Assaults.  ┘
text
┐  5th VIRGINIA INFANTRY REGIMENT    Starting Stands: 5 Stands (Standard)  Troop Quality: Regular (Discipline Check: 4+)   Armament: Smoothbore Muskets  Health Track: Fresh: 5–4 | Worn: 3 | Spent: 2   Special Traits: REBEL YELL + BUCK & BALL : Hits on 3+ at   Short Range (0–6"). +1 Melee when assaulting.  ┘
text
┐  33rd VIRGINIA INFANTRY REGIMENT    Starting Stands: 4 Stands (Small)  Troop Quality: Regular (Discipline Check: 4+)   Armament: Smoothbore Muskets  Health Track: Fresh: 4 | Worn: 3 | Spent: 2   Special Traits: REBEL YELL + BUCK & BALL .  ┘
┐  ROCKBRIDGE ARTILLERY    Starting Stands: 1 Stand (Section)  Troop Quality: Veteran (Discipline Check: 3+)   Armament: 10-pdr Parrott Rifles (Cast Iron w/ Wrought Band)   Combat Profile: Canister (0–6"): 3+ Hit | Rolls 3D6 | Standard Canister   Medium (6–20"): 4+ Hit | Rolls 2D6 | Heavy Rifled Shell   Long (20–36"): 4+ Hit | Rolls 2D6 | High-Velocity Solid Shot   Special Trait: COUNTER-BATTERY EXPERTS: +1 to hit enemy unlimbered batteries at >14.0".  ┘
Confederate 2nd Brigade ("Carolina Brigade") — Right Wing
- Brigade Commander: Brig. Gen. Lawrence Branch
- Leadership Profile: Reliable / Standard .
- Staff Pip Roll: 1D3 Pips (1-3 Pips per turn).
- Brigade Stand Strength: 20 Total Stands.
- Faltering Thresholds: Hesitant at 6.0" Stands Lost (30%) | Broken at 10 Stands Lost (50%).
text
┐  7th NORTH CAROLINA INFANTRY REGIMENT    Starting Stands: 5 Stands (Standard)  Troop Quality: Veteran (Discipline Check: 3+)   Armament: Rifled Muskets (.58)  Health Track: Fresh: 5–4 | Worn: 3 | Spent: 2   Special Trait: SHARPSHOOTERS : May re-roll one missed shooting die at Medium   Range (6"–14"). REBEL YELL (+1 Melee).  ┘
text
┐  18th NORTH CAROLINA INFANTRY REGIMENT    Starting Stands: 5 Stands (Standard)  Troop Quality: Regular (Discipline Check: 4+)   Armament: Rifled Muskets (.58)  Health Track: Fresh: 5–4 | Worn: 3 | Spent: 2   Special Trait: REBEL YELL . Standard disciplined Confederate line.  ┘
text
┐  28th NORTH CAROLINA INFANTRY REGIMENT    Starting Stands: 5 Stands (Standard)  Troop Quality: Regular (Discipline Check: 4+)   Armament: Rifled Muskets (.58)  Health Track: Fresh: 5–4 | Worn: 3 | Spent: 2   Special Trait: REBEL YELL . Standard line regiment.  ┘
text
┐  37th NORTH CAROLINA INFANTRY REGIMENT    Starting Stands: 4 Stands (Small)  Troop Quality: Green (Discipline Check: 5+)   Armament: Smoothbore Muskets  Health Track: Fresh: 4 | Worn: 3 | Spent: 2   Special Traits: SEEN THE ELEPHANT + BUCK & BALL +   REBEL YELL .  ┘
text
┐  FLUVANNA ARTILLERY    Starting Stands: 1 Stand (Section)  Troop Quality: Regular (Discipline Check: 4+)   Armament: 12-pdr Napoleons (Smoothbore Gun-Howitzer)   Combat Profile: Canister (0–6"): 2+ Hit | Rolls 4D6 | Auto-Disorder   Medium (6–18"): 4+ Hit | Rolls 2D6 | Solid Shot / Shell   Long (18–30"): 5+ Hit | Rolls 1D6 | Spherical Case / Solid Shot   Special Trait: POINT-BLANK DEFENSE: Auto-disorders any charging unit within 6.0".  ┘
6.0 Four-Player Command Assignments & Play Pacing
| 4-Player Table Protocol | Left Wing | Right Wing |
|---|---|---|
| Confederate Side (North Edge) | Player A: Commands 1st Brigade (Garnett - Stonewall) | Player B: Commands 2nd Brigade (Branch - Carolinas) |
| Union Side (South Edge) | Player A: Commands 1st Brigade (Vance - Western Vols) | Player B: Commands 2nd Brigade (Potts - Keystones) |
- [SCEN-10-6.1] Pacing Guidelines for 3-Hour Completion:
- Turns 1–2 (Maneuver & Approach): 20 minutes per turn. Both sides advance rapidly toward the creek and high ground.
- Turns 3–5 (The Clash at the Creek & Farm): 30 minutes per turn. Resolving closing volleys, firefights across Heron's Run, and assaults on Miller's Farm.
- Turns 6.0"–7 (Climax & Collapse): 25 minutes per turn. Brigade faltering thresholds trigger; decisive bayonet charges and final objective control.
- Total Playtime: ~ 180 minutes (3.0 hours).
7.0 Tactical Advice & Scenario Designer Commentary
Tactical Briefing for Union Commanders
Your primary goal is to force a crossing at the Stone Bridge and Shallow Ford while using the Low Ridge to anchor your right flank. * Deploy Cooper’s Battery B (3-inch Rifles) on the Low Ridge immediately; its long range (36") allows plunging counter-battery fire against the Rockbridge Artillery. * Advance the Iron Brigade (2nd Wisconsin) directly toward the Bridge. Their Iron Discipline trait ensures they will not stall easily under artillery fire. * Watch out for the Confederate smoothbore units (5th & 33rd Virginia) lurking near the woods—do not let them close to within 6.0" where their Buck & Ball hits on 3+.
Tactical Briefing for Confederate Commanders
You are defending strong natural features: Oak Ridge Woods on your right and Miller’s Farm on your left. * Rush the 7th & 18th North Carolina into Miller’s Farm. The stone walls provide Heavy Cover (4+ save) and +2 in Melee, making the farmstead virtually impregnable to frontal assault. * Place the Fluvanna Artillery (Napoleons) covering the Stone Bridge defile. Any Federal unit attempting to cross the bridge into canister range (6.0") will face 4D6 hitting on 2+ with automatic Disorder.
- Keep General Garnett's Stonewall Brigade in reserve behind the creek to execute a devastating **Rebel Yell Counter-Charge ** when the Federals stumble crossing the water.
Quick Reference Sheet (QRS)
QUICK REFERENCE SHEET — PAGE 1
Master Sequence, Command, Maneuver, Terrain & Defensive Reactions
1.0 Master Turn Sequence of Play
2.0 Command Structure & Staff Pip Allocation
- Command Radius (4-Tiers): Measured from any edge of Brigadier to regiment's center-front.
- 0–6" (Bugle/Acoustic): 1 Pip, ignores impassable terrain.
- 6–12" (Standard Courier): 1 Pip, must trace path around impassable terrain.
- 12–24" (Distant Courier / Out of Command): 2 Pips, limited free moves, -1 Discipline.
- >24" (Out of Communication): Cannot receive Pips at all.
| Brigadier Rating | Staff Pip Roll | Standard (Free) Orders (In Radius) | Staff Pip Special Menu (Cost: 1 Pip, or 2 Pips if 12–24") |
|---|---|---|---|
| Aggressive / Brilliant | 1D3 + 1 Pips (2–4) | • Advance in Line (6") or Column (8") | • Assault: 1 Pip/Reg, 2 Pips for contiguous line . |
| Reliable / Standard | 1D3 Pips (1–3) | • Change Formation / Wheel up to 45^\circ | • Double-Time: +3.0" to advancing infantry . |
| Timid / Political | 1D3 / 2 (Up) (1–2) | • Hold Position & Fire in Phase 3 | • Rally Line: Instantly remove 1 Disorder marker . |
| Division Commander | +1 Bonus Pip / Turn | • Limber or Unlimber Artillery Battery | • Battery Focus: Combine up to 3 sections . |
| Attached Brigadier | +1 Melee / +1 Disc. | • Skirmish Screen Recall / Dress Ranks | • Reserve Pip: Save for opponent's turn reactions . |
| Preparatory Order | N/A | • (Hoarding) | • Save 1 Pip at turn end for next turn . |
| Oblique (Sidestep) | 0 Pips | • Free Lateral Move | • Move 3" sideways to close gaps in line . |
| Open Order (1864+) | 1 Pip/Reg | • Free Pivot 360 | • +1 Cover Save; 6" Open/5" Woods; Auto-loses Melee . |
| Wave Assault (Mass) | 2 Pips | N/A | • Stack 2+ reg; Rear pushes thru stalled front; No Shooting . |
3.0 Master Formations, Movement Rates & Terrain Penalties
| Unit Type & Formation | Open Ground | Woods / Rough | Road / Trail | Obstacle Crossing | Formation / Tactical Characteristics |
|---|---|---|---|---|---|
| Infantry Line of Battle | 6.0" | 4.0" | 6.0" | -2.0" | Full firing pool (1D6/stand); max 45^\circ wheel; baseline line . |
| Infantry Open Order | 6.0" | 5.0" | 6.0" | -0.0" | +1 Cover Save; -1 To Hit; Auto-loses Melee . |
| Infantry Assault Column | 8.0" | 5.0" | 9.0" | -2.0" | Front rank only fires (2D6); +1 Melee; -1 save vs. Canister . |
| Infantry Road Column | 10.0" | 6.0" | 12.0" | -1.0" | Rapid road march; cannot fire/charge; -2 saves if attacked . |
| Mounted Cavalry (Line) | 9.0" | 5.0" | 14.0" | -3.0" | +1 Shock vs. open infantry; 12.0" charge; pistol/carbine <= 6.0"" . |
| Dismounted Cav Skirmish | 5.0" | 4.0" | 6.0" | -1.0" | 1 in 4 Horse Holder deduction; counts as Light Cover in open . |
| Artillery (Limbered) | 8.0" | 3.0" | 12.0" | -4.0" | Cannot fire; takes full turn to unlimber (Horse Art: half-move) . |
| Artillery (Prolonge / Hand) | 2.0" | 0.0" | 2.0" | Impassable | May pivot up to 45^\circ and fire in same turn . |
- Terrain LOS Limits: Dense Woods (Blocks >3"); Cornfields (Blocks >4"); Orchards (Blocks >6"); Reverse Slopes (Dead Ground, Blocks all LOS from lower ground, ).
4.0 The 5 Defensive Reaction Windows
| Reaction Name | Primary Trigger | Cost / Requirement | Tactical & Combat Resolution |
|---|---|---|---|
| 1. Closing Volley | Enemy charges within 4.0" | Free (Undisordered & Unsmoked) | Point-blank volley (1D6/stand). If 1+ hit or Nat 6.0" (Disorder), charger rolls Discipline Check (4+) or stalls 2.0" away Disordered. Place Smoke. |
| 2. Opportunity Fire | Enemy crosses arc (<8.0") | Free (Unengaged & Unsmoked) | Pauses enemy move mid-stride; fires full volley; places Smoke; firer is marked as fired for next turn. |
| 3. Skirmish Evade | Formed enemy closes within 6.0" | Free | Screen makes immediate 4"–6" escape move through friendly lines without disordering parent unit. If they do not evade, they are automatically Overrun and Destroyed. |
| 4. Refuse Flank | Enemy enters flank (45^\circ–90^\circ) | 1 Reserved Pip (or 4+ Check) | Outer 1–2 stands wheel 45^\circ back; cancels enemy +1 enfilade to-hit and +2 flank melee shock bonuses. |
| 5. Counter-Charge | Enemy declares charge in open | 1 Reserved Pip (Rebel Yell/Cav) | Defender surges 2"–3" forward; negates attacker charge momentum/downhill; applies +1 shock trait. |
---
QUICK REFERENCE SHEET — PAGE 2
Combat, Gunsmoke, Opposed Melee, Morale & Casualties
1.0 Master Ranged Weapon Profiles Matrix
Firing Eligibility: Must have chosen "Hold Position" in Phase 2 (Units that Advanced/Double-Timed cannot fire). 45^\circ forward arc. Friendly Fire: Cannot fire through formed friendly lines. May fire through friendly Skirmish Screens at -1 ext{ To-Hit}. Artillery Overhead Fire: Level 1+ artillery may fire Shell/Solid over Level 0 friendlies IF friendly is >6 ext{"} from muzzle AND >4 ext{"} from target. No Canister overhead. Dice Pool: Roll 1D6 per stand firing in front rank (Artillery: 2D6 per section stand).
Suppression Rule: A Natural 6.0" (at 0–6") or Two 6s (at >6") acts as a Shock Trigger. Defender must pass a Discipline Save or take a Disorder Marker. Modifiers: Fresh (+1), Cover (+1), Spent (-1), Crossfire (-1) .
| Weapon Classification | Point-Blank (0"-4.0") (Art: Double Canister) | Medium (4.1"-8.0") (Art: Std Canister) | Long (8.1"-16.0") (Art: Shell/Solid) | Special Weapon Trait & Tactical Rules |
|---|---|---|---|---|
| Smoothbore Musket (.69 Buck & Ball) | 4+ (2 Dice) | 4+ (1 Die) | — | Buck & Ball: Devastating at point-blank; incapable of fire beyond 200 yards. |
| Rifled Musket (Springfield / Enfield) | 4+ (1 Die) | 4+ (1 Die) | 5+ (1 Die) | Universal Standard: Reliable, accurate firepower across all tactical bands. |
| Magazine Repeater (Spencer / Henry) | 4+ (3 Dice) | 5+ (1 Die) | — | Rapid Fire & Prone: 3 dice at PB. Skirmishers & Dismounted Cavalry gain Light Cover (5+) in open ground. |
| Single-Shot Breechloader (Sharps) | 4+ (1 Die) | 4+ (1 Die) | 4+ (1 Die) | Prone Reload: No long-range penalty. Skirmishers & Dismounted Cavalry gain Light Cover (5+) in open ground. |
| 12-pdr Napoleon (Smoothbore Gun) | 2+ (3 Dice, No Saves) | 3+ (2 Dice, 4.1"-10") | 4+ (>10") | Canister Monster: Double canister ignores light cover saves at Point-Blank. |
| 3-inch Ordnance / 10-pdr Parrott | 3+ (3 Dice, No Saves) | 4+ (2 Dice, 4.1"-10") | 4+ (>10") | Precision Shell: High velocity; superior long-range counter-battery sniper. |
2.0 Cover Saves, Casualties & Gunsmoke Rules
- Cover Saves (Defender rolls 1D6 per hit taken):
- Open Ground / Pasture: No Save (All hits count).
- Light Cover (Fences, Woods, Cornfields, Orchards, Skirmishers): Saves on 5+.
- Heavy Cover (Stone Walls, Earthworks, Sunken Roads, Masonry Farmsteads): Saves on 4+.
- Casualty Stand Removal: Every 2 Unsaved Hits = Remove 1 Physical Stand (60–75 men). (Track 1 odd hit on micro-dice).
- Plunging Fire & Overshoot: A Natural 6 rolled to-hit affects a secondary unit within 4.0" behind the target:
- Infantry: 1 stray hit max.
- Artillery (>8.0"): 1 automatic Unsaved Hit.
- Artillery Canister (<8.0"): 1 stray hit for every Natural 6.
- Gunsmoke Obscuration :
- Place Smoke Marker against front base of stationary firing unit. Line of sight through/out of smoke beyond 6.0" suffers -1 to-hit.
- Exception: Skirmishers & Dismounted Cavalry do NOT produce smoke markers.
- Point-blank fire (0–6") ignores smoke. Smoke is removed when the unit moves or spends a turn holding fire.
3.0 Opposed Melee / Shock Resolution (Phase 4)
\mathbf{Shock Score} = 1D6 + Engaged Stands + Tactical Modifiers
| Tactical Shock Modifier | Value | Applied To | Mandatory Condition |
|---|---|---|---|
| Fresh Regimental Health | +1 | Either | >75% original stands remaining in unit . |
| Spent Regimental Health | -1 | Either | <35% original stands remaining in unit . |
| Charging Momentum | +1 | Attacker | Advanced >= 3.0" across open ground into contact . |
| Assault Column Formation | +1 | Attacker | Formed 2 stands wide x 2+ deep . |
| Confederate Rebel Yell | +1 | Attacker | Unit possesses Rebel Yell trait . |
| Open Order / Skirmish | AUTO-LOSE | Defender | Open Order units instantly lose melee if charged . |
| Mounted Cavalry Shock | +1 | Cavalry | Mounted charge against infantry in open ground . |
| Defending Heavy Fortifications | +2 | Defender | Touching Stone Wall, Earthworks, or Sunken Road . |
| Defending Light Cover / Crest | +1 | Defender | Touching Split-Rail Fence or deployed on Hill Crest . |
| Enfilade / Flank / Rear Contact | +2 | Attacker | Contacted behind target's 90^\circ flank line . |
| Unit is Disordered | -2 | Either | Unit possesses a Disorder Marker . |
| Brigadier General Attached | +1 | Either | Brigadier attached to Color Stand . |
- Melee Outcome (Margin of Defeat):
- Victor: Holds ground; takes 0 mandatory losses; makes free 2.0" consolidation move.
- Margin 0 (Tie): Both take 1 Hit, gain Disorder, remain locked.
- Margin 1 - 2 (Repulse): Loser takes 1 Hit, retreats 3.0" Disordered.
- Margin 3 - 4 (Bloody Rout): Loser takes 1 Full Stand Loss (2 Hits), retreats 6.0" Disordered.
- Margin 5+ (Overrun): Loser takes 2 Full Stand Losses (4 Hits), retreats 9.0" Disordered.
- Double Disorder Clause: If Loser is already Disordered, take 1 extra Micro-Hit.
4.0 Discipline Checks, Morale & Brigade Faltering
- Discipline Checks (1D6): Veteran (3+) | Regular (4+) | Green (5+) .
- Regimental Shatter Threshold: Any regiment reduced to 1 stand remaining immediately shatters and is removed .
- The Brigade Faltering Clock (Tracked via D6 on Brigadier Base, ):
- Hesitant Threshold (30% Total Brigade Stands Lost): Cannot charge/assault; no double-time; -1 to all shooting dice; -1 to Discipline Checks.
- Broken / Whipped Threshold (50% Total Brigade Stands Lost): Complete moral collapse; all units gain Disorder and must spend all future turns executing full moves (6") toward friendly table edge.
5.0 Leader Casualties & Historical Traits Reference
- Leader Risk Trigger: If attached Brigadier's regiment suffers a stand loss or a natural 6.0" to-hit, roll 1D6 :
- 1–3: Unhurt / Close Call.
- 4: Lightly Wounded (-1 Staff Pip per turn).
- 5: Severely Wounded / Captured (General removed; replacement uses Timid profile 1D3/2).
- 6: Killed in Action (KIA) (General removed; unit gains instant Disorder; all remaining pips lost).
- Army Traits:
- Rebel Yell: +1 Melee when charging/counter-charging; forces enemy discipline check .
- Iron Discipline: Ignores first natural 6.0" Disorder result each turn; rallies on 3+ .
- Seen the Elephant: Must pass 5+ Discipline Check first time taking fire or become Disordered .
- Steady: +1 to Discipline Checks from Closing Volleys; re-roll 1 failed cover save per game .
- Bucktails / Sharpshooters: Re-roll 1 missed shooting die at Medium Range (6–14") .
Rosters & Markers
12. BRIGADE ROSTERS, PLAY-AIDS & PRINTABLE TOKEN TEMPLATES
1.0 Roster Architecture & Play-Aid Design
- [ROST-12-1.1] Zero-Bookkeeping Design Principle: This ruleset is engineered to minimize in-game paperwork. While physical stand removal handles regimental losses and miniature cotton puffs represent Disorder and Gunsmoke, these printable roster cards provide a clean, organized command station for each player.
- [ROST-12-1.2] Universal Formats:
- Brigade Command Cards (Quarter-Page Size): Kept next to each player's section of the table or mounted on 4x6 inch index cards. Tracks Brigadier quality, Staff Pip reserves, and the Brigade Faltering Clock.
- Regimental Roster Strips: Optional modular trackers for scenarios with complex traits, specialized weaponry, or ammunition tracking.
- [ROST-12-1.3] Marker Dimensions: All printable tokens are designed for standard 0.75" to 1.0" (20–25mm) round or square punch-outs, compatible with standard craft epoxy stickers, wooden craft discs, or 3D-printed bases.
2.0 Universal Brigade Command Card Template
- [ROST-12-2.1] Brigade Command Card Format: Each player uses one card per brigade. Photocopy or print four cards per sheet on cardstock.
| Brigade Command Roster Field | Value |
|---|---|
| Commander / Rank | [Brig. Gen. / Col.] |
| Leadership Rating | Aggressive (1D3+1) / Reliable (1D3) / Timid (1D3/2) |
| Command Radius / Division | 12.0 Inches / Division Name |
| Staff Pips | Tracker 1-4, Reserved Pip |
| Faltering Clock | Total Stands, Hesitant Threshold (30%), Broken (50%) |
| Regiments | Name, Troop Quality, Weapon, Traits, Stand Tracker, Health Track |
3.0 Pre-Filled Printable Scenario Cards: "Clash at Heron's Creek"
Union Command Cards
Confederate Command Cards
4.0 Printable Markers & Status Token Cutouts
- [ROST-12-4.1] Token Printing Instructions: Print this page onto 110 lb cardstock or sticker paper. Cut along dotted borders. Tokens are scaled to standard 0.75" to 1.0" (20–25mm) dimensions.
| Token Type | Effect |
|---|---|
| Disordered | -2" Move, -1 Shoot, -2 Melee |
| Gunsmoke | -1 To-Hit Beyond 6" |
| Hesitant | No Charge, -1 Shoot |
| Broken | Full Retreat To Edge |
| Low Ammo | -1 To-Hit Until Supply |
| Reserved Staff Pip | Reactions Only |
| Opp. Fire Fired | Cannot Fire in Phase 3 |
| Objective Control | VP Area Control |
5.0 Tactical Play-Aid: Range & Measuring Ruler
- [ROST-12-5.1] The Tactical Range Stick Template: Cut out a 1.0" x 12.0" strip of rigid plastic or thick cardstock and mark the following operational bands:
| Range Band | Description |
|---|---|
| 0" - 4.0" | Point-Blank, Canister, Buck & Ball. Reaction B Closing Fire Trigger Line. |
| 0" - 6.0" | Short Range, Canister Zone (Smoke Ignored). |
| 0" - 12.0" | Command Radius / Staff Allocation (In-Command Bubble). |
| 6.0" - 14.0" | Medium Range / Musketry Limit (Springfield/Enfield). |
| 14.0" - 20.0" | Long Range. |
6.0 Tabletop Marker Guidelines & Crafting Recommendations
- [ROST-12-6.1] Gunsmoke Markers (3D Alternative):
- While card tokens are functional, using 1.0-inch tufts of gray and white polyester fiberfill (pillow stuffing) glued to 1-inch metal washers creates a dramatic 3D visual on the table.
- Placing a puff of smoke in front of a regiment instantly identifies it as having fired, reminds players of the -1 obscuration penalty, and visually turns the tabletop into a historical Civil War battlefield.
- [ROST-12-6.2] Tracking Odd Micro-Hits:
- Rather than using paper sheets, keep a supply of 5mm or 7mm mini colored D6s.
- When a regiment sustains an odd unsaved hit (1 hit), place a micro-dice showing '1' directly behind the Color Stand. When the second hit is sustained, remove the physical stand and remove the micro-dice.
- [ROST-12-6.3] Brigadier Command Base Setup:
- Mount your Brigadier on a 1.0" x 1.0" or round base with two small indentations or magnetic recesses:
- One standard colored D6 to track Current Available Staff Pips (1 to 4).
-
One small red D6 to track Cumulative Brigade Stand Losses for the Brigade Faltering Clock.
-
This completely eliminates the need for off-board roster sheets during play, allowing players to assess the command and morale status of any brigade on the table at a single glance.
Examples of Play
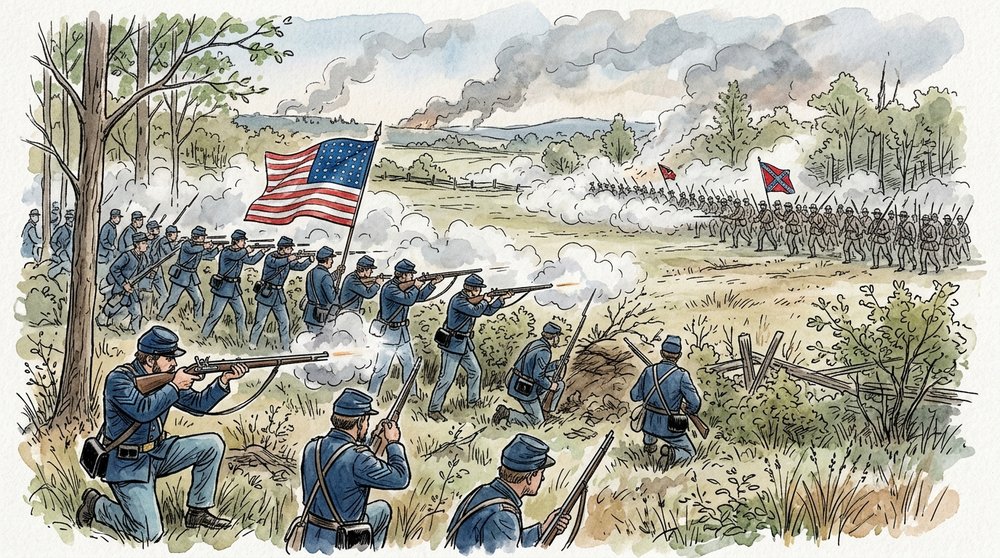
15. EXAMPLES OF PLAY
This section provides detailed narrative examples of the core mechanics in action. Each example establishes a tactical situation and walks through the relevant rule interactions.
1. Staff Pips and Command Radius
Situation: A Brigadier General must maneuver their brigade across an open field, but one regiment has strayed far from the command staff, and another needs to push hard. Relevant Rules: Command Measurement, Staff Pips, Double-Time
Example:
General Branch rolls a 2 for his Staff Pips this turn.
* The 7th North Carolina is currently 6.0" away from Branch (Tier 2: Standard Courier Range). Branch spends 1 Pip to issue them a Double-Time order. They move their base 6.0" allowance, plus an additional 1D6 inches.
* The 18th North Carolina is 14.0" away (Tier 3: Distant Courier Range). Branch has only 1 Pip remaining, but Tier 3 requires 2 Pips for special orders. The 18th is considered Out of Command. They may only execute a free, straight-ahead move and cannot deploy, wheel, or charge this turn.
2. Defensive Reactions & Opportunity Fire
Situation: A Confederate column attempts to march quickly past a deployed Union line, exposing its flank. The Union player interrupts their movement to punish the maneuver. Relevant Rules: Opportunity Fire, Flank Enfilade
Example:
The 5th Virginia is in Road Column and begins a 12.0" march across the front of the 14th Brooklyn (who are un-activated and deployed in Line).
* At the 3.0" mark of the march, the 5th Virginia crosses into the 14th Brooklyn's 45-degree firing arc.
* The Union player halts the Confederate movement and declares Reaction 2: Opportunity Fire.
* The 14th Brooklyn fires its volley. Because the 5th Virginia is in Road Column, the Brooklyn regiment claims the Flank Enfilade bonus (+1D6 bonus die).
* After casualties and suppression are resolved, the 5th Virginia (if they did not fail a Discipline Check) may complete the remaining 9.0" of their march.
3. The Mechanics of the Assault
Situation: A Union regiment launches a bayonet charge against a defending Confederate line holding a stone wall. Relevant Rules: Assault Declaration, Closing Defensive Volley, Shock Melee
Example:
The 2nd Wisconsin (Iron Brigade) declares an assault against the 26th North Carolina, who are defending a stone wall 8.0" away.
* The Charge: The Union player spends 1 Staff Pip. The 2nd Wisconsin advances toward the wall.
* The Interruption: At the 4.0" mark, the Confederate player halts the advance and declares Reaction 1: Closing Defensive Volley. They fire with a +1 bonus (Target in Open Ground) while claiming Heavy Cover (+2 Discipline) from the wall.
* The Impact: The 2nd Wisconsin takes 1 casualty and a Disorder marker, but passes their Discipline check and survives the volley. They complete the final 4.0" of their charge, moving into base-to-base contact.
* The Melee: Because the 26th North Carolina is defending an obstacle, the 2nd Wisconsin suffers a -1 modifier to their Shock resolution roll. Both sides roll 1D6 and apply their modifiers; the loser is driven back 4.0" and marked Hesitant.
4. Morale and the Rally Line
Situation: A brigade has taken severe casualties over several turns and approaches its breaking point. Relevant Rules: Brigade Morale Exhaustion, The Rally Line
Example:
The Irish Brigade has lost 4 physical stands throughout the battle. The Union player tracks this by turning the casualty die on the Brigadier's base to 4.
* During the next volley, the 69th New York loses another stand. The brigade's casualty die clicks over to 5 (its Exhaustion Threshold).
* The entire Irish Brigade immediately becomes Faltering.
* The Consequences: All regiments in the brigade are instantly marked Hesitant, halving their movement and preventing any further assault declarations. To recover, the Brigadier must fall back and establish a Rally Line, abandoning their offensive push to reorganize the men.
Master Rules Index
17. MASTER INDEX
"Order and discipline are the true foundations of military success."
This index provides a comprehensive, hyperlinked reference to every chapter, section, and specific rule in Dress on the Colors.
00. INTRODUCTION, SCALES & UNIT STANDARDS
- 1.0 Design Philosophy & Core Principles
- RULE-00-1.1 - The Core Objective
- RULE-00-1.2 - The Command Philosophy (Eliminating the Freeze)
- RULE-00-1.3 - Visual Clarity
- RULE-00-1.4 - Dynamic Engagement (The Reaction System)
- 2.0 Core Scales of Action
- RULE-00-2.1 - Ground Scale
- RULE-00-2.2 - Time Scale
- RULE-00-2.3 - Figure & Stand Ratios
- RULE-00-2.4 - Table Space & Battlefield Footprint
- 3.0 Basing Specifications (15mm Standard)
- RULE-00-3.1 - Standard Base Dimensions
- RULE-00-3.2 - Stand Compatibility
- RULE-00-3.3 - The Center Color Stand
- 4.0 Regimental Sizes & Tactical Footprints
- RULE-00-4.1 - Regimental Size Categories
- RULE-00-4.2 - Minimum & Maximum Stand Thresholds
- RULE-00-4.3 - Regimental Health Profiles
- 5.0 Spatial Geometry: Frontage Accuracy vs. Depth Distortion
- RULE-00-5.1 - Frontage Accuracy
- RULE-00-5.2 - The Depth Distortion Dilemma
- RULE-00-5.3 - Rules Compensating for Depth Distortion
- 6.0 Designer Commentary & Historical Context
01. SEQUENCE OF PLAY & THE TURN STRUCTURE
- RULE-01-1.0 - Overview
- 2.0 Phase 1: Staff & Command Phase (Simultaneous)
- RULE-01-2.1 - Step 1.1
- RULE-01-2.2 - Step 1.2
- RULE-01-2.3 - Step 1.3
- 3.0 Phase 2: Active Maneuver & Assault Phase (Active Side)
- RULE-01-3.1 - Step 2.1
- RULE-01-3.2 - Reaction Window A
- RULE-01-3.3 - Step 2.2
- RULE-01-3.4 - Reaction Window B (The 4.0" Line)
- 4.0 Phase 3: Active Ranged Combat Phase (Active Side)
- RULE-01-4.1 - Step 3.1
- RULE-01-4.2 - Step 3.2
- RULE-01-4.3 - Step 3.3
- RULE-01-4.4 - Step 3.4
- 5.0 Phase 4: Assault & Melee Resolution Phase (Simultaneous)
- RULE-01-5.1 - Step 4.1
- RULE-01-5.2 - Step 4.2
- RULE-01-5.3 - Step 4.3
- 6.0 Phase 5: Status, Smoke & Clean-up Phase (Joint)
- RULE-01-6.1 - Step 5.1
- RULE-01-6.2 - Step 5.2
- RULE-01-6.3 - Step 5.3
02. COMMAND, STAFF PIPS & TACTICAL MANEUVER
- 1.0 The Command Structure & Brigadier Ratings
- RULE-02-1.1 - The Brigade as Tactical Element
- RULE-02-1.2 - Brigadier Leadership Profiles
- RULE-02-1.3 - Generating Staff Pips
- RULE-02-1.4 - Physical Tracking & Pip Hoarding
- 2.0 Command Radius & Out-of-Command Status
- RULE-02-2.1 - The 4-Tier Command Network
- RULE-02-2.2 - Line of Sight for Command
- RULE-02-2.3 - Out-of-Command Restrictions (The Inertia Rule)
- RULE-02-2.4 - Attached Leaders
- 3.0 The Staff Pip Menu: Standard vs. Special Orders
- RULE-02-3.1 - Free Standard Orders (The "No Freeze" Baseline)
- RULE-02-3.2 - Special Staff Pip Tasks
- RULE-02-3.3 - Expenditure Timing
- 4.0 Formations & Tactical Dispositions
- RULE-02-4.1 - Line of Battle
- RULE-02-4.2 - Assault Column (Column of Companies)
- RULE-02-4.3 - Road / March Column
- RULE-02-4.4 - Skirmish Screens
- RULE-02-4.5 - Artillery Formations
- 5.0 Movement Rates, Maneuver Rules & Geometry
- RULE-02-5.1 - Master Movement Table
- RULE-02-5.2 - Wheeling & Direction Changes
- RULE-02-5.3 - Formation Changes & Re-forming Line
- RULE-02-5.4 - Inter-Unit Intervals & Passage of Lines
- RULE-02-5.5 - Retrograde Movements (Falling Back)
03. TERRAIN, ELEVATION, REVERSE SLOPES & LINE OF SIGHT
- 1.0 Master Terrain Classifications & Movement Effects
- RULE-03-1.1 - Terrain Scale & Standard
- RULE-03-1.2 - Master Terrain Matrix
- RULE-03-1.3 - Entering and Exiting Terrain
- RULE-03-1.4 - Fractional Movement Minimum
- RULE-03-1.5 - Rough Ground & Formation Disruption
- 2.0 Linear Obstacles, Entrenchments & Sunken Lanes
- RULE-03-2.1 - Split-Rail & Snake Fences
- RULE-03-2.2 - Stone Walls
- RULE-03-2.3 - Hedges & Brush Rows
- RULE-03-2.4 - Abatis & Field Earthworks
- RULE-03-2.5 - Sunken Roads (e.g., The Bloody Lane)
- 3.0 Structures, Buildings & Town Sectors
- RULE-03-3.1 - Isolated Farmhouses & Stone Structures
- RULE-03-3.2 - Artillery Destruction of Buildings
- RULE-03-3.3 - Town & Village Sectors
- RULE-03-3.4 - Melee in Built-Up Sectors
- 4.0 Elevation, Slopes & Dead Ground (Reverse Slopes)
- RULE-03-4.1 - Elevation Levels
- RULE-03-4.2 - The Crestline Position
- RULE-03-4.3 - The Reverse Slope & Dead Ground Rule
- RULE-03-4.4 - Intervening Hills Blocking LOS
- RULE-03-4.5 - Artillery Plunging / Overhead Fire
- 5.0 Line of Sight (LOS) & Firing Arcs
- RULE-03-5.1 - The 45° Forward Arc of Fire
- RULE-03-5.2 - Origin of Measurement
- RULE-03-5.3 - Strict Prohibition on Firing Through Friendly Units
- RULE-03-5.4 - Skirmish Screen Sight Exception
- RULE-03-5.5 - Blocking Terrain & Vision Limits
- RULE-03-5.6 - Target Priority Rules
- RULE-03-5.7 - Flank & Enfilade Definitions
- 7.0 Designer Commentary & Historical Context
04. DEFENSIVE REACTIONS & INTERACTIVE TACTICS
- 1.0 The Reactive Philosophy & Trigger Windows
- RULE-04-1.1 - The Anti-Passivity Principle
- RULE-04-1.2 - Reaction Trigger Windows
- RULE-04-1.3 - The Reaction Economy (Free vs. Reserved Staff Pips)
- RULE-04-1.4 - Single Reaction per Trigger Limit
- 2.0 Reaction 1: Closing Defensive Volley (Point-Blank Charge Halting)
- RULE-04-2.1 - Trigger Condition
- RULE-04-2.2 - Cost & Eligibility
- RULE-04-2.3 - Execution & Dice Pool
- RULE-04-2.4 - The Charge Discipline Check
- RULE-04-2.5 - Outcome of the Volley
- RULE-04-2.6 - Gunsmoke Aftermath
- 3.0 Reaction 2: Opportunity / Interdiction Fire (Maneuver Punishment)
- RULE-04-3.1 - Trigger Condition
- RULE-04-3.2 - Cost & Eligibility
- RULE-04-3.3 - Execution & Resolution
- RULE-04-3.4 - Tactical Cost to Firer
- RULE-04-3.5 - Resumption of Movement
- 4.0 Reaction 3: Skirmisher & Light Cavalry Screen Evade
- RULE-04-4.1 - Trigger Condition
- RULE-04-4.2 - Cost & Eligibility
- RULE-04-4.3 - Evade Execution
- RULE-04-4.4 - Attacker Redirection & The Overrun
- 5.0 Reaction 4: Refuse the Flank (Hasty Pivot)
- RULE-04-5.1 - Trigger Condition
- RULE-04-6.2 - Cost & Execution Requirement
- RULE-04-6.3 - Mechanical Execution
- RULE-04-6.4 - Tactical Combat Impact
- 6.0 Reaction 5: Counter-Charge (Rebel Yell & Mounted Shock)
- RULE-04-6.1 - Trigger Condition
- RULE-04-6.2 - Eligibility & Traits
- RULE-04-6.3 - Cost
- RULE-04-6.4 - Counter-Charge Surge Execution
- RULE-04-5.5 - Melee Modifiers & Combat Impact
- 7.0 Master Summary Matrix of All 5 Reactions
- 9.0 Designer Commentary & Historical Context
05. RANGED COMBAT, WEAPONS, COVER & GUNSMOKE
- 1.0 Sequence of Ranged Combat & Firing Eligibility
- RULE-05-1.1 - The Ranged Combat Phase (Phase 3)
- RULE-05-1.2 - Firing Eligibility Criteria
- RULE-05-1.3 - Target Nomination & Priority Rules
- RULE-05-1.4 - Measurement Origin & Firing Arcs
- RULE-05-1.5 - Enfilade & Flank Raking Fire
- 2.0 The Stand-Based Dice Pool & Master Weapon Profiles
- RULE-05-2.1 - Dice Pool Formulation
- RULE-05-2.2 - Small Arms Weapon Matrix
- RULE-05-2.3 - Field Artillery Matrix
- RULE-05-2.4 - Depressed Muzzles & Double Canister Carnage
- RULE-05-2.5 - Artillery vs. Deep Formations
- RULE-05-2.6 - Concentrated Battery Fire (Staff Pip Spend)
- RULE-05-2.7 - Low Ammunition Rules (Optional Historical Chrome)
- 3.0 Defensive Saves, Casualties & Micro-Damage
- RULE-05-3.1 - The Cover Save Step
- RULE-05-3.2 - Master Cover Save Categories
- RULE-05-3.3 - Casualty Stand Removal (2 Hits = 1 Stand)
- RULE-05-3.4 - Regimental Shatter Threshold
- 4.0 Suppression: The Natural 6 Disorder Trigger
- RULE-05-4.1 - The Suppression Rule
- RULE-05-4.2 - The Discipline Save
- RULE-05-4.3 - Resolution Timing & Multiple 6s
- RULE-05-4.4 - Tactical Effects of Being Disordered
- RULE-05-4.5 - Plunging Fire & Overshoot
- 5.0 The Gunsmoke Obscuration Rules
- RULE-05-5.1 - The Smoke Bank Trigger
- RULE-05-5.2 - The Obscuration Penalty
- RULE-05-5.3 - Point-Blank Smoke Penetration (0–6")
- RULE-05-5.4 - Smoke Dissipation & Clearing
- RULE-05-5.5 - Multi-Regiment Smoke Walls
- 6.0 Friendly Fire & Intervisibility Restrictions
- RULE-05-6.1 - Strict Prohibition on Firing Through Formed Friendly Lines
- RULE-05-6.2 - Firing Through Skirmish Screens
- RULE-05-6.3 - Artillery Overhead & Plunging Fire
- 7.0 Master Shooting Modifiers Summary Matrix
- 9.0 Designer Notes & Historical Commentary
06. ASSAULTS, CHARGES, OPPOSING SHOCK & MELEE RESOLUTION
- 1.0 Assault Initiation & Charge Declarations
- RULE-06-1.1 - The Decisive Shock Phase
- RULE-06-1.2 - The Command Requirement (Staff Pip Expenditure)
- RULE-06-1.3 - Charge Eligibility Criteria
- RULE-06-1.4 - The Charge Vector & Alignment
- RULE-06-1.5 - Terrain Restrictions on Assaults
- 2.0 The Approach & Reaction Trigger Window B (The 4.0-Inch Line)
- RULE-06-2.1 - The 4.0-Inch Interruption Line
- RULE-06-2.2 - Order of Defensive Reactions
- RULE-06-2.3 - Resolving the Closing Defensive Volley
- RULE-06-2.4 - The Pre-Contact Discipline Check
- RULE-06-2.5 - Consequences of the Discipline Check
- 3.0 Physical Contact & The Opposed Melee Roll (Phase 4)
- RULE-06-3.1 - Base Alignment & Contact Geometry
- RULE-06-3.2 - The Opposed Melee Formula
- RULE-06-3.3 - Master Shock Modifiers Matrix
- RULE-06-3.4 - Engaged Stand Count Calculation
- 4.0 Melee Resolution, Casualties & Aftermath
- RULE-06-4.1 - Determining the Victor
- RULE-06-4.2 - Tied Melee Combats (The Bloody Draw)
- RULE-06-4.3 - Consequences for the Defeated Unit
- RULE-06-4.4 - Consequences for the Victor (Consolidation & Reform)
- RULE-06-4.5 - Breakthrough & Sweeping Advances
- 5.0 Assaulting Artillery Batteries & Heavy Fortifications
- RULE-06-5.1 - Overrunning Artillery Batteries
- RULE-06-5.2 - Storming Heavy Earthworks, Stone Walls & Sunken Roads
- 6.0 Master Melee Modifiers Reference Matrix
- 8.0 Designer Notes & Historical Commentary
07. MORALE, BRIGADE FALTERING, LEADERS & ARMY TRAITS
- 1.0 Regimental Health & Morale States
- RULE-07-1.1 - Dynamic Degradation
- RULE-07-1.2 - Regimental Health Profiles
- RULE-07-1.3 - Regimental Stand Health Breakdown Reference
- RULE-07-1.4 - The Master Discipline Check
- RULE-07-1.5 - Consequences of Failed Discipline Checks
- 2.0 The Brigade Faltering Clock (The Brigade Morale Engine)
- RULE-07-2.1 - The Brigade Collapse Doctrine
- RULE-07-2.2 - Tracking Brigade Casualties
- RULE-07-2.3 - Threshold 1
- RULE-07-2.4 - Threshold 2
- RULE-07-2.5 - Brigade Size vs. Threshold Breakdown
- 3.0 Rallying, Re-forming & Regimental Recovery
- RULE-07-3.1 - The Disorder Marker & Tactical Penalties
- RULE-07-3.2 - Rallying via Staff Pips (Command Rally)
- RULE-07-3.3 - Natural Regimental Rally (Phase 5)
- RULE-07-3.4 - The "Double Disorder" Attrition Rule
- RULE-07-3.5 - Reforming Worn Lines (Resting in Reserve)
- 4.0 Leaders, Headquarters & Officer Casualties
- RULE-07-4.1 - Leadership Command Functions
- RULE-07-4.2 - Attaching Leaders to Regiments
- RULE-07-4.3 - The Leader Casualty Risk Trigger
- RULE-07-4.4 - Leader Casualty Resolution Matrix
- RULE-07-4.5 - Targeting Solitary Command Stands
- 6.0 Designer Notes & Historical Commentary
08. CAVALRY OPERATIONS, DISMOUNTED TACTICS, WEAPONS & HORSE ARTILLERY
- 1.0 Mounted Operations, Formations & Movement
- RULE-08-1.1 - Regimental Scale & Basing
- RULE-08-1.2 - Mounted Formations
- RULE-08-1.3 - Master Cavalry Movement Rates
- RULE-08-1.4 - Mounted Shock vs. Formed Infantry
- RULE-08-1.5 - Cavalry vs. Cavalry Clashes
- 2.0 Dismounted Tactics
- RULE-08-2.1 - Dismounting
- RULE-08-2.2 - Remounting
- 3.0 Cavalry Weaponry & Carbine Mechanics
- RULE-08-3.1 - Master Cavalry Weapon Profiles
- RULE-08-3.2 - Mounted Shooting Restrictions
- RULE-08-3.3 - Rapid Fire & Ammunition Depletion
- 4.0 Screening, Reconnaissance & Evasion Tactics
- RULE-08-4.1 - The Vanguard & Flank Screen
- RULE-08-4.2 - Cavalry Evasion (Reaction 3 Application)
- RULE-08-4.3 - Delaying Actions (The "Dismount & Fall Back" Tactic)
- 5.0 Horse Artillery ("Flying Batteries")
- RULE-08-5.1 - Horse Artillery Organization & Mobility
- RULE-08-5.2 - Rapid Deployment (The Half-Move Unlimber)
- RULE-08-5.3 - The Flying Battery Galloper Tactic
- 7.0 Designer Notes & Historical Commentary
09. PICKUP GAMES & SCENARIO GENERATION
- 1.0 The Random Engagement Generator
- RULE-09-1.1 - Playing Without a Historical Scenario
- RULE-09-1.2 - Generating the Battle
- RULE-09-1.3 - Initiative & Attacker/Defender
- 2.0 Deployment Type Matrix (Roll 1D6)
- 3.0 Victory Conditions Matrix (Roll 1D6)
10. OPTIONAL RULES
- 1.0 Pre-Game Command Bidding
- 2.0 The Clean Barrels (First Volley)
- 3.0 The Friction of War Events
- 4.0 Hidden Deployment (Blinds)
- 6.0 Historical Army Traits
- RULE-07-5.1 - Army Traits Overview
- RULE-07-5.2 - The Rebel Yell Doctrine
- RULE-07-5.3 - Seen the Elephant (Green Units Under Fire)
- RULE-07-5.4 - Iron Discipline (Elite Formations)
- 7.0 The Horse Holder Rule (Detailed Dismounting)
- RULE-08-2.1 - The Decision to Dismount
- RULE-08-2.2 - The Horse Holder Deduction (The 1-in-4 Rule)
- RULE-08-2.3 - Deploying the Dismounted Skirmish Line
- RULE-08-2.4 - The Horse Holder Stand (Vulnerability & Movement)
- RULE-08-2.5 - Remounting Procedure
- 8.0 Advanced Artillery Tactics
- RULE-05-8.1 - Overhead Fire
- RULE-05-8.2 - Counter-Battery Fire
- RULE-05-8.3 - Bouncing Solid Shot (Enfilade)
- 7.0 Pre-Planned Written Orders (Token System)
- 8.0 Elite Sharpshooter Regiments (Optional Trait)
- 9.0 Seeing the Elephant (Premature Firing)
- 10.0 The July Sun (Heat Exhaustion)
- 11.0 Uncontrollable Pursuit (Breakthrough Frenzy)
- 12.0 Refusing the Flank (The Chamberlain Maneuver)
- 13.0 Digging In (Hasty Breastworks)
- 14.0 Spiking the Guns (Artillery Overrun)
- 15.0 The Rebel Yell / Union Huzzah (Psychological Shock)
- 16.0 Desperate Valor (Command Action)
- 17.0 Caught Flat-Footed (Forced Reaction Penalty)
- 18.0 The Second Line of Battle (Support Morale)
- OPT-10-21.1 - Deploying into Open Order
- OPT-10-21.2 - Movement & Maneuvers
- OPT-10-21.3 - Firepower & Survivability
- OPT-10-21.4 - The Melee Trap
- 22.0 The Wave Attack (Deep Mass Assault)
- OPT-10-22.1 - Authorizing the Wave Assault
- OPT-10-22.2 - The Kinetic Strike (No Musketry)
- OPT-10-22.3 - Continuous Momentum (The Surge)
- OPT-10-22.4 - The Artillery Magnet
11. CAMPAIGN PROGRESSION
09. DESIGNER NOTES, MATHEMATICAL MODELS & HISTORICAL PHILOSOPHY
- 1.0 Design Mission & The 3–4 Hour Table Target
- 2.0 Deconstructing Historical Mechanics (The Evolutionary Path)
- 3.0 Mathematical Modeling & Combat Probability Analysis
- 4.0 Spatial Physics: Frontage Accuracy vs. Depth Distortion
- 5.0 The Gunsmoke Obscuration Mechanics (Historical & Tactical Rationale)
- 6.0 Command Friction: Staff Pips vs. Activation Checks
- 7.0 The 5 Reactive Windows (Engaging the Non-Active Player)
- 8.0 Summary of Key Design Constants
10. INTRODUCTORY SCENARIO: "CLASH AT HERON'S CREEK" (AUTUMN 1862)
[UNION DEPLOYMENT ZONE: South Edge (Within 6.0" of Table Edge)]
- 3.0 Scenario Rules & Victory Objectives
- 4.0 Union Order of Battle (Army of the Potomac)
- 5.0 Confederate Order of Battle (Army of Northern Virginia)
- 6.0 Four-Player Command Assignments & Play Pacing
- 7.0 Tactical Advice & Scenario Designer Commentary